Best Tips for Working with Air Drying Clay
Air hardening clay is a wonderful craft material. It’s inexpensive, easy to use, and sculpt. However, sometimes it can get tricky and hard to achieve a polished and nice look. I will share my best 23 air dry clay tips and tricks to achieve the best results in this post.
The clay nose keeps falling off of my gnome no matter how hard I try to attach it to the face.
My clay project turned out fantastic, but cracks appeared as it started to dry.
My air-dry clay keeps sticking to my table and making my craft stretch and deform.
Did these happen to you too?
It is heartbreaking when you invest a lot of time and effort into sculpting with air hardening clay, and you end up with a cracked or broken piece after all your hard work.
So, how can you improve air dry clay crafts?
I will show you how to avoid air dry clay disasters and make crafting easier with this fantastic craft material!
Before diving into the details, if you are a total beginner, make sure to check out the PROs and CONs of working with it air hardening clay.
DISCLOSURE: THIS POST MAY CONTAIN AFFILIATE LINKS, MEANING I GET A COMMISSION IF YOU DECIDE TO MAKE A PURCHASE THROUGH MY LINKS, AT NO COST TO YOU. PLEASE READ MY DISCLOSURE FOR MORE INFO.
1. Prepare your work surface
Make sure that your hands, tools, and work surface is clean. This simple thing will prevent stains and dust from sticking into the clay.
Air dry clay attracts lint and dust like a magnet. Nothing is more annoying than small, unremovable particles in white clay (well, cracks maybe). Especially if you don’t plan to paint your craft, if you plan to color your project, acrylic paint will usually cover these imperfections.
2. ‘Condition’ the clay
Conditioning the clay means preparing the clay by kneading. Wet your hands and knead the clay for a couple of minutes, like you would do with the cookie dough, to soften, smooth, and uniformize.
This simple trick will make your air hardening clay easier to work with and eliminate tiny air bubbles or lumps from the clay.
3. Avoid clay sticking to the worksurface
Air dry clay tends to stick to the table or work surface, making it hard to remove the final project without damage. It may stretch, difform, or bend.
Some use a tile, but I’ve found a flexible non-stick ‘cover’ more effective as a work surface like wax paper, plastic wrap, or a silicone craft mat. When you finish crafting, hold your clay piece carefully with one hand and peel off the sheet you were using.
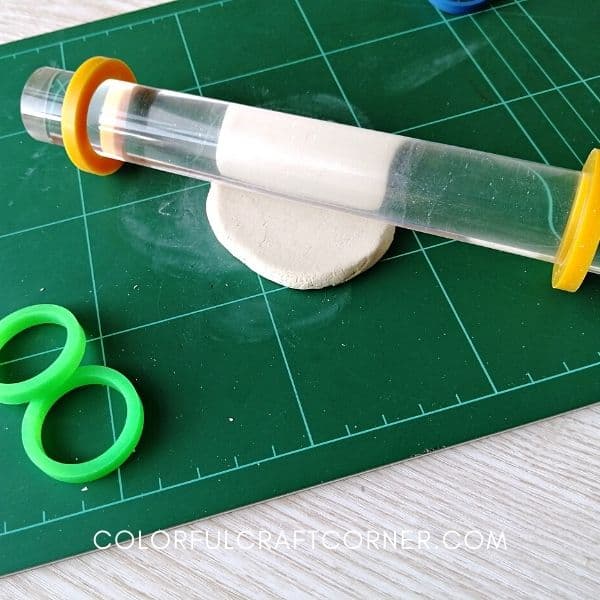
4. Roll out clay evenly
Many crafters, including myself, encounter difficulty when rolling out clay.
Why is it important to roll out clay evenly?
First and foremost, it makes your clay craft look nicer, but it will also help prevent curling and make it more durable. To have even thickness across your piece, you can purchase rolling pin guide rings or use wooden sticks on both sides of your work surface.
I like the silicone guide rings more because they are cheap, easy to store, and come in several sizes. Before putting one in your craft, make sure to pick the right size for your rolling pin or choose a rolling pin with guide rings included.
Check out my other article on rolling out clay for more information.
5. The optimal clay thickness
Ideally, your air drying clay project should be a quarter of an inch thick. I tested several widths. In my experience, 1/6 inch thickness will also work.
However, do not roll out clay too thin because it will weaken your craft make it more prone to curling and cracking (if stretched on an armature like styrofoam).
6. Handle air dry clay properly
Air hardening clay may be stiff when you take it out from the packaging. To make it more pliable and moldable, lightly wet your hands before kneading.
The more you touch, the drier the clay gets, so if you plan to work with it for an extended time, make sure to mist the clay when you see that it gets dry. Dryer clay produces small cracks as you shape it or bend it.
BONUS TIP! If your hands become dry quickly, add moisturizer before crafting with clay.
7. Do not add too much water
You may need to add water while working and sculpting with clay. For example, when conditioning the clay, if you work with it for a long time and it gets dry, when transferring an image, or when you smooth out imperfections and edges as the final step.
However, you should never add too much water. A few drops or a light mist is enough. Adding water excessively to air drying clay crafts will result in cracks and a weak project.
8. Pick tools you actually need
Clay and sculpting tools come in all shapes, sizes, colors, and materials (wood, plastic, metal, double-headed, with a silicone head, etc.). If you plan to sculpt many projects with details, you should get a set of clay tools like this. It will make your job easier.
Although, if you want to make a few clay crafts now and then, tools around your home will do the trick. A craft knife for cutting, a jar or wine bottle for rolling, an old pencil, a brush, toothpicks and knitting needles for shaping, etc. No need to buy a bunch of tools for the sake of a craft.
9. Use an armature
Using armatures inside of air drying clay projects has three benefits:
- They make the craft more durable and strenghten thin parts like fingers (you can use wire to sculpt hands).
- You will need less clay, which also make large sculptures lighter.
- Armatures may prevent cracks.
What can you use as an armature?
Add wire or toothpicks to strengthen thin protruding parts like arms, fingers, branches, etc. Aluminum foil and styrofoam are perfect for the body of your clay project. For example, check out my air-hardening clay bunny tutorial I made last year. I used styrofoam eggs, a cone for the body, and wire for the ears.
If you want to strengthen your clay crafts, I have seven tips you can try.
10. Slip and score when joining parts
Attaching protruding parts to your air drying clay crafts can be tricky. Even though it may seem that the nose is fixed when the clay dries, it may fall off.
To ensure that the attached piece is fixed, score both elements where they meet in a crosshatch pattern. Before joining them, you should apply a small amount of water or ‘slip.’ Slip is clay glue that you can make by mixing clay scraps and water until they form a thin paste.
If your attached pieces are long (for example, arms, tails, branches, etc.), it’s best also to use an armature to keep them in place. Wire or toothpicks are the best for thin elements.
11. Cover large clay sculpture
Air dry clay is a ‘forgiving’ craft material. If you can’t finish sculpting in one session, you can wrap your clay project in a clean damp cloth and cling film to keep it moist. You can return the next day and continue working on it.
Make sure that the cloth is not wet! Too much moisture will weaken the craft, and it may also ruin the details you worked so hard on.
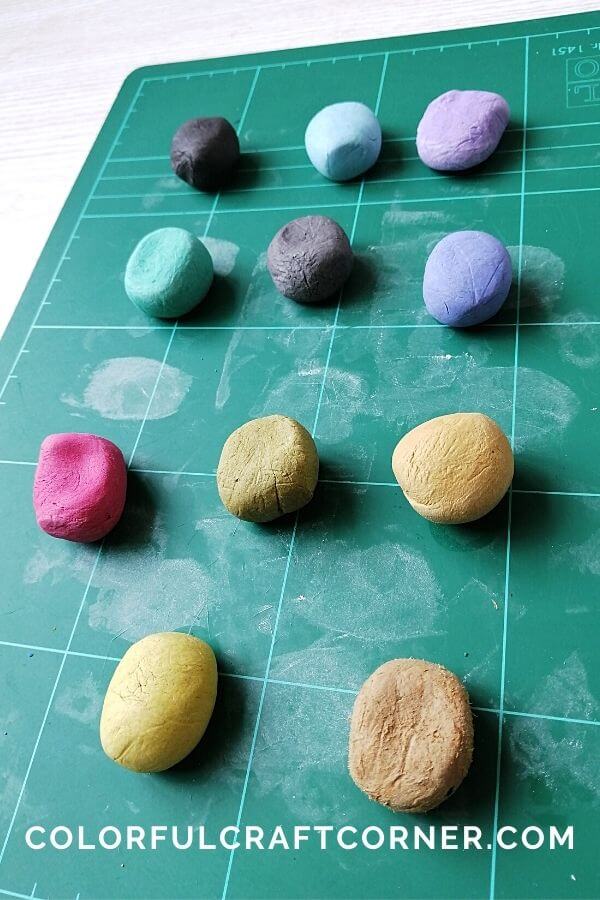
12. Make colored clay if needed
Kid’s air drying clay is available in several colors. The good news is you can turn regular white air hardening clay into colored clay.
I’ve experimented with DAS air modeling clay by mixing it with several pigments. You can check the article on my colored clay results.
To sum it up, acrylic paint, tempera, food coloring, and fabric paint are all suitable for coloring clay. Don’t expect vivid colors; the result is more of a pastel shade. However, this opens up new possibilities to make amazing and unique crafts.
13. Add texture and fun effects
I love air dry clay because it makes it super easy to customize and personalize projects. My recent new love is adding texture and effects to clay. You can add texture by pressing particular objects onto the surface of your craft, and you can add effects by mixing particles into clay.
Here are a few examples of what to use:
- To add texture press: stamps, stencils, pasta, filigrees, leaves, flowers, textured rolling pins, lace, etc. into the clay.
- To add effects mix clay with glitter, coffee, sand, twist colored clay pieces for a marbled effect, etc.
BONUS TIP! You can accentuate the textures by rubbing soft pastels on the wet clay (see my mandala trinket dish as an example).

14. Transfer images to air dry clay
Transferring an image to air dry clay is super simple. You only need a drawing, a photo, a pattern, or a template printed out with an inkjet printer. Lately, I’ve been experimenting with image transfer onto clay and all its various uses.
It works beautifully with black ink, but it will dry to a light grey. You can also transfer a colored image, but the result is very light.
I like to use this simple hack to transfer an intricate design that I will trace with markers or paint (see my dreamcatcher wall hanging) or transfer a template that I will cut out with a craft knife.

15. Smooth while wet
It’s best to eliminate imperfections while the clay is still wet. Dip your finger into water and try to smooth out rough edges, or use other tools to make your design as clean as possible.
You can cover or fix more minor mistakes with sandpaper after the project is dry, but not all of them.
16. Dry it properly
Drying air hardening clay the right way is crucial. It’s best to dry it slowly and flip it occasionally to maximize airflow on every side.
If your climate is too hot and dry, you should cover it with cling film or a damp cloth or dry it in a cupboard.
For more information, check out my in-depth article on how to dry clay properly.
Never, ever try to speed up drying with a hairdryer or fan. They dry the outer layers faster, which results in cracks or curling. If you want to speed up drying, read my next tip.
17. Put it into the oven to speed up drying
If you need to speed up drying, use an oven. The oven will create a warm environment which makes the project dry evenly.
Add parchment paper or tin foil to a baking sheet and place your clay project on it.
Insert the sheet into the COLD oven and set it low (170-175 degrees). Leave it in for 20-30 minutes, turn off the oven and leave it until it has cooled off. Repeat if needed.
I recommend monitoring while the craft is in the oven. If you notice cracks or anything weird, take it out immediately.
18. Avoid cracks and curling
You can fix some of the air dry clay mistakes, for example, cracks, but there are others you can’t hide or cover-up, like curled pieces. So, it’s best to try and prevent them.
Curling happens when your clay is not rolled out evenly, if it’s rolled out too thin, or if you want to dry it fast or a combination of these. Also, in my experience, some brands are more prone to curling (Activa) than others (DAS – I seldom had a curled craft using this brand even if it was rolled out super thin. Read my DAS modeling clay review for more details).
Cracks are pretty common and expected. Shrinkage causes cracks, which happens as moisture evaporates from the clay. You can prevent them by drying them slowly and ‘leaving room’ for shrinking (clay stretched tightly onto round surfaces, e.g., balls, eggs, jars, etc., will result in more cracks). Learn more about preventing cracks from this article.
You worked so hard, and cracks appeared on your craft? Please don’t get frustrated; the good news is you can fix them.
Read along to find out how!

19. Fix the cracks
Cracks are annoying but pretty easy to fix. When your project is dry, take a small amount of wet, soft clay and push it into the cracks. Smooth it as well as you can. Leave it to dry. Remove imperfections with sandpaper.
However, if your clay craft has tons of cracks, don’t spend hours pathing them up. If you can, remove the clay and start over (like I did with these air dry clay bunnies).
20. Polish after it has dried
In most cases, it’s hard to smooth out all the imperfections while the clay is still wet. So, if you want a polished look, use the sandpaper after your craft has thoroughly dried.
Also, as water evaporates when drying, it will leave the surface with minor imperfections. You can achieve a smooth and even surface by sanding. When painting, this will also help you because the color will cover the surface more evenly.
BONUS TIP! It’s best to sand air dry clay outside or in a well-ventilated room. Protect your table and put away everything in the surroundings because the fine clay dust will cover everything. You may also use a dust protection mask.

21. The best paint for air dry clay
The best paint for air dry clay is acrylic paint. It has good coverage, vivid colors, and acts as a sealant (I still like to apply a coat of varnish after painting). You may also use tempera, but the colors become dull after drying.
I also like to use watercolors for a softer result (don’t apply it with too many watery pigments). For example, I used watercolor for this leaf dish.
To add details, you can use markers and ink pens. Be careful when glazing or sealing the craft. Some sealants make markers and pens smudge.
22. Seal your clay project
Sealing air drying clay crafts has several benefits. That’s why it’s crucial to finish every project by applying one or more coats of varnish.
The sealant will protect your craft from soaking moisture. It will also make it stronger and more durable. To seal your air dry clay crafts, you can use Mod Podge, Yacht or Wood Varnish, Acrylic Varnish, Lacquer Spray, or resin.
It’s always best to apply several thin coats of varnish than adding one thick layer!
A ‘waterproof’ varnish won’t make your craft food-proof or safe for beverages. Also, you can’t wash them. To clean a clay craft, use a brush or a damp cloth.
23. Store ‘air-tight’ leftover clay
To keep left-over clay in good condition, moist and soft, put it in a zip lock bag and an air-tight container.
If your clay somehow dried out or fully hardened, don’t throw it out! You can revive it. I will show you how in an upcoming post.
BONUS – What can you make with air dry clay
Now that you are set up for success, here are a couple of air dry clay craft ideas for adults:
- 27 Things to Make out of Air Modeling Clay
- 15 Cute Things to Make out of Air Drying Clay
- or type into the Search bar ‘air dry clay’ to find all my articles and tutorials using this wonderful craft material.
Final thoughts
I hope you’ve found this article helpful or at least a couple of golden nuggets that will improve your air drying clay crafts. If so, let me know in the comments!
