In this blog post, I will show you how to make beautiful DIY faux stone earrings out of air dry clay. You can apply this fantastic technique to create chic home decor, for example, trays, bowls, plates, etc.
I wanted to create air dry clay earing for quite some time, but I couldn’t come up with the perfect idea. I didn’t want to make the “cut & paint” pieces; I needed something more interesting.
I’ve been watching many tutorials on making faux stone with polymer clay. Last week I had an “AHA” moment; I had to try it with air dry clay. Acrylic paint and air drying clay work nicely together, so I was pretty confident that it would work out.
So, here we are. Let’s jump in and see how to make stunning marbled air dry clay earrings!

DISCLOSURE: THIS POST MAY CONTAIN AFFILIATE LINKS, MEANING I GET A COMMISSION IF YOU DECIDE TO MAKE A PURCHASE THROUGH MY LINKS, AT NO COST TO YOU. PLEASE READ MY DISCLOSURE FOR MORE INFO.
If you’re new to this fantastic craft material, you may want to read these posts first:
- 23 air dry clay tips for beginners
- The best pigments to color air dry clay
- How to roll out air dry clay evenly
- How to air dry clay the right way
- How to prevent and fix cracks on air dry clay
Tools and supplies
- DAS air dry clay,
- acrylic paint,
- craft knife blade,
- silver leaf,
- rolling pin,
- cling film,
- cookie cutters or earring cutter,
- straw,
- sandpaper,
- sealant,
- jump rings,
- earring hooks and posts,
- pliers,
- jewelry glue.
How to make air dry clay earrings
1. Condition the clay
Knead a pice of air dry clay for a couple of minutes. This will make your clay smoother and easier to work with.
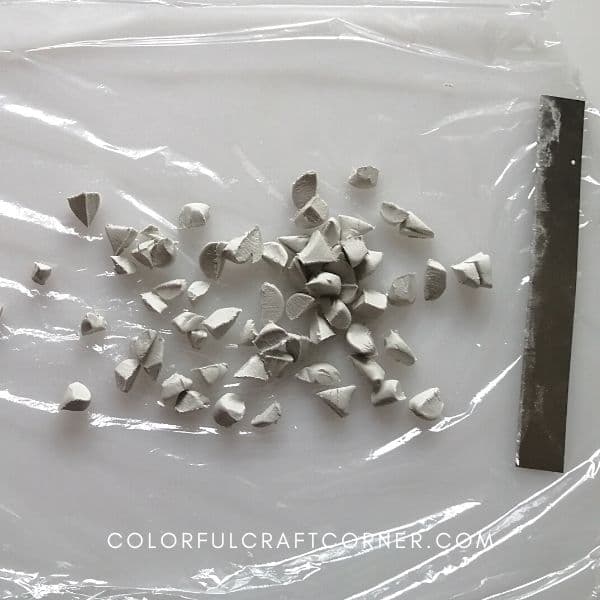
2. Chop the clay
Flatten or slightly roll out the clay and use the craft knife blade to chop it up into pieces in various sizes.
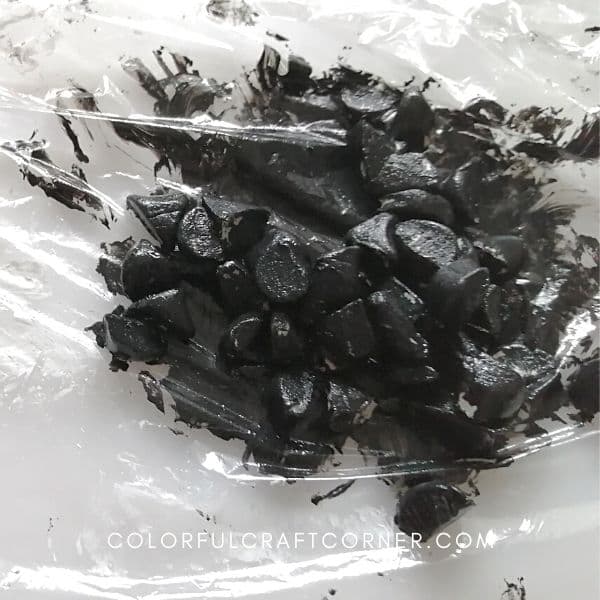
3. Paint the clay
I used white and black acrylic paint to color the air dry clay pieces. I hoped the white paint would add a subtle touch, but it was unnoticeable.
Wear gloves because covering the pieces in paint is messy. Don’t forget to protect your table and clothes too!
When all the pieces are covered in black, let the paint dry for a couple of minutes.
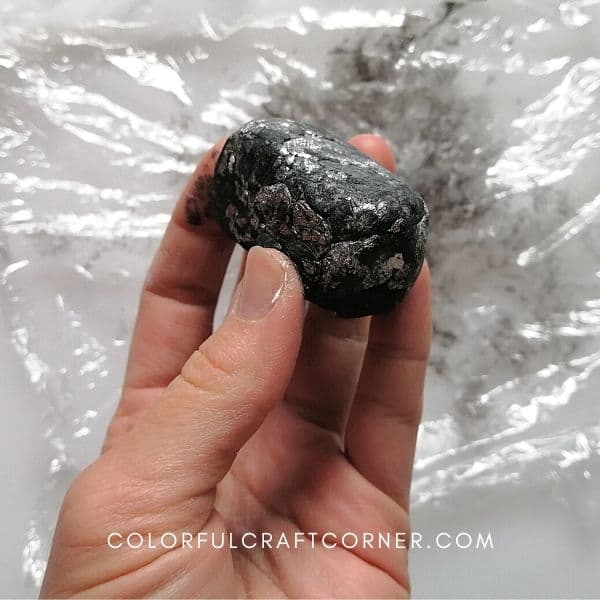
4. Create the clay cane
Add a sheet of silver foil (you can also use gold foil or glitter to add some sparkle) and press the pieces tightly. Make sure there is no gap between the pieces.
NOTE: The earrings may break easily if the pieces are too loose.
5. Create the clay slab
Slice the clay slab and try to cut them the same thickness. Lay them flat, close to each other. Run your rolling pin (or a glass bottle if you don’t have one) over the pieces to press them together and create the slab.
At this point, you’ll see the beautifully marbled clay slab with silver accents.

6. Cut out the earrings
You can use cookie cutters, polymer clay earring cutters, or a free-hand cut with a craft knife to cut out the earrings. Try to place the cutters where the silver foil peaks out.
Using a small straw, add holes for the jump rings.
Let them dry for 24-48 hours. Rotate them occasionally to maximize airflow and avoid curling.

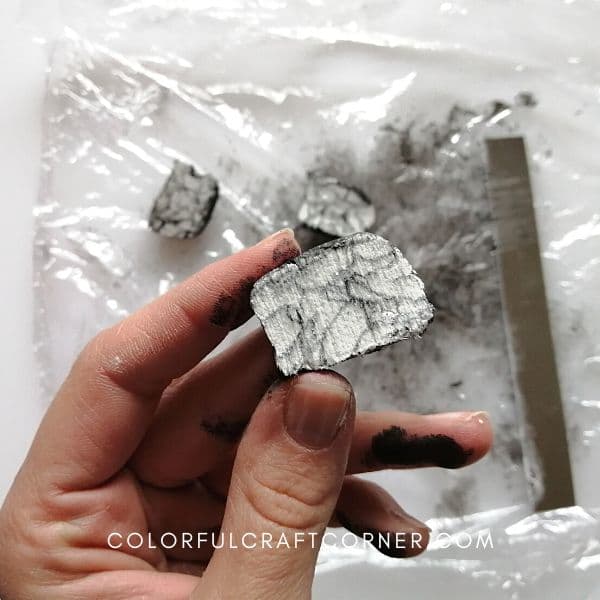
7. Sand & apply a sealant
When they are fully dry, you can start to buff the edges. I used 400 grit sandpaper.
DAS air dry clay has tiny paper fibers. When you cut the clay cane, the fibers drag the black paint leaving small smudges behind. You can carefully sand these to reveal the beautiful black lines and howlite stone pattern.
Remove the dust left from the sanding with a soft brush or cloth.
Apply 1-2 coats of varnish to seal and protect the pieces.

8. Assemble the earrings
Add the jump rings and earring hooks. Use two pliers and work cautiously so you won’t accidentally break the top of the earrings. (Remember, it’s not as durable and flexible as polymer clay.)
For the stud earrings, add a drop of jewelry glue on the back of the clay pieces. Add the earring posts and let them dry. You can secure them with a sealant or a drop of epoxy resin.

Video tutorial
FAQ
Can you use air dry clay for earrings
You can use air dry clay for earrings, but remember it’s not as durable, flexible, and light as polymer clay. These earrings are not heavy, but I’m used to larger and heavier pieces too. If your ears are sensitive, you can pick lightweight air dry clay, for example, Hearty, to make super-light earrings.
Will air dry clay break easily
Air dry clay is more durable than I thought. I made a drop test with different types of air drying clay and found that DAS modeling clay withstands much damage even if rolled out thin. They will resist long if you don’t want to break them intentionally.
They may chip if you drop them, but you can fix them with wet clay if it bothers you. Also, here is my post on strengthening air dry clay projects.
What clay is best for earrings
Polymer clay is best for earrings because it’s lightweight, water-repellent, and easy to customize with paint, texture sheets, glitter, metallic pigments, etc. It comes in numerous fantastic colors, but you can mix them to achieve other beautiful personalized colors. You can also use light air dry clay, for example, Hearty, if you have an oven.
NOTE: As you can see, traditional air dry clay is also suitable for making earrings and other jewelry. However, I would only recommend it for personal use. If you want to sell clay earrings, pick polymer clay since it’s more durable.
How to seal air dry clay earrings
Air dry clay is porous; it becomes pliable when exposed to moisture and water. Applying a sealant or varnish to protect your project is the best practice. You can use Modge Podge (NOTE: it will turn yellow when exposed to sunlight regularly), acrylic sealer, liquid epoxy resin, and PVA glue mixed with water.
How to care for your clay earrings
Keep your air dry clay earrings away from water and open fire. Clean them with a soft cloth and store them in a jewelry box or drawer to protect the colors from the sunlight.
Final thoughts about the air dry clay earrings
Air drying clay is a fantastic craft material. You can also create beautiful earrings, necklaces, and other jewelry, among other fun projects.
This easy DIY earring tutorial is perfect for beginners. The subtle white and black marble pattern makes these earrings elegant. They would make a lovely DIY gift for your BFF, mom, or a coworker.
Use this faux stone technique to create beautiful home decor projects like bowls, ring dishes, or a vase.
I hope you liked my tutorial. It was so much fun to make them. Let me know in the comments if you try it!
Other air dry clay craft ideas:
- 27 things to make out of air dry clay
- 15 cute things to make with modeling clay
- 19+ air dry clay pot ideas