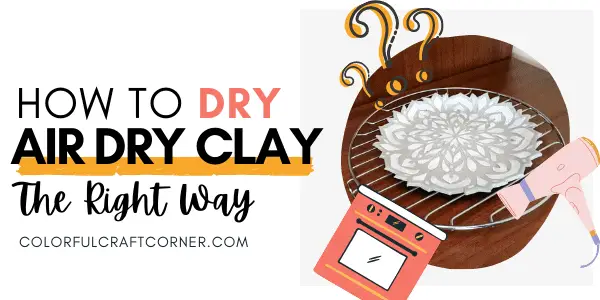
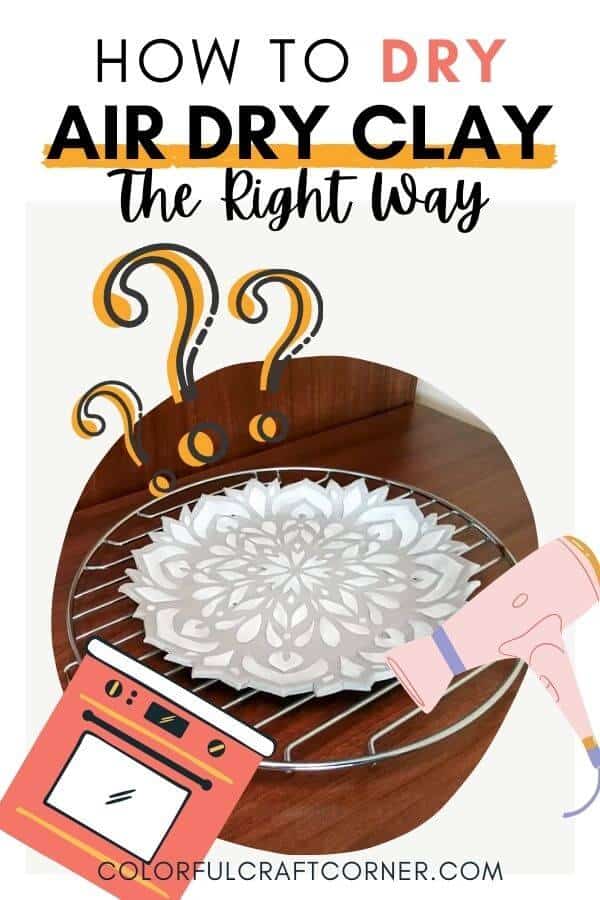
Air Dry Clay Drying Tips for Best Results
Air drying clay is such a wonderful craft material. This type of clay doesn’t need a kiln or oven to cure, unlike traditional clays or polymer clay. Perfect for beginners, experienced crafters, and also for kids. You can do various projects for example, pinch pots, home decor, jewelry, etc.
It may take 24-72 hours for an air dry clay project to dry. That’s why lots of crafters try to speed up the process which often ruins the craft. So, let’s see how to make air dry clay dry faster and a few tips for best results and to avoid ‘clay disasters’, frustration, and distorted clay crafts..
The most annoying thing is when air dry clay cracks or curls while drying. This stands for most clay brands (Amaco, Activa Plus, Fimo, or Crayola air dry clay), however, some of them are less prone to cracking and distortion, for example, DAS, Creative paperclay, or La Doll.
This is because there are different types of air-dry clay and they are not created equally. Some contain earthen clay while others paper pulp. Paper based clay (DAS or Creative paperclay) seam to have a better resistance to cracking.
Let’s dive in!
- Air Dry Clay Drying Tips for Best Results
- How long does it take for air drying clay to harden?
- Can you make air dry clay dry faster?
- How to speed up the drying process?
- FAQ
- How do you know when air dry clay is dry?
- Best practices for drying air modeling clay
- How to store leftover air dry clay
- Conclusion about drying air hardening clay crafts properly
DISCLOSURE: THIS POST MAY CONTAIN AFFILIATE LINKS, MEANING I GET A COMMISSION IF YOU DECIDE TO MAKE A PURCHASE THROUGH MY LINKS, AT NO COST TO YOU. PLEASE READ MY DISCLOSURE FOR MORE INFO.
POPULAR AIR DRY CLAY CRAFT TUTORIALS:
- Easy Clay Mandala Trinket Dish
- Cute Air Modeling Clay Crafts
- Cool Air Dry Clay Craft Ideas
- DIY Clay Rabbit Step-by-Step Tutorial
- Super Simple Clay Bird Tutorial

How long does it take for air drying clay to harden?
Air drying clay projects take an average of 24-72h to dry. The drying time depends on the size of your piece and the thickness of the clay body. Larger pieces may take as long as a week to harden. The one exception is epoxy clay, which takes only a few hours to dry.
However, you need to take into consideration a couple of factors that determine the drying time.
1. Warm environment
Air modeling clay will cure faster in a dry climate. However, if it dries too fast, it will make it more prone to cracking. So, if your home or climate is too hot, slow down the drying time by loosely covering the craft with cling wrap or a damp cloth.
2. Humid climate
If your climate or your home has a lot of moisture in the air, your air drying clay craft will dry slower. If live in a very humid environment, you will have a hard time making air drying clay crafts. You may need to ‘help’ the drying process. Follow the drying technique I recommend in the following sections.
3. General aspect
Obviously, the thicker the clay, the slower it will dry. So, more solid sculptures take the longest to dry. However, you can create them in layers which will also help in minimizing cracking.
I wouldn’t recommend rolling out air dry clay too thin just for the sake of the slower drying time, because they are more prone to curling.
4. Airflow
Sides that are in contact with a surface or covered with plastic wrap or put in a bowl (to take their shape) will dry slower. The moisture is ‘trapped’ and it will take longer. You can maximize airflow by occasionally rotating the piece or by putting your clay craft on a baking cooling rack.
5. Water
The amount of water in the clay highly determines the drying time. If you use a lot of water while sculpting, it will not only slow down the drying time but also makes your craft weaker and increases the likelihood of cracking.
Can you make air dry clay dry faster?
The short answer is zou can dry air hardening clay crafts faster, but it’s not recommended. In my experience, the best practice is placing air-drying clay on wax paper and letting the project dry at room temperature. You can help helping the drying process by rotating the clay craft from time to time.
I know the excitement of seeing the final form of your new creation (which may take several days to fully dry), and I understand why some try to speed up the process. I did it too, and then regret it because my project cracked and distorted.
If you’re in a hurry, let’s see a few viable ways to speed up the drying.
How to speed up the drying process?
Good news! If you need to dry your clay pieces fast you can try these hacks to dry them faster.
- The best way to dry air dry clay projects faster is using a standard oven (read along to learn how to do it). You can use your oven for clay objects in all shapes and sizes.
- You can also use a dehydrator. This method would work for flat and smaller pieces, for example, jewelry, trays, dishes, etc.
- Create large clay crafts in multiple sessions by applying thin layers.

FAQ
I will list all the different ways crafters try to speed up drying. Most of them are a big NO-NO.
Can you dry air dry clay with a hairdryer?
You should never use a hairdryer to make your air drying clay crafts dry faster. A blow dryer emits a strong warm airflow which makes the outer layer shrink and dries faster in spots. Even if you move the hairdryer continuously, you can’t make the clay dry evenly. The uneven drying will result in cracks or breakage.
Can you dry air dry clay in the oven?
Air dry clay, as the name indicates, it’s self-hardening, you don’t need an oven or kiln compared to polymer clay or ceramic clay. Some crafters suggest, even recommend, putting air modeling clay crafts in the oven.
I personally never did it. Crayola, for example, states on its craft safety page that you shouldn’t put it in an oven, kiln, or microwave.
If I really need to speed up drying, this would be the only method I would try because it’s the safest method for drying clay crafts without issues.
Why?
The oven creates a warm environment making the clay dry evenly and not just drying the project from one side like other methods.
Follow these steps if you want to dry your air hardening clay craft in the oven.
- Place your craft on a baking sheet wrapped with tin foil or parchment paper.
- Insert the sheet in the cold oven, and turn it on to low heat (set it to the lowest setting ~170-175 degrees).
- Leave it on for approximately half an hour.
- Turn it off and leave the clay product in the oven until it cools down.
- Check your craft, and repeat if needed.
Drying air modeling clay crafts in the oven or a dehydrator could be the only way to harden clay crafts for those who live in a very wet climate. High humidity makes almost impossible for air dry clay to cure.
Never put clay crafts in a hot oven because it will crack almost instantly!
Can you put air-dry clay in the microwave?
Microwaves heat the items too quickly. Air dry clay can’t hold too much heat, so putting it in the microwave will make your piece break and fall apart.
Can you put air dry clay into the sunlight to speed up drying?
You should never put your air-hardening clay into direct sunlight to make it dry faster. Just like the hairdryer, it will heat one side of your craft, and make the outer layer dry faster which results in cracks.
Can you use a heat gun to dry self hardening clay?
Similarly to the other methods mentioned before, air hardening clay won’t resist the hot air flow coming out of heat gun. It will most likely result in cracks or breakage.
Why you shouldn’t speed up drying air dry clay?
The number one reason you shouldn’t try to make your air hardening clay projects dry faster is that they are more likely to crack and break. Nothing is more heartbreaking than a ruined craft after you invested all that time and effort.
I recommend not trying to speed up drying, rather slowing it down to minimize the chances of cracks, curling, and distortion. It is better to give it that extra time and avoid breakage. You can slow down drying by loosely covering your clay project with a piece of plastic wrap or use a light, damp cloth in a warm weather.
How do you know when air dry clay is dry?
There are three simple ways to tell if your air modeling clay project is dry.
1. The color test
The color of your clay gets lighter as the water evaporates from the clay. It is most visible in terracotta, grey, or black clays, but it’s observable in white air dry clay too.
When the clay craft gains a uniform color (lighter than the original) it indicates that your craft is dry.
2. Sound test
After moisture evaporates from the air drying clay, the item gets porous. If you carefully knock it with your fingers you will hear a hollow sound, like it’s empty.
3. Nail test
This is the final test I make before sanding, painting, and sealing my clay crafts. Sometimes the outer layer becomes light, there are no darker spots which indicate that it’s fully dry. However, sometimes on thicker crafts, the middle hasn’t fully hardened.
So, I lightly push my nail into the clay (where it’s not visible). If it leaves a strong mark, the clay project is not fully dry and I’ll leave it alone for another day.
NOTE! Since air dry clay is porous, the nail test will leave a very light mark after it’s completely hardened.
Best practices for drying air modeling clay
- Place your air dry clay craft in a warm, dry and well ventillated room.
- Slow down drying if needed (if you live in hot climate) by covering your air-dry clay project..
- Maximize airflow by rotating your clay craft to make it dry evenely. Putting it on a cooling rack also helps.
- Don’t paint your craft before it has fully dried. The clay shrinks when drying and the paint applyed to wet clay will crease or peel off. Acrylic paint and oil paints act as a sealer which won’t let the moisture evaporate from the clay.
- Don’t seal clay objects until they’re cured. A varnish will trap the moisture inside the clay. This will weaken the project and it may also grow mold. When the clay is bone dry, you can use an acrylic sealer, mod podge or epoxy resin to protect, strenghten and make your clay craft water-resistant.
How to store leftover air dry clay
To keep your unused clay fresh for the next craft session, make sure to pack it in an air-tight container, zip lock bag or plastic bag, and store it in a dry and dark place.
Leftover clay can get a little bit dry if it’s stored for a long time, but you can revive it with a little water.
IMPORTANT! Too much water will make it more prone to cracking.
Conclusion about drying air hardening clay crafts properly
I hope some of my tips will help you avoid frustration caused by cracked, distorted, or broken air dry clay crafts. I know the feeling when you’ve worked for hours on a craft for yourself or to give as a gift, and they get ruined.
Do you like to craft with air dry clay? Have you ever tried to dry it faster? How did it turn out?
Leave a comment!
Related air drying clay articles:
- What to Use to Color Air Dry Clay
- Is Air Hardening Clay Safe for Mugs
- The Best Tips for Making Air Hardeing Clay Stronger
- DAS Stone Effect Clay Review
- 10 Fun Air Hardening Clay Kits for Adults
Thank you will definitely TRY
You’re welcome! 🙂 Happy crafting!
I use to do air dry clay a long long time ago. I am going to try and do it right thanks to your suggestion
I’m happy that you found my tips useful 🙂
I’m going to try your tips because I got clay last week and it
was not drying at all
I hope they will help 🙂
Thank you for the amAZing tips. I will definitely try them.
I’m glad you liked it! I hope your clay craft turns out as you wish 🙂
I have just started using air drying clay and I place it to dry in a foil tray with kitchen roll in bottom and on top with another foil tray on top to prevent curling up
What are you making? 🙂