
How to make an easy clay bunny
Are you looking for a cute clay bunny sculpture for Easter? With this easy step-by-step tutorial, you can create rabbits out of air-dry clay in all sizes. You don’t need sculpting skills! The video tutorial will walk you through how to make a fail-proof armature for a clay bunny.
I love, love, love air dry clay crafts!
It’s cheap, easy to work with, and also fun to make your own clay.
I wanted to create a cute bunny for Easter. Last year I made a sock rabbit (check out the tutorial). My new craft love is air dry clay, so I’ve decided to make one in clay too.
I kept searching for ideas. I found several posts and ideas on how to make a clay bunny. But all of them were so small.
I needed something BIGGER!
So, I’ve decided I will make one on my own and share it with you today!
The concept (creating styrofoam armature) came from one of my previous crafts, the easy air dry clay bird.
This method allows me to create larger bunnies. Also, it’s easy to replicate. DOUBLE WIN!
I always keep in mind while designing a craft to be replicable. I made this blog to help other creatives make beautiful crafts and not to display my work.
Now let’s get to the fun part!
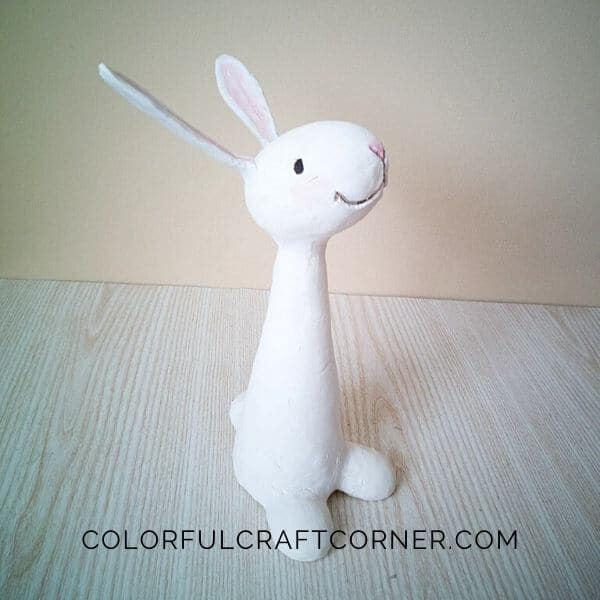
I’ve designed two air dry clay rabbits, a standing and a sitting sculpture.
Make the one you like or create both of them.

How to create a clay Easter Bunny?
First of all, gather your tools and supplies!
DISCLOSURE: THIS POST MAY CONTAIN AFFILIATE LINKS, MEANING I GET A COMMISSION IF YOU DECIDE TO MAKE A PURCHASE THROUGH MY LINKS, AT NO COST TO YOU. PLEASE READ MY DISCLOSURE FOR MORE INFO.
Tools and supplies for the air dry clay rabbits
I’ve separated the tools and supplies into two categories. It’ll make it easier for you if you don’t plan to make both bunnies.
Tools for both bunnies:
- homemade air dry clay,
- masking tape,
- toothpicks,
- craft knife,
- hot glue or foam glue,
- plastic wrap,
- sealant or varnish (for example Mod-Podge),
- sandpaper (optional),
- paint (optional),
- other decorations (ribbon, hat, eyes, etc.).
Standing clay bunny armature:
- body: styrofoam cone (19 cm/7.25″),
- head: styrofoam egg (8 cm/3.15″),
- tail: styrofoam ball (2.5 mm/0.8″),
- legs: styrofoam egg cut in half (7 cm/2.8″),
- ears: two pieces of wire (25 cm).

Sitting clay bunny armature:
- body: styrofoam egg (15 cm/6″),
- head: styrofoam egg (9.5 cm/3.75″),
- tail: styrofoam ball (2.5 cm/0.8″),
- legs: styrofoam egg cut in half (7 cm/2.8″),
- ears: two pieces of wire (30 cm).
Step-by-step instructions:
Let’s get to work!
Watch the video tutorial or skip to the written instructions, whichever you prefer. Also, check out the tips and hacks section for the best results!
NOTE! I somehow deleted the video on how to wrap the bunnies with clay, but the process is pretty straightforward. You can watch how the armature is made.
1. Create the clay rabbit’s armature
Carve out the sockets for the heads, tails, and legs using a craft knife.
Insert a toothpick, add a layer of glue and attach the pieces to their places.
2. Shape and attach the bunny’s ears
Bend the wires into bunny ear shapes.
Cover the wire with masking tape. Leave half an inch uncovered at the bottom.
Insert the bunny ears. For more stability, make a line cut with the craft knife for the ears and push them in further.
Shape the ears to make them look cuter.
3. Cover the rabbit with air dry clay
Either roll the air dry clay out or press with your hands into a 1/8 inch thickness.
Gradually cover the bunny with the clay. Start from the bottom and work your way up.
Make sure that the clay is lying flat on the armature. Any clay that is partially in the air and not connected to the body will break easily when touched or sanded.
Smooth the surface as well as possible (you can’t smooth out everything with sandpaper after it’s dry).
For these types of air dry clay sculptures, I like to use homemade clay. It’s a lot softer than the storebought. It’s easier to wrap the armature and patch the cracks or holes.
I used the cornstarch and baking soda recipe from this post by A Piece of Rainbow. I was impatient and my bunnies ended up with lots of cracks (Yikes!). I removed the clay. Made a batch of cold porcelain and wrapped them again.
Cold porcelain was stronger, but it also cracked (a few here and there that I patched after the first layer was dry).
4. Add details while wet
You may leave them smooth or add a few details like eyes, mouth, nose, and toes.
Use sculpting tools or the craft knife to create the face.
You can accentuate the details with paint after the bunny is dry.
5. Let it dry
Give at least 24h for the clay to completely dry. A well-ventilated, warm room is perfect.
You may also cover with a plastic bag to slow down the drying time and prevent cracking.
Make a test on the bottom. Push it with your nail. If it leaves a mark, it’s not dry yet.
Occasionally rotate the bunny so every side can dry.
6. Make touch-ups
In most cases, bigger or smaller cracks will appear while drying because the clay slightly shrinks.
To fix the cracks, use leftover air dry clay. Grab a small amount of soft clay, and push it in the cracks. Remove the excess, and smooth it with your fingers. Leave it to dry for a couple of hours.
If the surface is rough, or if you want a very smooth finish, use sandpaper.
7. Decorate the clay bunnies
Paint the clay bunnies or add other decorations like a ribbon tied in a bow, a cute straw or felt hat, paint blushy cheeks with a sponge, etc.
You can also paint the entire bunny with acrylic paint.
It’s up to you!
Glaze or seal the bunnies to make them last longer. Air-dry clay may soak up moisture from the air and become brittle and yellow with time.
An artist-grade sealant or water-based varnish (Mod Podge) will keep your rabbit sculptures in good condition for years.
Tips and hacks:
- chop the bottom of the large egg to make the sitting bunny sculpture more stable,
- fold a piece of plastic wrap multiple times and use that to smooth out clay,
- wash your hands well before using the clay to avoid smudges, dirt, and lints,
- if you want to speed up the process and bake the bunnies substitute the styrofoam with aluminum foil (you have to shape it),
- patch up cracks with leftover clay,
- be extra careful and gentle while sanding, air dry clay is brittle, especially at thin parts (ears).

My fails and lessons learned
- Don’t rush it and make them dry faster! They will crack and ruin the sculpture.
- Cold porcelain will dry harder, but you can’t sand it, so make them as perfect as you can while it’s still wet.
- Wood glue maybe not the best choice to make cold porcelain. Mine became yellow. It also doesn’t take paint as well as other air dry clays.
- Don’t get discouraged if something goes wrong. Make improvements, if you can, and embrace imperfections. It’s handmade after all. You’ll learn and get better with practice.
Final thoughts about the air dry clay bunny
As you could see, it’s easy to create cute clay rabbits. You don’t even need sculpting skills.
This method is good for several reasons:
- big chunks of air-dry clay dry slowly, so it speeds up the crafting process,
- using a styrofoam armature allows you to create big and light bunnies,
- you can create identical sculptures if this is your goal (for example selling them at craft fairs).
Have you ever tried to make air dry clay crafts and sculptures? Leave a comment!
