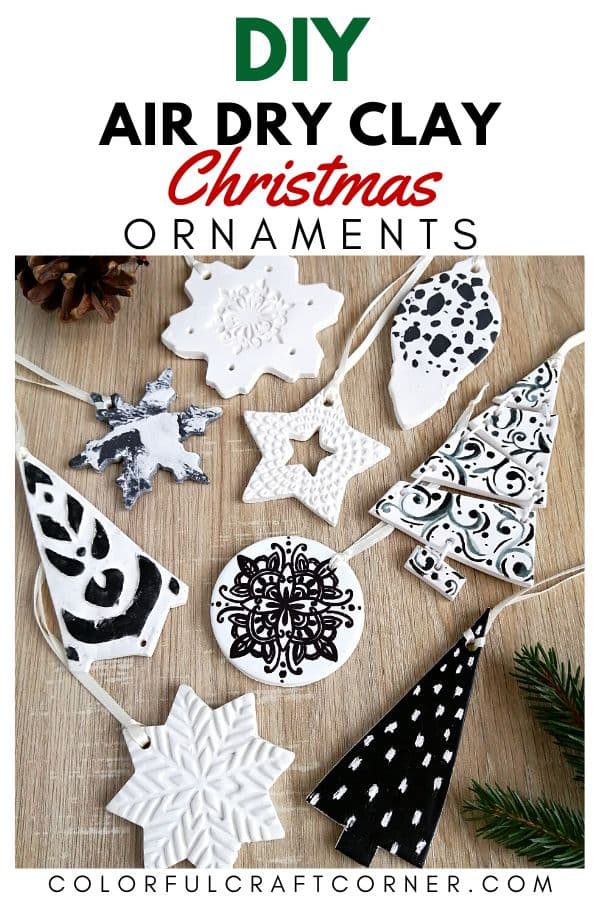
DIY clay Christmas tree decorations
This blog post will show seven ways to make beautiful air dry clay Christmas tree ornaments. You can create unique homemade Christmas decorations, gift tags, or a keepsake ornament with these simple ideas.
The holiday season is here! I like to do a few last-minute projects this time of year, and this Christmas craft was waiting too long in my craft box. I wanted to share it sooner, but life happened. Hopefully, I’ll be able to post another or two other fast DIY Christmas ornaments.
Air dry clay is perfect for creating your own ornaments. It is easy to work with, and personalize it with lots of fun things. These handmade ornaments are a fun way to make Christmas gifts with your kids!
Every method has its step-by-step tutorial, but I put them in one video.
FUN TIP: Add a few drops of essential oils to your homemade ornaments, and your house will smell amazing!
Let’s dive into how to make air dry clay Christmas ornaments!
Tools and supplies
Must haves:
- air dry clay,
- rolling pin,
- craft mat, cling film, wax paper or parchment paper,
- Christmas cookie cutters,
- craft knife,
- plastic straw,
- sandpaper,
- varnish.
Project dependant:
- stencil,
- rubber gloves,
- sharp tool for carving,
- paints: acrylic paint, watercolor, soft pastels, paint markers, etc.
- inkjet printer,
- paper.
1. Stamped or textured ornaments
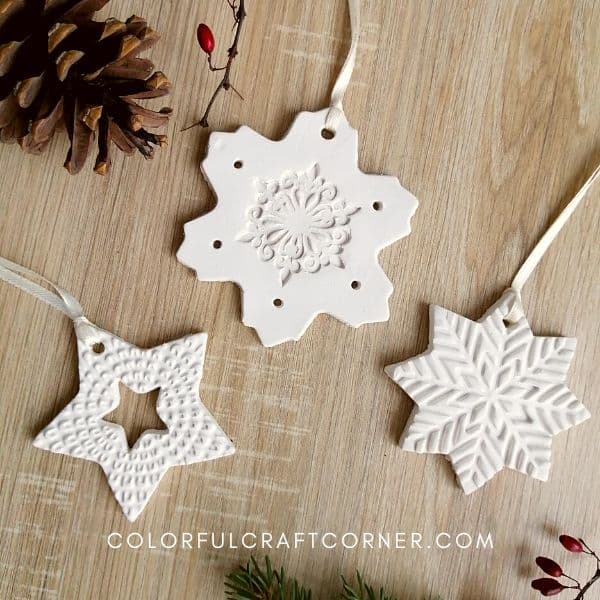
Air drying clay takes imprints well. you can use lots of tools and stuff around your home to add texture to your clay Christmas ornaments.
A few tools to personalize your ornaments: silicone stamps, plastic letters, plants and flowers, jewelry charms, etc.
PRO TIP: Dust textured cookie cutters with cornstarch so the clay won’t get stuck in the small holes.
To create my ornaments, I used a textured snowflake cookie cutter, a laser-cut wooden snowflake as a stamp, and a plastic filigree coaster.
How to:
1 – Roll out the clay evenly.
2 – Create the texture:
a. Press the wooden snowflake into the clay. Carefully remove it. Use a snowflake cookie cutter to pierce the ornament. Add decorative holes.
b. Lay the coaster on top of the rolled-out clay. Press it into the clay. Run your rolling pin a couple of times through the coaster. Make sure the coaster doesn’t move. Lift it. Use a large and a small star cookie cutter to cut out the ornament.
c. Use a medium brush to dust the textured cookie cutter with cornstarch. Press it into the modeling clay. Remove gently and slowly to prevent the clay from sticking and stretching.
3 – Use a straw to add a hole for hanging.
4 – Let it dry overnight.
5 – Add a ribbon or thread for hanging.
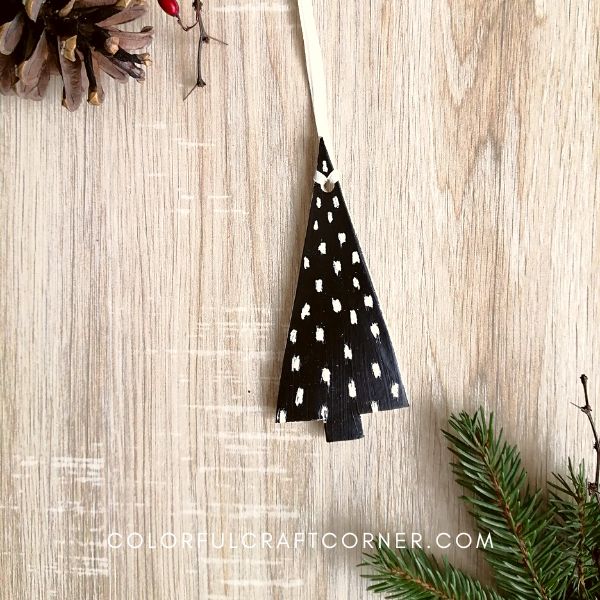
2. Painted tree ornament
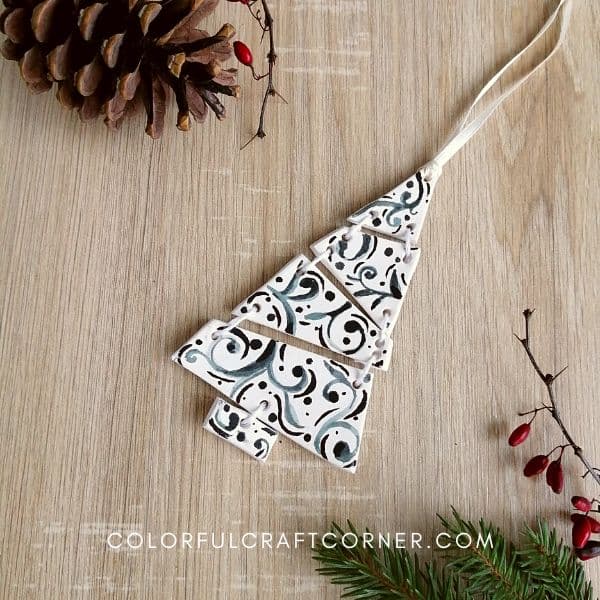
You don’t need to be an artist to create wonderful painted Christmas ornaments. With simple shapes and doodles, you can create wonderful modern ornaments. I decided to show you a fun, personalized multi-piece Christmas tree ornament.
Instructions:
1 – Roll out the air drying clay.
2 – Cut out a simple, triangle-shaped tree with a small trunk.
3 – Use a craft knife or blade and create oblique cuts.
4 – Add small holes for the jump rings or thread.
5 – Let the pieces dry.
6 – Sand them if needed.
7 – Add your design or doodles. I added decorative lines and dots with watercolor.
8 – Seal the pieces.
9 – I couldn’t find my bag with a large jump ring, so I assembled the tree with embroidery floss.
10 – Hang and enjoy.
This ornament is a perfect gift for new families with names.
3. Marbled snowflake ornament

This ornament is my favorite. I’m sure you’ve seen marbled polymer clay crafts. Guess what? You can also achieve a marbled look with air-drying clay. You can color and add fun mix-ins to create cool effects. I used black acrylic paint to color the clay (learn more about how to dye clay) and glitter to add a sparkling touch, but you can also add coffee for a stone effect.
How to make the ornament:
1 – Take a chunk of white air dry clay. Dive it in two. Set one aside and dived the other half in two.
2 – Get your rubber gloves and add a few drops of acrylic paint to one of the clay pieces. Mold it until the paint incorporates.
TIP: Protect your hands, clothes, and table! Acrylic paint can easily stain as you color the clay.
3 – Add a generous amount of glitter to the other piece of clay. Incorporate it well.
4 – Flatten the white clay into a rectangle.
5 – Create thick and thin tubes with colored and glitter clay. Lay them around the white clay.
6 – Roll it into one thick tube. Twist and roll until you’re satisfied with the look.
PRO TIP: Don’t overwork the clay. The black clay will blend in too much, and you won’t achieve the nice marbled effect.
7 – Roll out your glittery-marbled clay and use cookie cutters to create your ornaments.
8 – Let it dry overnight.
9 – Sand the edges if needed. Paint the edges with metallic paint. Add a ribbon, and enjoy!
4. Elegant tree ornament with a stencil

Using stencils is an easy and fun method to add a “reverse” texture to modeling clay. I used my DIY mandala stencil to create this chic ornament. You can use any other stencil you like; for example, a snowflake stencil is also perfect for creating a textured tree.
1 – Roll out the clay.
2 – Lay the stencil on the clay. Use a toothpick or the tip of your craft knife to push the stencil into the clay. Focus on all the small parts around the cut-out sections.
3 – Rub a soft pastel on your finger and gently apply it to the design.
NOTE: You can skip this step and apply paint with a sponge to these areas after your clay tree ornament has dried.
4 – Gently and gradually remove the stencil.
5 – Use a blade, craft knife, or cookie cutter to cut out the ornament. Add a hole with a straw on the top of the ornament.
I trimmed the edges to create a slimmer tree because I wasn’t satisfied with the look.
6 – Let it dry.
7 – Sand rough edges and apply a coat of varnish to protect the ornament.
5. Ornaments in Terrazzo style
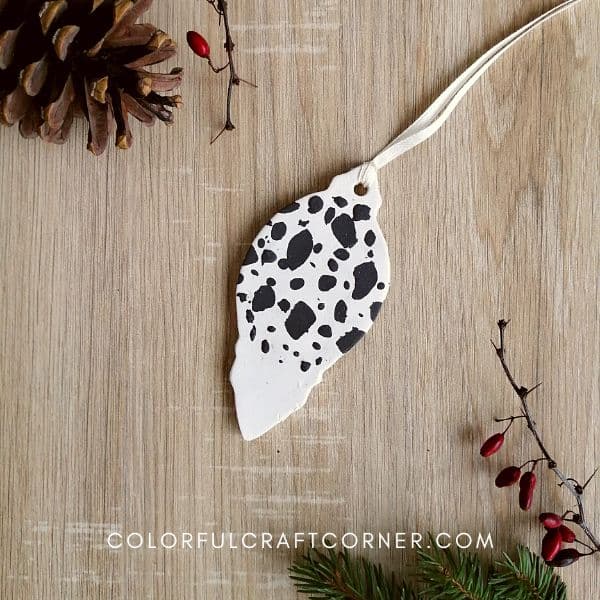
Terrazzo decor has become pretty popular in recent years. So, I decided to incorporate it into one of my ornaments. I regret not making at least two more shades of grey or other colors, but I think this simple black-and-white design is also beautiful
How to;
1 – Protect your clothes and workplace; also wear a pair of rubber gloves.
2 – Get a piece of wet clay and add some acrylic paint. Blend it in well.
3 – Roll out white clay.
4 – Use a blade to cut pieces of colored clay in different sizes.
5 – Arrange them on the rolled-out clay. Slightly press them with your hand, then run your rolling pin over them so they stick to the base.
6 – Cut it out with a cookie cutter. Add a hole with a straw.
7 – Ley it dry, Sand if needed, and add a coat of sealant.
NOTE: It’s best to add the colored clay before cutting out the ornament. However, I added several pieces because I was satisfied with the look.
6. Carved air-dry clay ornament
This method is super simple. You can cut out any shape, star, snowflake, circle, or other fancier ornament shapes.
Step-by-step instructions:
1 – Roll out the air dry clay.
2 – Cut out your desired shape with a cookie cutter or craft knife. I picked a simple triangle Christmas tree.
3 – Let the ornament dry.
4 – Sand if needed.
5 – Apply a coat of acrylic paint or tempera. Let the paint dry.
6 – Use a sharp tool to carve a pattern. Be gentle! Don’t press the tool too hard, you may break the ornament.
7 – Apply a coat of varnish.
I love this simple scandi tree ornament; I need to make a set with different designs.
7. Easy photo transfer ornaments

I learned this fun method from Red Rocking Bird and used it to create other beautiful air drying clay projects; for example, this DIY clay dreamcatcher and these clay Easter ornaments.
I used Canva to create my paper template. It has many beautiful designs, but you can also draw a unique pattern, scan it and print it.
How to:
1 – Print out a pattern with an inkjet printer.
2 – Roll out the clay.
3 – Slightly wet the surface of the clay by rubbing a few drops of clean water.
4 – Add the pattern (inked side facing down) and gently rub it in a circular motion. Make sure you go over every detail.
5 – Slowly remove the paper.
6 – Cut out the ornament. I picked a glass to create a simple circle ornament. Add a hole with a straw.
7 – Let it dry.
8 – I wasn’t satisfied with the intensity of the design, so I traced it with a black permanent marker.
9 – Seal it.
10 – Add a ribbon and enjoy!
I also tried to reverse the design (to have a black background with a white pattern), but it dried too light.
Video tutorial
FAQ and tips
Can I use handmade air dry clay?
Most of these methods are also suitable for making salt dough ornaments (I’m not sure about the image transfer). You can also use other homemade clays like baking soda clay. If you want to create your own clay, check out my 10 best homemade air dry clay recipes post.
How to dry air dry clay ornaments?
For best results, put the clay pieces on a flat surface and occasionally rotate or use a wire rack to maximize airflow and avoid curling. You can also read my other post on how to dry air dry clay properly for more instructions.
What to use to seal air drying clay?
A sealant will protect your ornaments and make them stronger at the same time. You can use a water-based sealant, such as Mod Podge, an acrylic sealer, and liquid epoxy resin.
What else can I use to decorate air dry clay ornaments?
There are endless ways to add other adornments to your beautiful ornaments. You can attach bows, plastic, metal, wood beads, ribbons, rhinestones, felt scraps, and chains. Or, apply gold leaf, flocking powder, or glitter. Add them after you seal the clay using hot glue or craft glue.
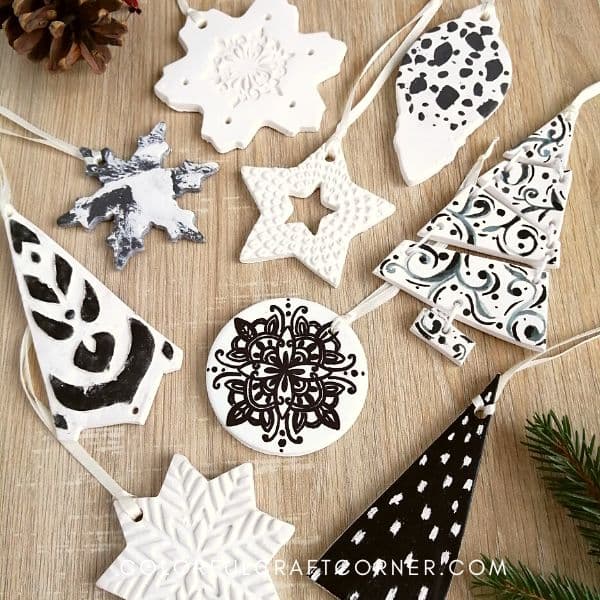
Final thoughts
I hope you liked my DIY black and white clay Christmas ornament collection. I loved creating them and am happy with how they turned out.
Handmade clay ornaments are a great idea for the whole family. Next year, I will make a set for our tree too.
Other air dry clay Christmas decorations:
- DIY Clay Angel Ornament,
- Easy Air Dry Clay Snowflake Candle Holder,
- How to Make a Clay House Luminary.