Tips for rolling out air dry clay without sticking
Do you get annoyed when you try to roll out air dry clay and it sticks to the surface? Or it gets thicker on the inside and thin out at the edges? In this post, I’ll show you how to roll out clay easily and evenly.
Even though working with air dry clay is pretty simple and fun, there are some hacks that you should know before you start crafting.
Why?
Some characteristics of clay will make you want to pull out your hair. For example, clay tends to stick to the working surface, cracks if not dried properly (read my article on how to dry clay the right way), falls apart if pieces are not stuck together well, etc.
I’ve been working with air drying clay a lot. At first, I’ve been struggling with removing the rolled-out clay from the table or tile. It was so annoying! My beautiful ornaments stretched as I wanted to remove them, their edges were damaged as I tried to lift them with a tool, etc.
To spare you some time (and a few white hairs) here are a few tips and hacks on how to roll out air drying clay.
Let’s get started!
DISCLOSURE: THIS POST MAY CONTAIN AFFILIATE LINKS, MEANING I GET A COMMISSION IF YOU DECIDE TO MAKE A PURCHASE THROUGH MY LINKS, AT NO COST TO YOU. PLEASE READ MY DISCLOSURE FOR MORE INFO.
Can you roll out air dry clay?
Air dry clay is a soft and smooth craft material, that has a consistency of cookie dough. You can roll it out with a rolling pin, but it can be tricky, because the clay tends to stick to the working surface and sometimes to the tools too.
Read on to learn my tips and recommendations, so can easily roll out air drying clay.

Recommended tools for rolling out clay
These tools will help you achieve the best results:
- Acrylic rolling pin:
- clay won’t stick to the acrylic rolling pin as easily,
- it’s small and easy to store.
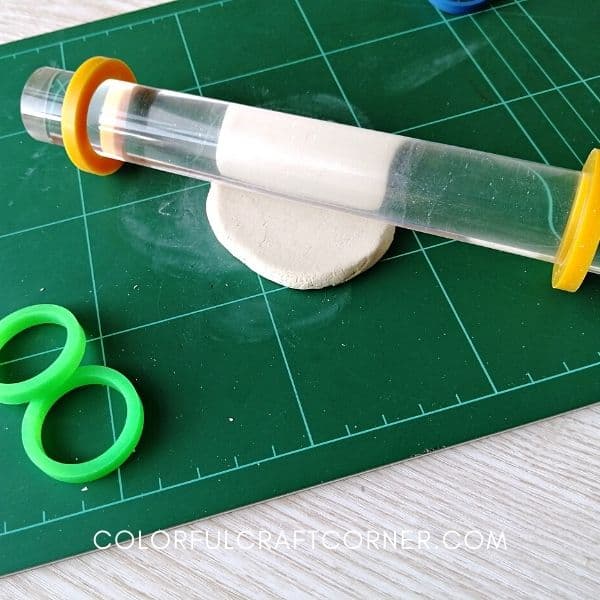
- Guide rings (These are for approx. 2″ rollers. Make sure you pick the right size for your rolling pin):
- helps you roll out clay evenly,
- comes in severeal sizes so you can pick the best thickness for your craft.
- Silicone craft mat:
- heat resistant, easy to clean, durable and protects your table,
- the flexibile silicone makes removing rolled out clay a breeze,
- silicone cutting boards are also perfect and safer when using a craft knife (you can’t cut them out).
In the sections below I’ll give you other alternatives for tools and explain a little bit how will they help you in working with air drying clay.
What can you use to roll out clay?

Even though I recommend using an acrylic rolling pin, traditional wood or metal rolling pin also works fine. Softer clay may stick to it easier, but if you don’t plan to craft with clay regularly, you shouldn’t invest in an acrylic rolling pin just for one project.
However, be careful when working with a used wood rolling pin. The grease from food may transfer to the clay and leave some stains. Make sure to wash it thoroughly before using it. It’s best to have one dedicated to crafts. Even though air drying clay is not toxic, I wouldn’t use a wooden rolling pin for making food after I’ve used it for clay.
If you don’t have a rolling pin, you can use a vine bottle, mason jar, or a glass. It’s slightly harder and trickier to roll the clay out evenly, but doable.
How do you keep air dry clay from sticking when rolling out?
The best way to prevent air drying clay from sticking is to roll it out on a flexible, non-stick surface (crafting mat, plastic sheet, etc.) This makes it super easy to remove the clay from your working surface. Lift the clay with the sheet and peel it off. This method also prevents stretching and distortions.
If you’re crafting with homemade air dry clay, you can use one of the ingredients to dust the working surface, like you would do when baking. For example, corn starch or flour would work like a charm, but don’t add too much, because it will harden and make it more prone to cracking.
Be careful when modeling store-bought clay, it is recommended to wet your hands, but too much water can do a lot of harm (makes it stickier, prone to cracking and breakage).
The so-called ‘conditioning’ of the clay would also help prevent stickiness. This means that, when you get a chunk of clay out of the package, take a couple of minutes and knead it. The clay gets smoother, pliable, and easier to shape.
What’s the best surface for rolling out clay?
Some recommend tiles or glass, but I don’t like them. I’ve found that thin and flexible surfaces or sheets are the best for rolling out clay.
These will protect your table, stop air dry clay from sticking and deforming, and also makes it easier to remove the clay from your working surface.
- silicone craft mat,
- silicone cutting board,
- wax paper,
- flexible plastic sheet (for example mylar sheets),
- freezer paper (the shiny side against the clay)
- plastic wrap (works fine for small pieces, but leaves creases in the clay when you roll out a bigger piece, see photo below).

How to roll out clay evenly?
Use rolling pin guide rings or wood sticks under your rolling pin so you can roll out clay evenly. These simple tools will help you to keep the rolled-out clay at the same thickness throughout the piece.
Why is important to have the clay rolled out evenly? It not only makes your project nicer but also makes it more durable, it will dry evenly, so prevents the clay from cracking and curling up while drying.
The guide rings are easy to use, clean, and store. They usually come in 3-5 (or more sizes) so you can pick the best thickness for your project.
How to use the ‘wood sticks method’:
- pick a quarter of an inch diameter wood stick (square sticks won’t move while rolling out the clay),
- place two sticks parallel on the sides of your working surface,
- put the clay in the middle and flatten it,
- place the rolling pin on the sticks and roll out the clay.
Rolling out clay evenly was the biggest issue for me, but this simple hack makes my clay crafts look more professional and durable.
How thin can you roll out air dry clay?
The optimal thickness for air dry clay crafts is 1/4 inch. This is thick enough to make your clay craft durable and also to dry properly.
However, I do roll them out thinner in some cases, but never under 1/6 inches thick. Clay crafts that are too thin will break easily and usually, they will curl when drying.
Bonus tip for rolling out clay
Make sure your working surface, your hands, and your tools are clean, dust- and lint-free. They stick to the clay easily, and it’s hard or the small one almost impossible to remove.
The dirt is super visible on the white clay, so be extra careful if you plan to leave your project white. Although if you want to paint it with acrylic paint, small particles won’t get noticed, the paint will cover it nicely.
Conclusion about rolling out air dry clay
Following these simple recommendations will ease your work with air dry clay. Even though there are some tools to help you, like the guide rings or a silicone craft mat, you can replace them with things you already have at home, no need for investing in a lot of money.
However, if you want to take working with air dry clay to the next level, and at-home pottery your new passion, these tools will make crafting easier. They are not expensive and will make a difference in the quality of your projects.
Related articles on how to craft with air drying clay:
- Tips for Drying Air Dry Clay Properly
- How to Color Store-Bought Air Dry Clay
- How to Prevent Air Dry Clay from Cracking
- How to Strenghten Air Dry Clay
- Is Air Dry Clay Fammable?
- Is Air Dry Clay Toxic?
- 10 PROs and CONs of Working with Air Dry Clay

Thank you so much!!!! Very informative.
I’m happy you found it helpful!