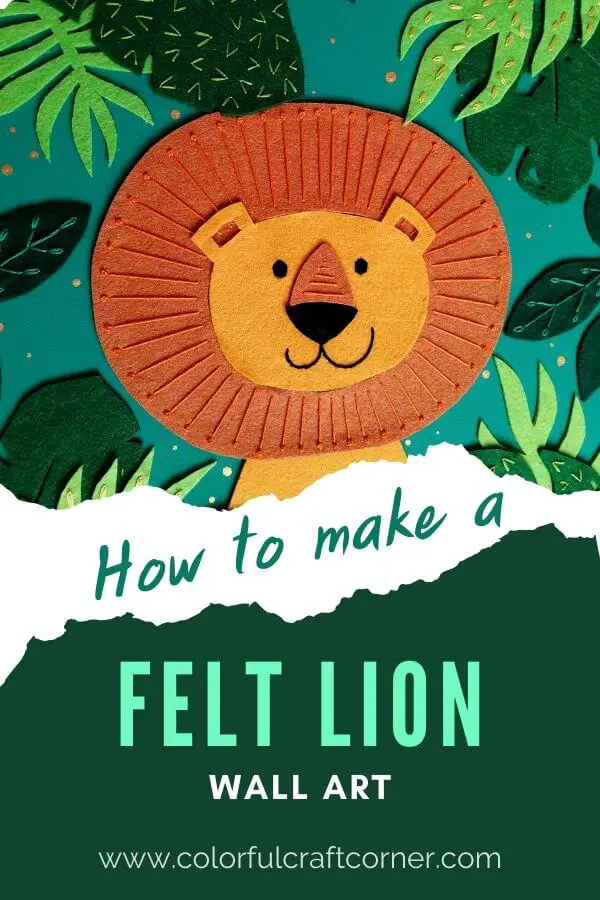
Easy and inexpensive felt lion wall art tutorial
In this post you will learnhow to make a cheap and easy felt lion wall decor for the kid’s room.
We’ve found out that our son adores lions. I did want to paint something on his walls or make a canvas wall art but wasn’t sure what to do. So, i’ve decided to create a lion wall art.
Through time I learned not to push myself when creativity is involved. I keep in my mind the idea of creating something for a specific purpose, and when I least expect it, the design clicks. Usually, the creativity flow comes when I’m nursing or doing monotonous chores, washing the dishes, ironing, or cleaning the house.
Thinking about a simple lion painting felt meh. I desired a little extra, but still an easy craft that I could finish in an afternoon. I admit it took me more than an afternoon (planning, making templates, and embroidering is time-consuming). Although, with the free templates, it wouldn’t last you longer if you wish to make it.
So, here we go. Let’s make this cute felt lion canvas wall art. I like to work with felt. It’s inexpensive, doesn’t fray, comes in various stunning bright colors, I can embroider them (I’m into embroidering), sewable, glueable, and soft and warm to the hands.
If you want to learn more about felt and how to work with it, check out my Ultimate Guide on How to Work with Felt post.
Let’s get started.

Lion wall art supplies:
- canvas,
- felt (apple green, grass green, dark turquoise green, bright yellow, gingerbread brown felt and black felt),
- scissors (I used regular scissors for cutting out big shapes, and a pointy head-scissor for cutting holes.),
- acrylic paint (matte turquoise and light gold-colored),
- paintbrush (a wide one or sponge paintbrush),
- glue gun + glue,
- the free templates,
- printer,
- depending on the method of pattern transfer: paper + pencil, freezer paper, or Sulky Sticky Fabry Solvy,
- cotton embroidery floss and needle (bright orange, turquoise, lime green, light grass green, black) – optional.
How to get started when you gathered all the tools and supplies?
Print and cut out the lion and leaf templates
I didn’t have to print them out because I drew them by hand. If you don’t have a printer draw your own leaves. Or trace them on the screen. Grab my templates from the Free Resource Library after you sign-up for my newsletter.
The freezer paper and the Sulky Sticky Fabry Solvy methods are the fastest and the most effective way to transfer patterns. Iron the designs on the felt and cut them out. I used stiff craft felt, you can get it at almost any craft store. Remove the freezer paper and leave the Fabry Solvy on.
Prepare the canvas
Paint the canvas with the paintbrush you choose. Wait until it’s fully dry. If you notice spots that weren’t covered, add another layer of paint or correct smaller blots with a sponge (it’s less visible).
Decorate
I used embroidery to decorate. I embroidered the larger leaves and the lion’s mane to add an extra pop of color. Embroidery floss has a delicate shine that highlights details on the matte felt background.

What embroidery stitches to use?
- long, running stitch and french knots for the mane,
- decreasing, parallel, running stitch for the nose,
- satin stitch for the eyes,
- split stitch for the mouth,
- lazy daisy stitch and backstitch for the leaves.
As you can see, I used basic embroidery stitches. If you’re not familiar with embroidery, but you want to give it a try, check this tutorial on how to sew these basic embroidery stitches.
You don’t like or don’t want to embroider? Decorate and add details with small felt pieces. Cut out shapes: triangles, circles, squares, arrows, and glue them on the leaves.
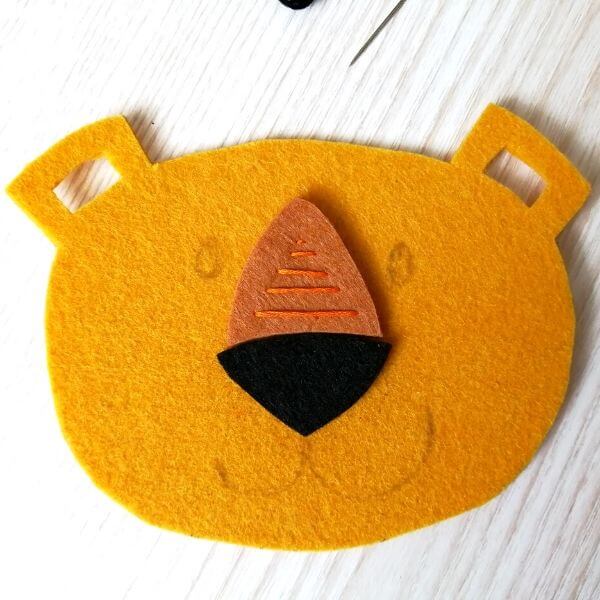
To create the head, you have to embroider parallel stitches on the nose, then glue them on and add the tip of the nose. Draw the eyes and the mouth line with a pencil. Embroider the eyes with satin stitch and the mouth with the running stitch.
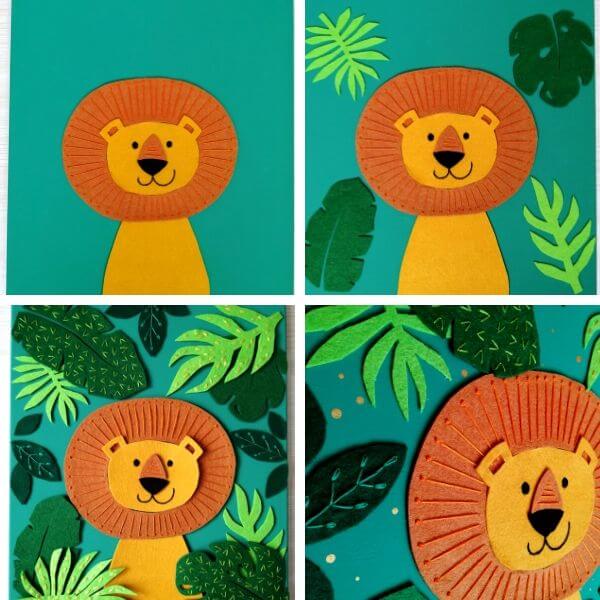
Arrange the pieces
When you’re done with all the cutting and decorating, get your canvas and arrange the pieces, until you’re satisfied.
Start gluing
Remove the leaves and start with the lion, stick it on the canvas. Start with attaching the nose on the head, then glue the body, the mane, and the head/face on the canvas.
Put the parts back and now move away embellished and turquoise leaves. Glue the first layer of leaves, the smaller ones.
Top them with the big embroidered leaves. Fill in the holes with the turquoise leaves.
Add charm
We are almost done. With the end of your brush, put a few gold dots all over the canvas. Concentrate on empty parts.
This simple technique makes the lion art appealing and whimsical. It’s not a must-do, you can leave it as it is, or use other colors.
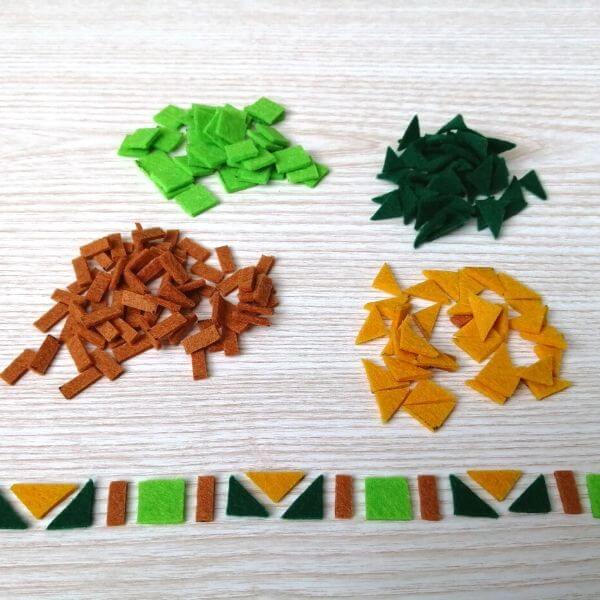
What to do with felt scraps?
Almost every felt craft project ends with a lot of felt scraps. Don’t throw them out! Cut them up to small geometric shapes and decorate the leaves (instead of embroidering) or create a playful frame.
I measured the depth of the canvas (~1 cm/half an inch) and cut out squares, triangles, and rectangles. Create a fun, repetitive pattern and glue it around the canvas.
For more felt scrap ideas check out this awesome post by Swoodson Says.
Tips and hacks:
- use sharp scissors, a blunt tool rips the felt and makes the edges fuzzy and ugly,
- experiment with other embroidery designs (draw them on the back of the leaves for guidance),
- if you don’t like felt, replace it with colored paper, decorate it with markers or gel ink pens,
- adapt it to your taste and style:
- try other embellishments: beads, ribbons, sequins,
- choose different color combinations (for color palette inspiration check out this site colorpalettes.net),
- pick other animals.
Final thoughts about the lion wall decor
This adorable felt lion wall art is one of my favorite craft projects. It turned out exactly I imagined. My son loves it.
It is a cheap and effortless way to decorate a child’s room or the playroom.For more felt craft ideas, I have a post with 100 stunning felt projects. Check it out here.
Would you give it a try to make this kid’s room decor? Would you like to see similar wall art or craft projects?
Related posts:
- The Best Felt Craft Ideas – The Ultimate List
- How to Craft with Felt – The Ultimate Guide (2020)
- The Best Felt Flower Tutorials and Patterns
- DIY Felt Embroidered Bookmark
- Canvas Wall Art With Lights
- Easy and Cool Felt Craft Kits for Adults
- DIY Christmas Felt Craft Kits for Adults
DIY Felt Lion Wall Art