
DIY Air Dry Clay House Tutorial
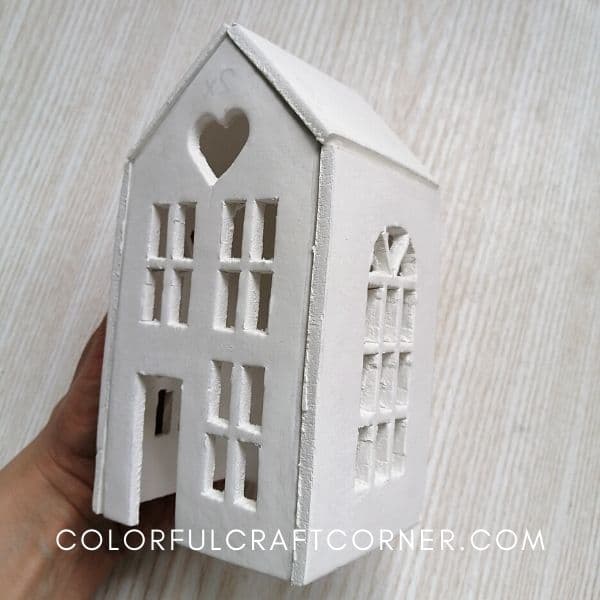
I will show you how to make a lovely white air dry clay house figurine in this post. I love the ceramic tealight houses that you can purchase around the holidays, so I had to make one using air drying clay.
A couple of years ago, I tried to make a clay house and failed utterly. I wanted to make it in one piece, but the corners cracked, the walls deformed, and I could barely remove it from the base.
Even though I’ve seen a couple of ideas on Pinterest that could make a tiny solid house, I wasn’t satisfied since I wanted to insert a candle and use it as a luminary.
Last year, I found this excellent article (it’s in Spanish and includes three beautiful clay tutorials). She found a clever way to assemble the house, and I had to try it.
The clay house design
I like the more detailed and intricate designs and patterns. They do need more patience and time, but they are worth it.
I wanted more windows and something similar to a metal house candle holder.
So, I searched for ceramic and metal house tealight holders and created my template using Canva. You can download mine (click the button after the tools and supplies section) or make your own if you like it.
Last year I made a non-edible gingerbread house out of the cinnamon dough with this technique. You can check out the article for the tutorial and grab the free template.
I hope I will have time and patience this year and make a couple of other houses and turn them into a lovely Christmas village for the Holidays. Or make mini houses and hang them on the Christmas tree. I haven’t decided yet.
Now let’s dive into the DIY clay house tutorial!
DISCLOSURE: THIS POST MAY CONTAIN AFFILIATE LINKS, MEANING I GET A COMMISSION IF YOU DECIDE TO MAKE A PURCHASE THROUGH MY LINKS, AT NO COST TO YOU. PLEASE READ MY DISCLOSURE FOR MORE INFO.
Tools and supplies
- air dry clay (I tried Darwi for this project),
- rolling pin,
- craft knife (I used a set like this one),
- small heart cookie cutter,
- house template,
- cling film,
- craft glue,
- sandpaper,
- acrylic paint,
- a sponge or brush,
- varnish.
Step-by-step instruction
Step 1 – Print and cut out the house templates.
Step 2 – Take a piece of air dry clay and knead it for a couple of minutes. I used Darwi air hardening clay for this craft. It was soft and smooth. It also has a nice white color (compared to DAS, grey when wet and dries to an off-white shade).
Step 3 – Roll out clay to an even thickness. I like to do it between two sheets of cling film because it won’t stick to the rolling pin or the surface. (For more tips, check out my other article on how to roll out clay).
Step 4 – Dab your fingers into water and rub them on the surface. Don’t over-wet the clay!
Step 5 – Place one of the templates facing down. Run your fingers around the line. Don’t push it into the clay. Slightly rub it. Leave the paper on for a couple of seconds, then remove it.
TIP! Don’t leave the paper on for too long. It will stick to the clay and tear. It’s best to work with one template at a time.
Step 6 – Flat tip craft knives are best for this craft for the windows, but you can also do it with the regular ones. Cut out the windows first, one by one, then the heart decoration. Cut out the house shape. Repeat with the other walls and roofs.

Step 7 – Leave them to dry for 24-48 hours. Flip them now and then and monitor them at the beginning so they won’t curl.
Step 8 – Assembly the house using craft glue. Use supporters, so the pieces stay in place while the glue cures.
Step 9 – Patch the holes and cracks with wet clay, both inside and out. If your hand doesn’t fit, you can use a wooden stick or silicone sculpting tools to push them into the gaps. Wet your fingertips and smooth them as well as you can.
Step 10 – Leave it dry for a couple of hours (I like to leave it overnight).
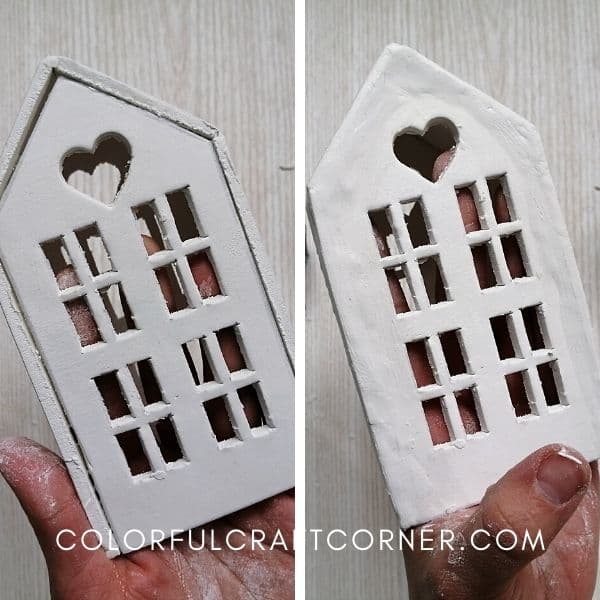
Step 11 – Sand it! I used medium sandpaper to smooth out the imperfections and a finer one to polish the finish.
Step 12 – Dust the clay house thoroughly! I like to use a soft brush.

Step 13 – Paint the house candleholder! I applied acrylic paint using a sponge to achieve a delicate texture and avoid brush marks. If needed, you can apply 2-3 coats of paint and wait for them to dry between the layers.
Step 14 – Apply a coat of varnish, both inside and out, to protect your beautiful clay project.
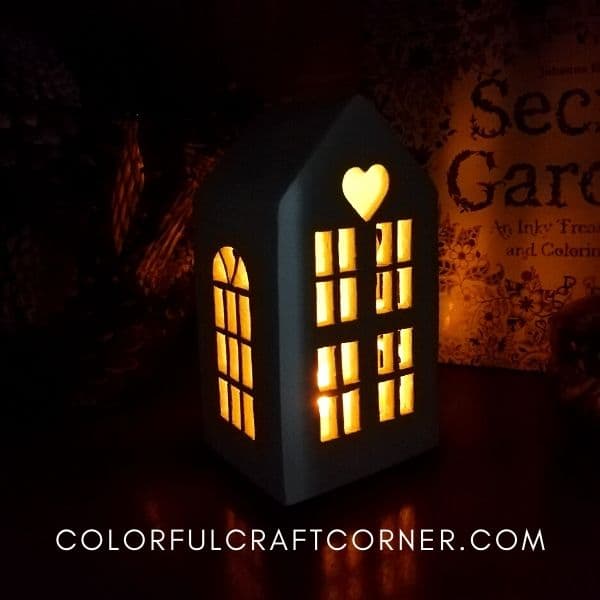
Step 15 – Insert a battery-operated LED candle and enjoy your new air dry clay house, tealight holder.
Video tutorial
Tips and hacks
- Don’t make the walls too thin! 1/4-1/6 inch thickness is always optimal when working with air drying clay.
- Even though this house is quite durable and stable, you can use an armature, for example, a milk or juice cardboard box. Cut out the windows (in one large piece) and glue the clay walls onto the cardboard.
- Get a set of tiny rectangle cutters if you don’t have the patience to cut out the windows. I like these metal cutters, but you can also opt for the cheaper plastic ones.
- You don’t need to paint it. I liked the whiteness of the clay. However, the glue left a slight grey mark, and I had to cover that up.
Final thoughts about the handmade clay house
I love how this handmade clay house turned out. It may seem complicated, but it’s pretty easy to make. You need some patience when cutting out the windows.
You can use this house all year as a beautiful candleholder or turn it into a Christmas decoration (you can replace the heart with a star or knead glitter into the clay for extra sparkle). You can also create mini versions and hang them on your Christmas tree (I may make a tutorial for these in the future).
I hope you liked this clay house tutorial. Do you like to work with air dry clay? Leave a comment!
Related air dry clay tutorials:
