
Easy DIY Snowflake Candleholders out of Clay
In this post, I will show you how to make a beautiful snowflake candle holder using air drying clay. This craft is super simple and almost fail proof. You can make it with your kids too!
I’m already in the Christmas mood! How about you? Usually, if I want to have new Christmas decor or ornaments I need to start making them starting from the end of Summer.
I remember, 3 years ago, I was still painting Christmas ornaments on the 24th of December. I wanted them up on the tree so badly. I promised myself I won’t do it again.
So, I was looking and brainstorming new Christmas decor ideas. I wanted something that I could use before and after Christmas, so something that’s not too closely related to the Holiday, but Winter themed.
And I stumbled open these stunning ceramic snowflake candle holders. *ding* Paula, make one with clay! My new craft love is air dry clay, so no surprise I have a few packs at home. I also had two big snowflake cookie cutters, one from IKEA and another one which came in a set (I linked a similar one in the tools and supplies section). So everything was set.
I also mixed in a little silver glitter to make them sparkly like real snowflakes. I love how they’ve turned out. I will make a couple more, so I can give them as gifts for loved ones.
Now, let’s get started!
DISCLOSURE: THIS POST MAY CONTAIN AFFILIATE LINKS, MEANING I GET A COMMISSION IF YOU DECIDE TO MAKE A PURCHASE THROUGH MY LINKS, AT NO COST TO YOU. PLEASE READ MY DISCLOSURE FOR MORE INFO.
Snowflake candleholder tools and supplies
- air dry clay (I used Jovi this time),
- big snowflake cookie cutters,
- small rhomb cookie cutter (optional),
- plastic straw,
- glitter,
- rolling pin,
- guide rings (optional),
- plastic wrap or wax paper,
- sandpaper,
- varnish,
- brush,
- acrylic paint (optional),
- bowl.
Other Winter themed Air Dry Clay Crafts

Step-by-step instructions
Step 1 – Grab a good chunk of air drying clay and knead it a little.
Step 2 – Flatten the clay and poke it with your fingers a couple of times. Fill the holes with glitter.
NOTE! You can use any color. I used silver glitter to make it sparkly like snow.
Step 3 – Knead it well. Repeat if your clay is not sparkly enough.
Step 4 – Roll out the clay to about a quarter-inch of thickness. I like to do it between two sheets of plastic wrap or wax paper because the clay won’t stick to the rolling pin and I can easily remove it when I’m done with the work.
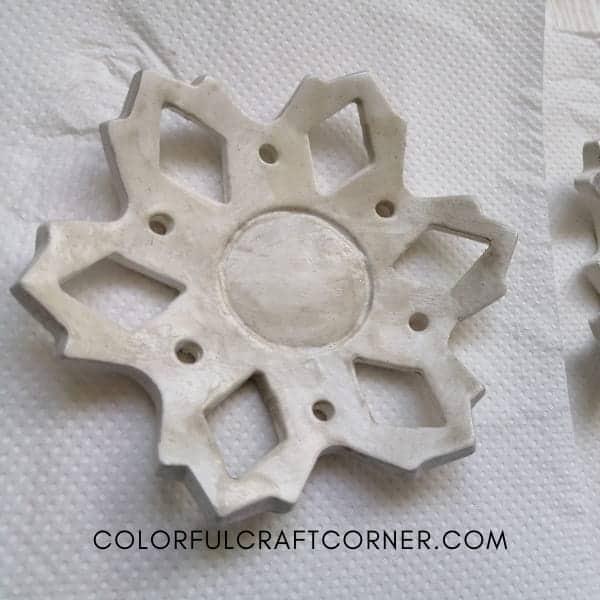
Step 5 – Use your large snowflake cookie cutter to cut out the candle holder. Remove the excess.
Step 6 – Create decorative cut-outs. I used a small rhomb and a plastic straw.
Step 7 – Smooth out the edges with your fingers. Slightly wet it if needed.
Step 8 (optional) – I sprinkled one of my snowflake candle holders with glitter and carefully smooth them not the clay.
Step 9 – Transfer the candle holders into a bowl so they can take a nice curved shape. You can experiment with the size of the bowl, the larger the bowl, the flatter your candle holder will be.
Step 10 – Leave them to dry for at least 24-48 hours. Flip them when the upper part is mostly set, so the bottom part could dry thoroughly.
Step 11 – Sand off the imperfections.
Step 12 (optional) – Use a brush and acrylic paint to decorate the edges.
Step 13 – Seal your clay candleholders with a varnish. Skip this step if you paint the whole thing with acrylic paint because it also acts like a sealant.
Step 14 – Enjoy your beautiful snowflake tea light holders.

Clay tea light holder – video tutorial
DIY candleholder – Tips and hacks
- Make sure your workface, tools, and your hands are clean. Small lints and dust are very visible on the white air hardening clay.
- Use a clean brush when applying the sealant. I made the mistake of using one that I thought was “clean” and transferred the dust and color from the brush to the white candle holder. (See the photo below this section)
- For your safety use battery operated candles or use a container for your tealights like the glass oneI used (check the one I used in the photos). Air dry clay could be flammable, and when it gets into contant with fire it will chars. Read my related article.
- Add texture and pattern to your candle holders with snowflake stamps or stencils. (Like I did with this mandala trinket dish).
- Decorate the lea light holders with rhinestones, flatback pearls or other fun Winter themed craft supplies.
Final thoughts about the air dry clay tea light holder
This is such an easy craft, kids would enjoy them too. You can’t get them wrong, just make sure they are not too thin (they will break easily), I recommend a quarter of an inch thickness and that your tools and hands are clean, so you won’t transfer anything to the clay.
I hope you enjoyed this tutorial! If you make them, or you made something else with air drying clay that’s Winter or Christmas-related, leave a comment. Let’s inspire each other!
Related Christmas crafts:
- Recycled Egg Carton Gnome
- Upcycled TP Roll Snowflake Ornaments
- Big Pinecone Heart Ornaments
- Chic Wire Mini Wreath Ornaments
- Simple Star Christmas Tree Topper
