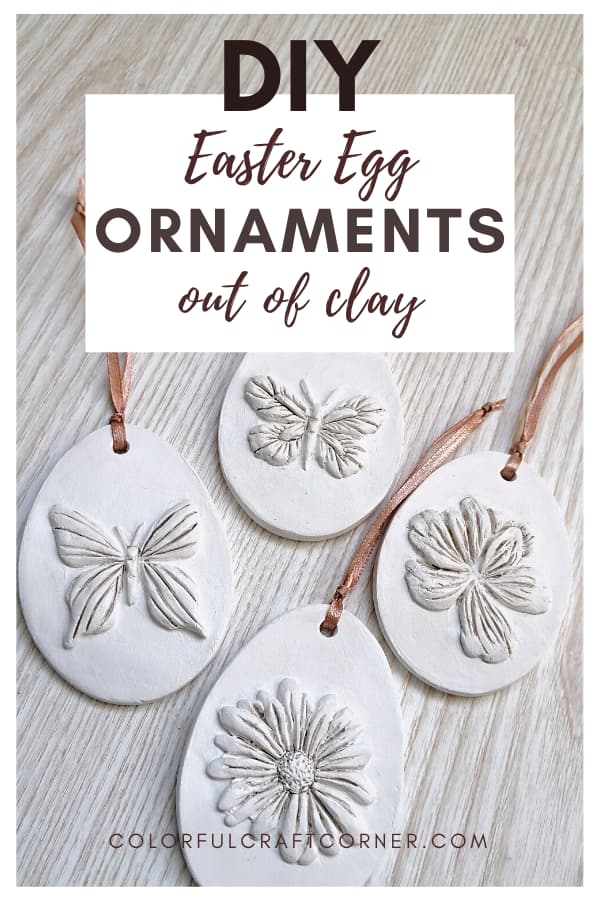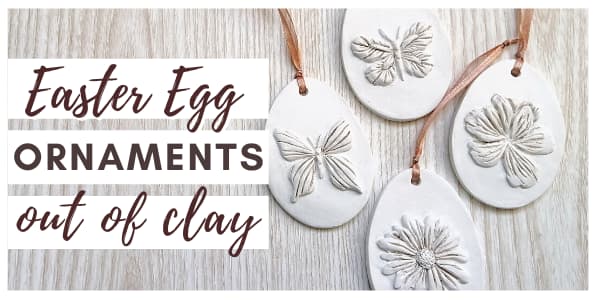
How to make Air dry clay Easter Egg Ornaments
This post will show you how to make beautiful DIY clay Easter egg ornaments with a simple image transfer method. You can leave them white, as I did, or paint the flowers in bright colors.
Air drying clay is a beautiful craft medium. I’ve been experimenting with it for quite some time, and I love its versatility.
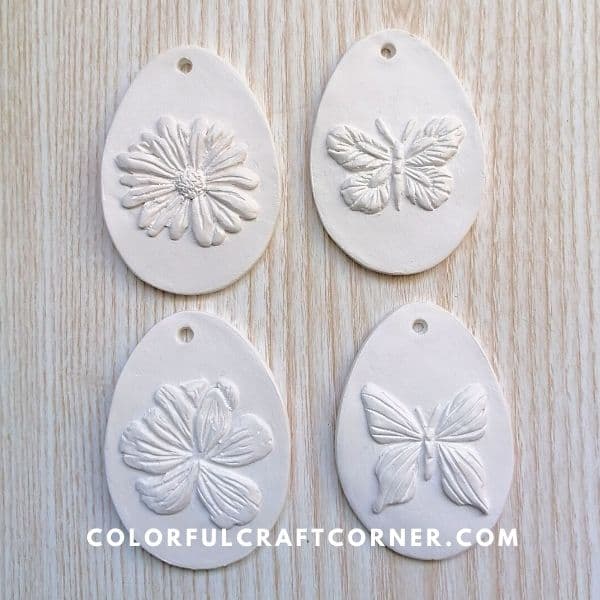
Last year, I made clay bunnies and a clay bird. So, I was thinking of a new air dry clay Easter decoration. I came up with three ideas. I’ll start with these Easter egg ornaments with flowers and butterflies (you can find the other two at the end of this post).
My initial plan was to transfer the images or templates and paint the flowers with watercolors. But I stumbled upon a textured decoration on Pinterest, and I instantly knew that I wouldn’t paint them.
I love how these clay Easter eggs turned out. They are rustic and delicate. The white color makes them easy to incorporate into any home decor style, especially in shabby-chic or vintage-styled homes.
Now, let’s get started with these simple hanging Easter egg ornaments.
DISCLOSURE: THIS POST MAY CONTAIN AFFILIATE LINKS, MEANING I GET A COMMISSION IF YOU DECIDE TO MAKE A PURCHASE THROUGH MY LINKS, AT NO COST TO YOU. PLEASE READ MY DISCLOSURE FOR MORE INFO.

Tools and Supplies
- air dry clay (I used Jovi for this craft because I had some leftover),
- templates (or egg cookie cutters),
- scissor,
- craft knife,
- straw,
- fine sandpaper,
- craft glue,
- acrylic paint,
- brush,
- sealant,
- ribbon or twine.
I created the templates in Canva (it’s free). Canva is full of fantastic graphics and fonts you can choose from.
If you like my designs, you can download my templates by clicking the pink button below or visiting my resource library.
Step-by-step Instructions
Step 1
Print out your Easter egg templates with an inkjet printer, then cut them around. You are an experienced crafter or air dry clay user. You can also free-hand these ornaments using an egg-shaped cookie cutter and build up the flowers.
Step 2
Grab a chunk of air dry clay and knead it for a couple of seconds or minutes. This is called ‘conditioning’ the clay and makes your craft material softer and smoother.
Step 3
Roll out clay evenly (you can use guide rings or other alternatives to an even thickness). I like to roll out air-dry clay between two sheets of cling film. It prevents sticking. I can easily remove the pieces, and also, it’s less likely to end up with dust and small particles in the clay.
Aim for a quarter of an inch thickness or at least 1/6″.
Step 4
Rub a few drops of water onto the clay’s surface in a circular motion. Do not over-wet the clay! Dipping your fingers 3-4 times and evenly spreading the moisture will do it.
NOTE! The paper will stick and tear easily if the clay gets too wet. It’s challenging and time-consuming to remove the wet paper from the clay without damaging the surface.
Step 5
Apply the templates facing down. Carefully rub the back of the paper (concentrate on the parts where the flowers and butterflies are).
Do not leave them on for too long! I recommend making one at a time.

Step 6
Trace the outline with the craft knife or cut them out with a cookie cutter. Use a straw to make the holes for the string or ribbon.
Step 7
Use your fingers or a wet brush to smooth out imperfections.

Step 8
Leave them to dry for at least 24-48 hours.
Step 9
Apply a thin coat of craft glue. Add small clay pieces gradually and use sculpting tools, the back of your brush, a toothpick, or anything else to shape the petals and wings.
Step 10
Leave them to dry for a couple of hours (I usually leave them overnight).

Step 11
Use sandpaper to achieve a polished look. Dust it thoroughly with a soft brush and cloth.

Step 12
Paint them with white acrylic paint. I like to make two thin coats, leaving them dry thoroughly between layers.
Step 13
Apply a second color (watered up) to contour the shapes in the gouges. Remove the excess with a paper kitchen towel or wet wipes.
Step 14
Use a water-based or acrylic sealant to protect your air dry clay Easter egg ornaments.
Step 15
Add ribbon, string, or twine to hang your beautiful decorations. You can also add bows, beads, or other decorations to make them prettier.
Video Tutorial
Tips and Tricks:
- Air dry clay is quite heavy even after drying. So, if you plan to display these hanging Easter egg ornaments on a branch tree, pick a lighter clay. For example, Hearty or Fimo Air Light clay are good choices for lightweight decorations.
- Add the holes on the sides and create a lovely clay easter egg garland.
- You can also add quotes, words, or names to your egg ornaments, like Happy Easter, Bunny, hop-hop, etc. But make sure to mirror the image.
Final thoughts about the clay Easter Egg Ornaments
As you can see, it’s pretty simple to make air drying clay ornaments. You can pick any symbol you like. I think they would look cute with bunnies or baby chicks. Welcome Spring and decorate your house with these ornaments or give them as gifts for loved ones.
I hope you liked this tutorial. How do you decorate for Easter this year?
Related air dry clay Easter and Spring crafts
- How to Make a Happy Easter Sign
- How to Make a Pierced Easter Egg Candle Holder
- How to Make Clay Bunnies
- Easy Air Drying Clay Bird