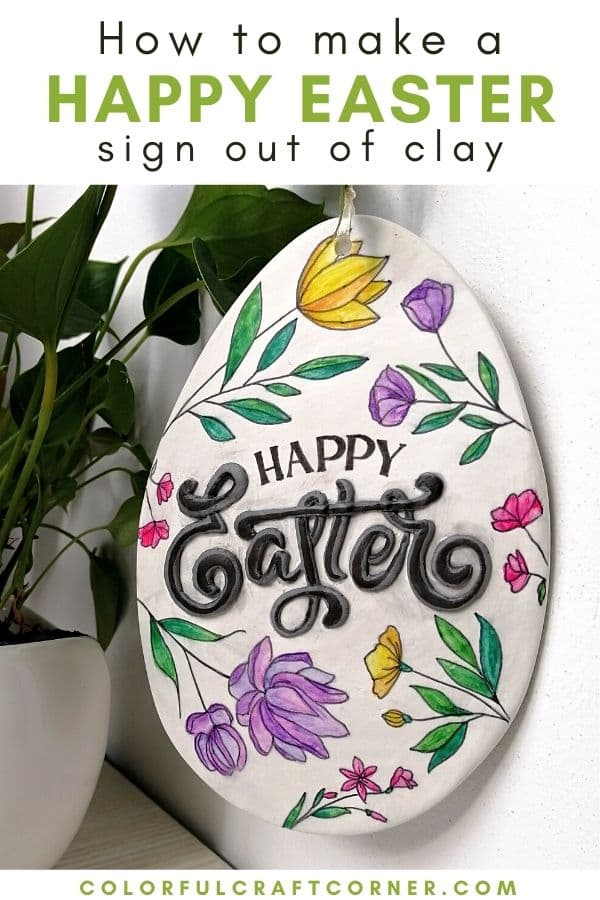
DIY Happy Easter Sign out of Air Dry Clay
I’ll show you how to make a beautiful Happy Easter sign out of air drying clay in this post. To make this simple craft, you’ll need air hardening clay, watercolor pencils, a black fine point marker, and a template printed out (you can download it for free under the tools and supplies section).
In my previous post, the clay Easter eggs ornaments that I’ve decorated with flowers and butterflies, I already mentioned that I planned out three crafts for this Easter. I make all of them using air drying clay.
This egg-shaped sign is the second Easter DIY this year. I wanted to experiment with watercolor pencils to color the flowers, but you can also use watercolor paint, acrylics, gouache, or markers.
I liked how the flowers turned out. They have that ‘watercolor effect’ that was hard to replicate by applying paint with a brush. (The clay absorbed the watercolor paint almost instantly when I painted this leaf dish.)
Now, let’s dive into this simple Easter craft.
DISCLOSURE: THIS POST MAY CONTAIN AFFILIATE LINKS, MEANING I GET A COMMISSION IF YOU DECIDE TO MAKE A PURCHASE THROUGH MY LINKS, AT NO COST TO YOU. PLEASE READ MY DISCLOSURE FOR MORE INFO.
Tools and Supplies
- air dry clay (I tried Fimoair Basic for this craft),
- craft knife,
- template (made in Canva, printed with an Inkjet Printer),
- rolling pin,
- cling film,
- straw,
- craft glue + a thin brush,
- acrylic paint,
- disposable gloves,
- watercolor pencils,
- a brush and a container with water,
- a black marker (mine had a fine point and also a brush tip),
- water-based varnish,
- thin ribbon or other string of your choice.

Step-by-step Instructions
Step 1 – Download or create a template for the sign and print it out with an inkjet printer. I made mine in Canva. You can find other beautiful flowers, butterflies, Easter, and Spring graphics (free).
NOTE! Make sure to mirror the image if you have text on the sign.
Step 2 – Print the sign with an inkjet printer (I have an Epson Ecotank). Then, cut the sign out.
Step 3 – Get a good chunk of air drying clay. I used Fimo for this project, but other brands like DAS or Jovi are perfect. Condition the clay by kneading it for a couple of minutes.
Step 4 – Roll out the clay to a quarter-inch thickness. Make sure to roll it out evenly (mine curled a bit because I was lazy to get my guide rings).
NOTE! Use rolling pin guide rings or other alternatives like wood sticks or thick cardboard stripes to achieve an even thickness.
Step 5 – Rub some water gently on the surface of the clay and place the template facing down. Run your fingers around the template for a couple of seconds, then remove it.
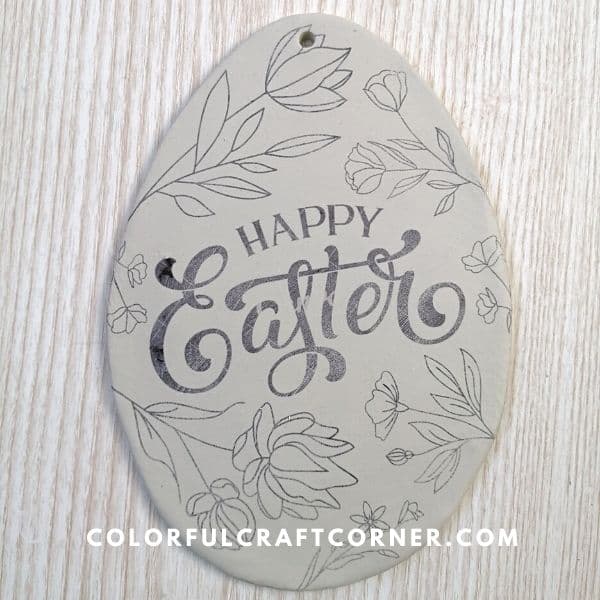
TIP 1! Lift one edge to see if the image has transferred. If not, place it back carefully and leave it on for a couple of seconds.
TIP 2! Do not over-wet and leave the template on the clay for too long. The paper sticks to the clay and tears when you try to remove it.
Step 6 – Cut around the edge with a craft knife. Smooth out the edges with your fingers and create a hole with a straw.
Step 7 – Leave it to dry for 24-48 hours. Flip it occasionally to maximize airflow.
Step 8 – Smooth out the edges and other imperfections with sandpaper. Dust it thoroughly with a soft brush or cloth.
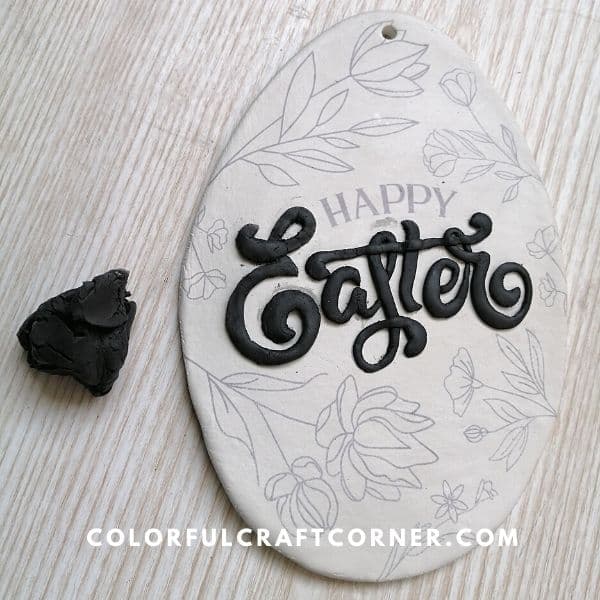
Step 9 – Mix a few drops of acrylic paint with air drying clay. It’s messy! Use gloves and protect your table!
NOTE! Make the clay darker than you want it. It will get significantly lighter after drying. Mine was a dark grey, almost black that dried to a medium grey.
Step 10 – Use a thin brush to gradually apply craft glue to the letters—one at a time. Shape small pieces of clay and attach them to the letters. Trim thick lines with the craft knife.
Step 11 – Leave it to dry for a couple of hours. Sand it if needed.

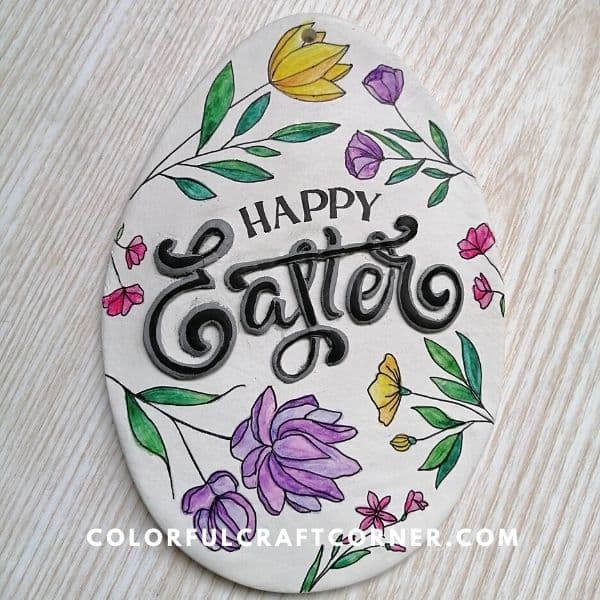
Step 12 – Color the flowers with watercolor pencils. Do not push them too hard! You’ll accidentally carve the clay.

Step 13 – Wet a clean, thin brush and blend the pencil marks. Do not add too much water! Leave it to dry for 15-20 minutes.

Step 14 – Draw the outlines with a fine tip marker. I used black, but you can add a twist and use a metallic pen.

Step 15 – Accentuate the word with a marker. OPTIONAL! If you like how it looks, leave it that way.
Step 16 – Add one or more coats of varnish to protect your beautiful clay sign.
Step 17 – Attach a ribbon. Use other decorations if you want!
Video Tutorial
Tips and Hacks
1. Roll it out evenly
I was in a rush when making this clay sign and lazy to look for my rolling pin guide rings. Well, it shows.
Since I haven’t rolled out the clay evenly, it curled up. While drying, I tried to level it, but my effort wasn’t 100% successful. I embraced this imperfection and learned the lesson.
Check out my tips on rolling out clay evenly if you also struggle with uneven thickness when working with clay.
2. Coloring the clay
If you color air dry clay at home, always make it darker. It will get significantly lighter after it has dried.
If you add a lot of paint, the clay will become crumbly and cracks as you shape it for the letters. Add a few drops of water to make it more moldable and smoother.
I’ve experimented with coloring clay with all sorts of pigments to find the best one. This is the article if you are interested.
3. Pick quality watercolor pencils
The best watercolor pencils for this craft are richly pigmented, with a softer, creamier consistency.
If your pencil has a rigid tip, you may accidentally carve the clay. You can’t cover these tiny spots nicely where the pencil removed the top thin layer.
In my experience, the dry pigments won’t stick to the carved clay. However, you can spread the paint with a moist brush in the second phase.
4. Which sealant to use
Moisture in the sealant may reactivate the pigments in the watercolor and the marker. The brush strokes will spread the paint and create smudges and color bleeds as you apply the varnish.
The best way to seal this craft is to use a spray varnish. Apply 2-3 thin coats for best results, and leave them dry thoroughly in between.
5. Add a backing
Trace your sign on a piece of felt and cut it out. Use craft glue or hot glue to stick it on the back of your Easter sign. The felt will protect the wall or your door when you hang your decoration.
It will also give extra strength, which is extremely important since air dry clay may break easily. Learn more about how to strengthen air dry clay crafts.
Final thoughts about the DIY Happy Easter Sign
Making this floral Happy Easter sign was super simple. Applying the letters was the trickiest part. However, if they become thicker, you can trim them with a craft knife while still wet or sand them after drying.
I love this air dry clay sign. You can easily adjust this craft idea to other holidays and occasions, for example, Christmas, baby showers, or as simple as a welcome sign for our front door.
I hope you liked this craft tutorial! How do you decorate for Easter? Leave a comment!
Related Air Drying Clay Easter Crafts:
- Clay Easter Egg Ornaments
- DIY Pierced Easter Egg Luminary
- Air Hardening Clay Easter Bunnies
- Simple Air Dry Clay Bird Tutorial