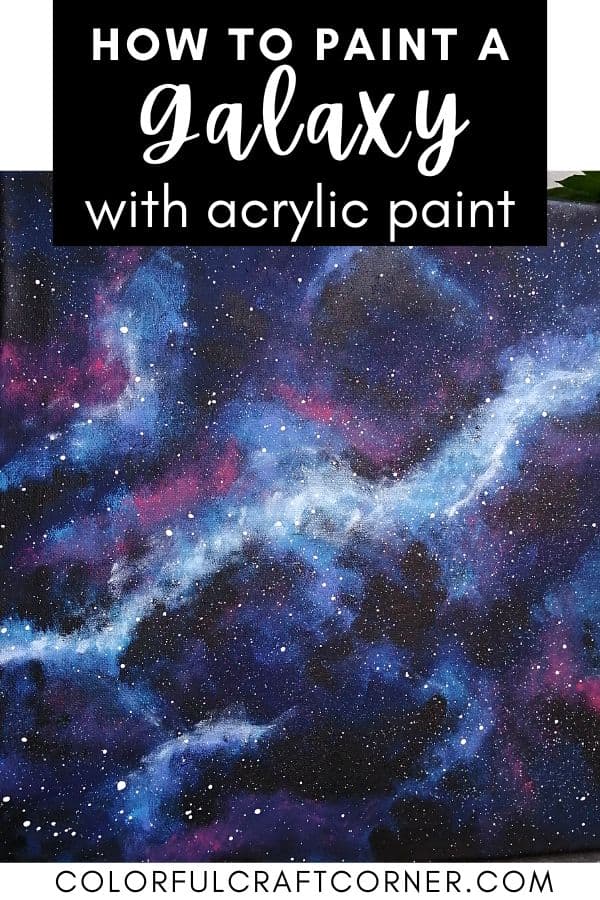
Step-by-step galaxy painting for beginners
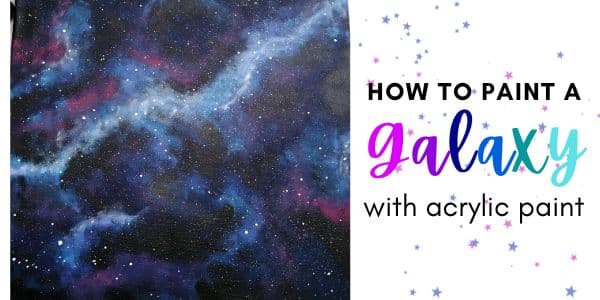
Are you a space lover who loves to paint? This blog post is for you because I will show you how to paint a galaxy on canvas using acrylic paint, a sponge, and an old toothbrush. While there are several different ways to paint a galaxy, using the sponge is the easiest because you don’t need painting skills.
I’m on a painting ‘journey’, a couple of weeks ago I decided to dive into the world of acrylics and create several art pieces on canvas. This galaxy art is the second, I did a butterfly painting last week, and more will follow.
In recent years, the space theme has been popular. You can see beautiful galaxy paintings everywhere. They are often turned into wall decor and fashion pieces (clothes, shoes, jewelry, bags). I’m not surprised, space has great colors that look good on almost anything.
This is my first time painting a galaxy using acrylics. Last year, I painted a galaxy quote art using watercolors. I loved it!
This process was also fun, but I liked the watercolors more. (You can see the tutorial here.) Even though the outcome was unpredictable with watercolors, I liked to play around with different effects characteristic of watercolors (for example, using salt). You have more control over the acrylics compared to watercolors.
The best thing about this easy painting is that you can’t mess it up, you can add as many layers of colors as you like, cover imperfections, and change them until you are satisfied with the look.
Now, let’s dive in!
DISCLOSURE: THIS POST MAY CONTAIN AFFILIATE LINKS, MEANING I GET A COMMISSION IF YOU DECIDE TO MAKE A PURCHASE THROUGH MY LINKS, AT NO COST TO YOU. PLEASE READ MY DISCLOSURE FOR MORE INFO.
Supplies and tools
- black canvas (I used a 16×16″ size canvas),
- acrylic paint,
- kitchen sponge,
- old toothbrush,
- a brush,
- a tray or paint palette.
Colors used for the galaxy
- Indigo blue,
- Ultramarine blue,
- Cerulean blue,
- Cobalt blue,
- Flamingo red,
- Titanium white,
- Lamp black.
You don’t need to use these colors, I just wanted to share them with you as a reference, a starting point, or a guide if you want to recreate my painting.
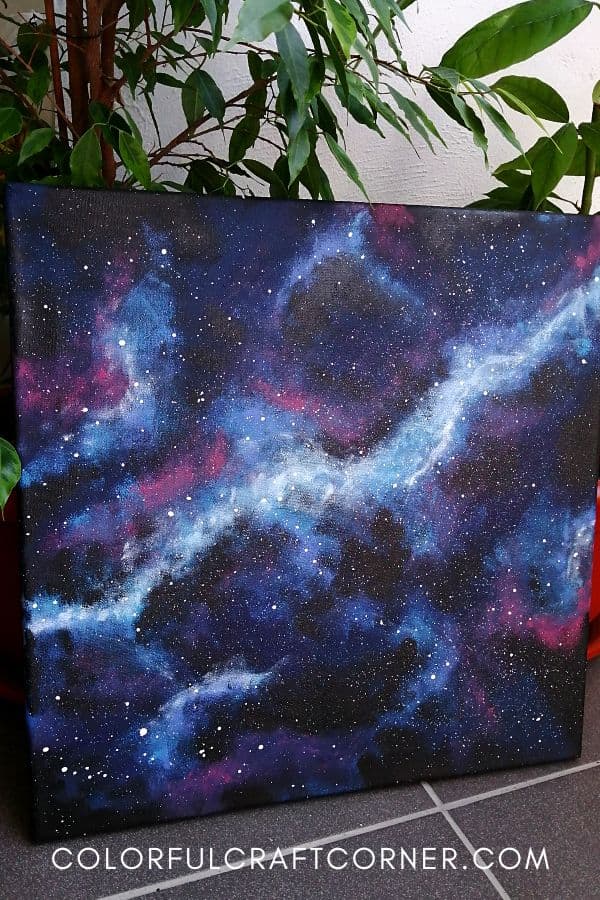
As you can see, I chose blue paint in four shades: two dark and two light blue colors, a highlight color, white to brighten, and black to darken certain spots. I’m disappointed I didn’t have Prussian blue because it’s perfect for painting outer space.
Step-by-step tutorial

Prepping (optional)
First thing, you need a black background. If you don’t have a black canvas, you need to prep it by painting the entire canvas black.
You can spread a layer of black paint with a large flat brush or a sponge. Acrylic paint is thick. When you paint large areas, the paintbrush will leave marks. This wouldn’t be a big deal, it gives a nice texture to acrylic paintings.
However, painting a galaxy requires a flat and smooth surface. These ‘lines’ may show up when you paint the galaxy and mess up the nice cloudy, airy, subtle transitions.
Using the sponge is a great way to achieve a smooth and even background.
1. Choose a color palette

The galaxy is full of vibrant colors. Even though the main color of space is blue, it is also filled with other colors, for example, pink, yellow, purple, deep violet, teal, green, orange, etc.
To paint a galaxy, you can use several color combinations. As a beginner, I suggest you find a reference image. You can then add this photo to a color extractor program to find the shades you need and like.
For example, Coolors is a fantastic palette generator. You will upload your preferred image or pick a photo from the built-in stock images. It has several galaxy photos to try.
In the first step, it will pick five different colors, but you can delete or add more shades. You can adjust and modify it by moving the small circles around the image. Save it and print it if you like to have a physical reference.
Limit your color palette. Too many colors make your painting messy, cluttered, or like a rainbow.

2. Dark colors
First, apply the dark blue paint you have, in my case, indigo. I added it around the edges and spread it with the sponge. I worked fast so it won’t dry competently, and I could blend it with my next color, the ultramarine blue.
I think the best practice would have been to add the two colors simultaneously and work them together for a smoother transition. However, it turned out fine.
3. Medium shade
The next step is to add light blue colors or the mid-tones. I applied the cerulean blue first, then used cobalt blue to soften the color and make the painting more interesting.
I was looking for a Milky Way galaxy, so I dabbed a curved line across the canvas and other smaller lines around the edges and empty spaces.
4. Light colors and highlights
Lighter colors will enliven your galaxy painting. I used flamingo red (for me, it’s pink) to add highlights and white to brighten and emphasize certain spots. I applied the pink paint randomly, here and there, while I added the white on top of the mid-tones.
To achieve that swirly, cloudy effect, paint with the sponge in a circular motion. Don’t work with a lot of paint, your sponge should be almost dry.
Work sparingly with both colors. If you add too much, they will blend in and lose their purpose of drawing attention and accentuating certain spots on the painting.
PRO TIP: To paint small areas or to have more control, pinch a pompom with a clothes pin and use that as a painting tool.
5. Adjust if needed
You can add as many layers as you like until you are satisfied with the results. I felt my galaxy was too colorful and bright, so I wanted to darken it.
I spread some black paint with the sponge to lightly cover or to add depth to certain areas of my galaxy. Be careful not to overdo it!
6. Add the stars

This is the final step of your beautiful galaxy painting. Stars in various sizes make the painting look like an actual galaxy, not just abstract art.
Different techniques to add stars:
- The old toothbrush method (see it below).
- Dip a flat brush in thinned-up paint (the brush should be saturated with paint but shouldn’t drip) and hit the handle to spread the dots.
- Use a q-tip, a dotter tool, or the brush end to add the stars.
This is my favorite step! Even though you could paint the stars with a small brush, using a toothbrush is more efficient and fun. It’s a fast and easy way to fill the canvas with many stars.
Thin up some white acrylic paint with a little water and dip the toothbrush in it. Run your finger from the tip to the handle to sprinkle the paint. I recommend testing first to see how this works to control the stars better.
PRO TIP 1:
- Slow and soft pressure result in small splatter stars.
- Long and intense pressure applied to the toothbrush result in larger stars.
I also added larger stars using the wrong end of the brush. You can also paint stylistic stars with a small round brush or a white marker.
PRO TIP 2: Add fine detail, for example, a starburst or a ‘shining’ star effect. Add a bit of white paint and top it with a tiny drop of water while the paint is still wet. This will spread some pigments and create a translucent ring around the center dot.
Video tutorial
I got in the creative flow so much I forgot to take pictures while painting. Luckily I made the video so you can follow along.
Tips and hacks
1. When I apply too much color, I lift the excess paint with a dry and clean sponge and either wipe it off or spread it to a different area. I had to do this with the pink several times.
2. Take your abstract galaxy painting to the next level by applying and mixing in glitter acrylic paint. Choose FolkArt Extreme Glitter for a fine sparkly look and Arteza Glitter Acrylic Paint to add accents to your art.
3. The artist sponge would work like a charm in this tutorial. The fun texture would perfectly fit this type of abstract painting.
4. I loved this simple and fast acrylic painting, but I will stick with watercolors for galaxies. You can paint a watercolor galaxy on canvas by applying Golden Absorbent Ground (here is a guide on how to use it). It’s a white gesso that creates layers that absorb water like watercolor paper.
5. An important thing, if you want to use the sponges after this painting, wash them out thoroughly when you’re done. Acrylic paint will harden as it dries, and you won’t be able to remove it. This is not a big deal with a regular dishwasher sponge (they are cheap), but it would be a shame to ruin an artist sponge.
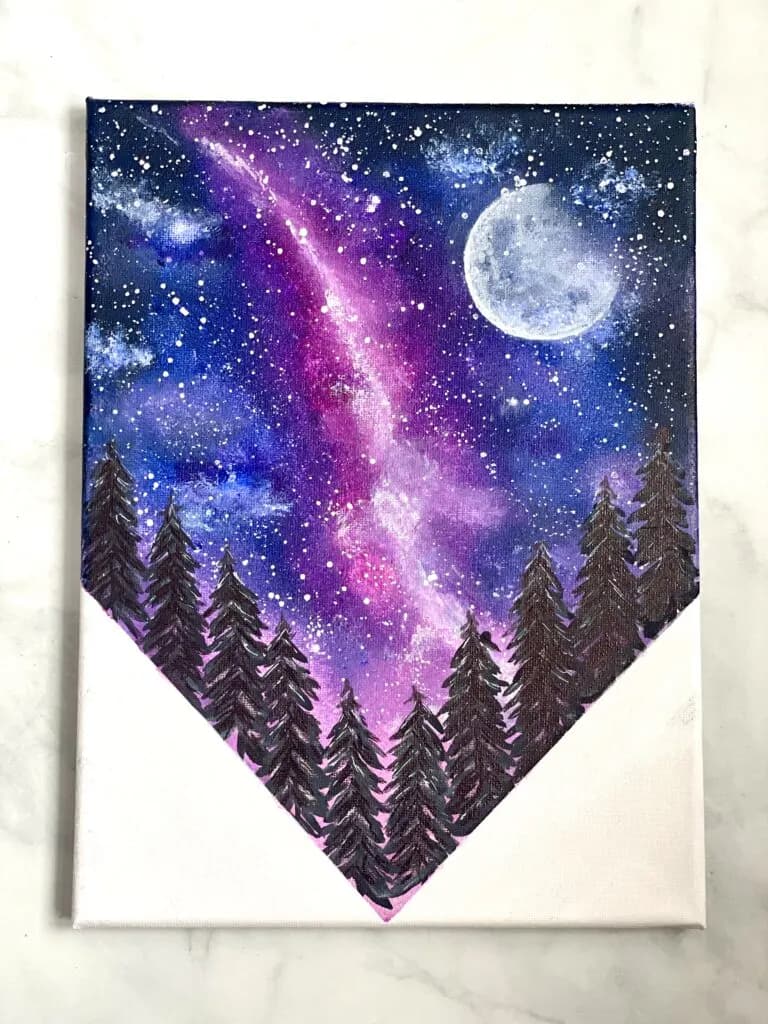
Other galaxy painting tutorials
I always research and find inspiration before starting a project. Watching how fellow artists work, their technique and style will help you clarify how you will achieve the perfect look.
So, I gathered other cool galaxy painting tutorials in written and video format (Youtube is full of amazing step-by-step paintings). The last painting is my favorite, next time, I will try to recreate or achieve a similar look. It’s fantastic!
1. Watercolor Galaxy Wall Art
I’ve been talking about this effect you can achieve with watercolors. As I did with the quote, you can use masking tape, masking liquid, or white crayons to preserve white space. Check out the tutorial by clicking the image.

2. Galaxy night sky
This galaxy night sky by Feeling Nifty looks fantastic. It’s a perfect example of how to adapt the idea and turn it into a different piece of art. For more tutorials visit her site!
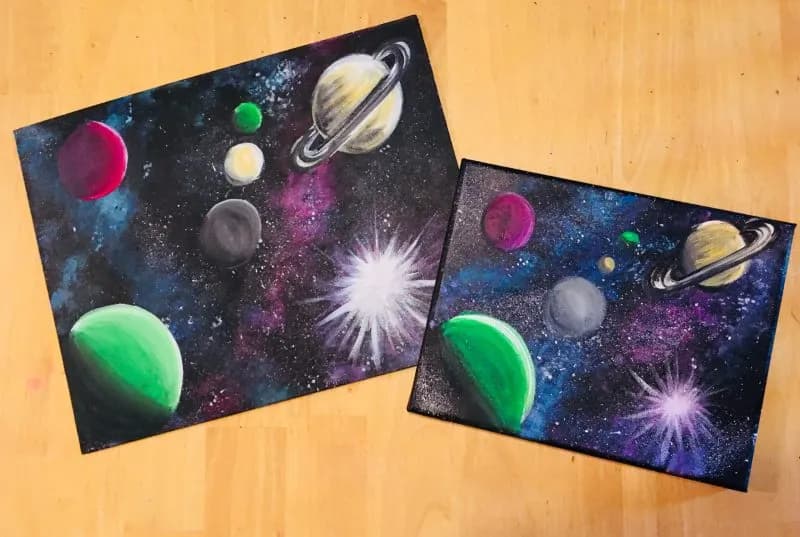
3. Galaxy painting with planets
If you’re looking for easy acrylic paintings for beginners, check out Step by Step Painting. She has more than 100 projects. This is a two-phase painting, she did the galaxy background first, then added the planets. Here is the step-by-step tutorial for the galaxy with planets.
4. Galaxy art using a brush
This painting looks awesome! I love how she uses her fingers to make the starbursts and to add the white highlights. The small details make her art stand out. If you like her style, check out her channel, she has other fantastic galaxy art pieces.
5. Galaxy acrylic pouring
With acrylic pouring, you can achieve a distinct look. Even though I find it beautiful, I like the other styles more.
6. Paint a galaxy with a plastic bag
This tutorial is a bit different than the rest. He paints the background blue and makes the galaxy effect using a plastic bag. This channel has other galaxy painting tutorials, so definitely check it out.
7. Advanced galaxy painting tutorial
This galaxy is stunning! The tutorial is 2 hours long but worth watching because you can learn much from it!
Final thoughts about this galaxy art
Following these easy steps, you can create your own galaxy painting. This fantastic wall art is done in less than an hour. So, if you are looking into acrylic painting and don’t know where to start, this project is the perfect first painting for a beginner.
I’m pretty pleased with how my galaxy turned out. Next time I’ll make the center less bright, and I will use some violets and purples.
In the upcoming weeks, I will share more easy acrylic painting ideas. If you are looking for a specific theme or idea, share it in the comments, and I’ll try my best to make a tutorial.
I hope you liked my acrylic galaxy painting. It was easy, fast, and so much fun to do it!
Other canvas art tutorials: