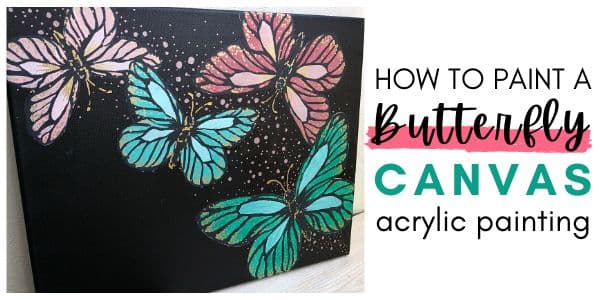
Easy butterfly painting for beginners
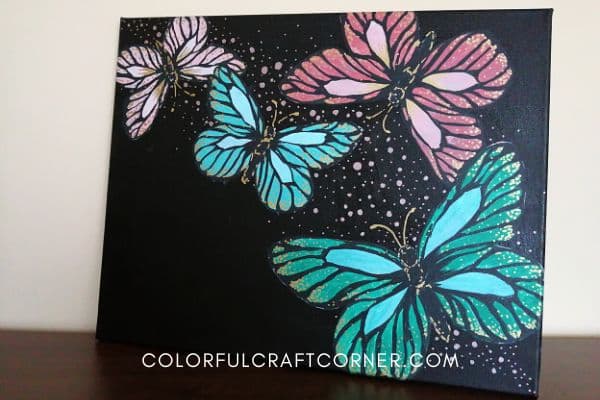
Butterflies are stunning insects that are often photographed, painted, or drawn. I decided to create my own butterfly painting and show you how to paint a butterfly on canvas using acrylic paint.
The Monarch butterfly is the most commonly painted. The wings have brilliant orange color and characteristic white spots at the outer edge.
For my art, I chose the Jezebel butterfly, not on purpose, I just liked the graphic I found on Canva. The wings are rounder, and the pattern is simpler.
I attended an art class in high school but preferred drawing, not painting. Occasionally I made a few acrylic paintings, but the pencil gave me more control over the end piece. When painting, I preferred soft pastels.
In recent years painting has become a popular hobby. I stumbled upon lots of amazing watercolor and acrylic paintings. So I decided to try painting again and see if I now like it better.
This is the first time I have painted butterflies, but I think it turned out okay. The metallic accents give the painting a magical feeling.
This acrylic painting is the first in a series of painting tutorials. I hope you will like them too.
DISCLOSURE: THIS POST MAY CONTAIN AFFILIATE LINKS, MEANING I GET A COMMISSION IF YOU DECIDE TO MAKE A PURCHASE THROUGH MY LINKS, AT NO COST TO YOU. PLEASE READ MY DISCLOSURE FOR MORE INFO.
Supplies
- canvas (mine is ),
- acrylic paint,
- a tray to mix colors,
- sponge,
- large flat brush,
- smaller brush,
- templates + scissor (optional),
- metallic markers,
- paper towel.
Click the button below to download the butterfly templates. The printable PDF is in A4 size.
Step-by-step tutorial
Prepping
1. The templates (optional)
Print out the templates. They come in four sizes, and I also included a sample version of how to arrange them in the PDF. Cut out the butterflies without cutting the outline to have a ‘stencil.’
This step is not a must, you can also lightly sketch it with a dull pencil. The ‘stencil’ method is super helpful for those who don’t feel comfortable free-hand drawing the butterfly.

2. The canvas
If you buy a black canvas, you don’t need any prepping. Add a coat of black paint for a white canvas and let it dry thoroughly. Even though acrylic paint dries fast, ensure it is fully set. The new layer will blend if it stays slightly wet and makes a huge mess with dull greyish colors. So, be patient!
I used an old canvas I didn’t like and covered it with a generous black coat to hide the old painting. However, the silhouette of the car is still somewhat visible.
Panting the butterfly
1. Create the base

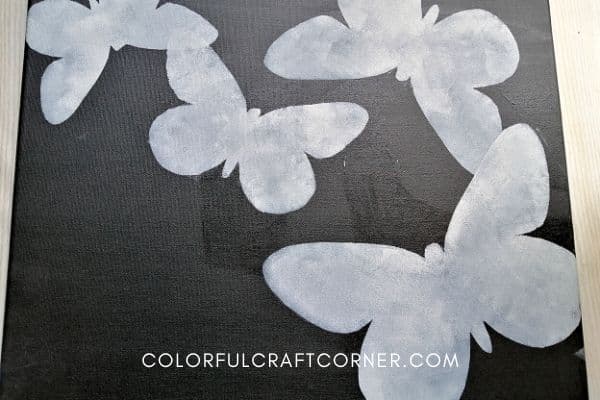
First thing, grab some white paint and a sponge. I cut up a kitchen sponge but using those round sponge brushes for painting would keep your fingers clean. Sadly, I haven’t washed out my old sponge, and it got hardened, I had to throw it out.
Start with the largest butterfly stencil. Place it on the canvas and hold it down with your fingers. Add a little paint to the sponge and start covering the blank space.
Continue with the other butterflies in descending order, rotating them to resemble a flying swarm of butterflies.
I let a couple of stencils hang over the edges of the canvas to have a more natural look.
FUN FACT! Did you know that a group of butterflies is called a kaleidoscope? (Source)
How to avoid color bleeding
- Work with small amounts of paint, if you apply too much, it will flow under the stencil and ruin the shape.
- Press down the stencil where you work so the acrylic paint won’t flow under.
Why do you need to paint it white?
This first coat acts as a primer to achieve vivid and bright hues. It can be difficult to cover a dark or black background, you may need several coats to achieve the desired opacity. The white layer will make your colors pop! It’s not a must but recommended.
2. First layer of color
Choose a color palette
While the white paint dries, mix your colors. You can paint the ‘original’ butterfly color. The Jezebel butterfly is white, with a black outline and yellow and red patches on the lower part of the wing. I picked a random color mix since this is an abstract painting.
You don’t need fancy and expensive paints. I worked with craft acrylic paint. If you love painting and want to continue this hobby, it is worth investing in artist-grade paints. They have rich pigments, have better coverage, and last longer (they won’t fade with time).
This Castle acrylic paint set is perfect for beginners. It has a creamy texture and 48 different color paints.
Professional acrylic paints are more expensive, but they have better quality. Liquitex is a good choice if you’re looking for easy-to-use, opaque, and thick acrylic paints.
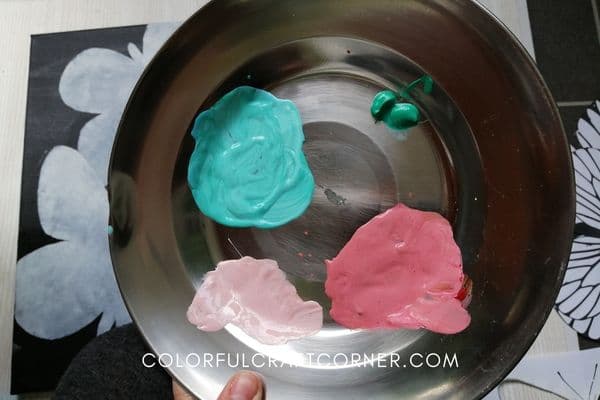
What colors I used:
- viridian green,
- salmon pink,
- lamp black,
- titanium white,
- burnt sienna,
- carmine red,
- cerulean blue.
How I mixed my paint
- First butterfly – pure green.
- Second butterfly – pink mixed with a bit of brown, a touch of red and white.
- Third butterfly – green mixed with white and a touch of blue.
- The fourth butterfly – I created a lighter version of the color from the second butterfly by adding more white.
Find a color palette online if you don’t know how to pick your colors and shades. Pinterest and Color Palettes are both fantastic for this purpose. I love this palette and will recreate this painting on a light background using its colors and copper highlights.
Paint the butterfly wings
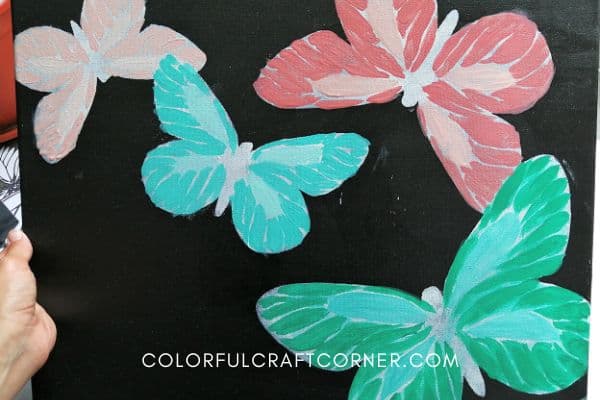
I used one of the templates as a guide. First, I did the center of the wings with lighter shades. By applying larger brush strokes, I painted the sections of the wings.
You can also use tracing paper to transfer the pattern of the wings and then fill in the spaces with a brush.
You may need a second layer if you can’t cover it well. Sometimes you end up with brush marks with lighter spots that may look ugly.
3. Second coat of paint
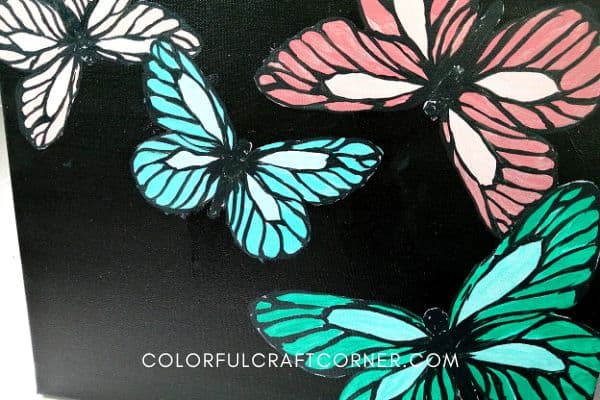
I didn’t want to create the outlines with pure black, so I mixed all the remaining paint and added black until I was satisfied with the tone.
Use a small brush to draw the outlines, separate the wing sections and fill in the body of the butterfly. I didn’t strive for perfect lines, I liked that in some areas, it was thinner or thicker.
4. Highlights and ornaments
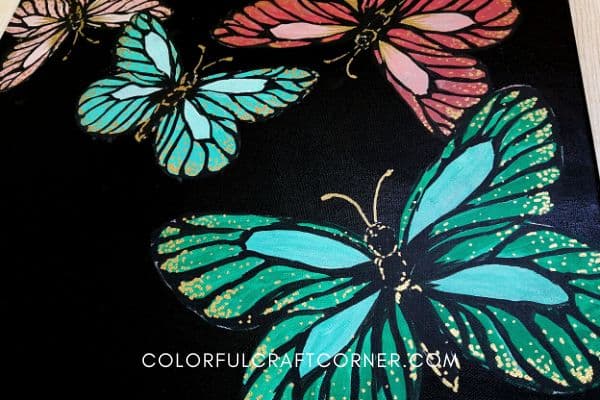
The last step is adding highlights and other decorative elements. These small details will make your art look finished and take it to the next level.
I chose gold as an accent color to decorate the wings. I added dots and lines on the wings.
I felt the canvas was too empty between the butterflies, so I added dots with a ‘rose gold’ marker in various sizes outside the butterflies.

There you are! You have a beautiful butterfly canvas art.
These dots show their path, but it seemed too much with the gold. For my next butterfly painting, I will make thin paint strokes to add white highlights and show the texture of the wings.
Video tutorial
Watch how I painted these butterflies step-by-step!
Tips and recommendations
- I think a softer background color would fit these butterflies more. Even though the strong contrast between the black and bright colors looks nice, it’s harsh for me.
- If you paint just one butterfly, you can add a background circle under the body and make a color transition toward the edges. This will lift and highlight the butterfly, which is helpful when the background and the colors of the butterfly are very similar.
- Do you want to skip drawing and sketching? You can always use transfer paper to add your design to the canvas. With this method, you can transfer all the details and fill them in with the paint.
- If you’re into acrylic painting, I’ve found two fantastic sites for learning acrylic painting and cool canvas painting ideas. I love Jasmine’s style from Fealing Nifty, she also has a course for all skill levels. The other, Step by step painting, has a fun membership, but you can find an acrylic painting tutorial or art lesson for almost anything.
Final thoughts about the butterfly canvas painting
I like how this abstract butterfly painting turned out. Sketching can take up a lot of time. You must consider the shape, size, symmetry, orientation, and proportions. The stencils made the creation easy peasy, and also a lot faster.
This simple process allows you to create your own stunning butterfly canvas art in a couple of hours.
I hope you liked my acrylic painting tutorial. Stay tuned for more easy and fun painting ideas!
Other canvas art ideas:


