A definitive guide on how to craft with felt.
In this post, you will learn the basics of how to craft with felt, packed with helpful tips and hacks to make your felt projects look professional.
I love to use felt in my craft projects. Felt is an inexpensive material and very versatile. I love that it doesn’t fray, and also comes in various stunning colors.
What is felt?
The meaning of felt
According to the dictionary:
“felt – noun
a: a cloth made of wool and fur often mixed with natural or synthetic fibers through the action of heat, moisture, chemicals, and pressure.
b: a durable woven cloth of wool or cotton heavily napped and shrunk.”
And according to Wikipedia:
“Felt has special properties that allow it to be used for a wide variety of purposes. “It is fire-retardant and self-extinguishing; it dampens vibration and absorbs sound; and it can hold large amounts of fluid without feeling wet…”
How felt is made:
Three methods of manufacturing are used to make felt. So we can distinguish three types of felt: woven felt, pressed felt, and needled felt.
1. Woven felt
In the first phase, wool or a blend of wool and other yarn is woven into a cloth. This cloth is then felted using steam and pressure to make the fibers interlock. The fabric is durable and resilient. This type of felt is used for musical instruments and printing (etching) blankets.
2. Pressed felt
In this felting process, wool fibers or a blend of wool and other fibers interlock through steam and pressure. The fabric is less durable than the woven felt. It’s the oldest fabric known to man. The advantages: less expensive and can be made thicker. Typical uses: filters, wicks, etc.
3. Needled felt
Needled felt is made with synthetic fibers or a blend of wool and synthetic fibers. The fibers are interlocked mechanically using a machine with thousands of needles. They are less expensive than pressed or woven felt. Craft felt and cushioning are made with this felting process.
How to make felt sheets at home:
If you want to, you can make custom felt sheets, felt balls, or other shapes. The process of felting is easy and fun.
You will need:
- wool (pure wool, not acrylic) – many crafters recommend Merino wool,
- hot/warm soapy water,
- bubble wrap or baking sheet,
- sheer polyester fabric,
- small bamboo mat or sushi rolling mat.
The process of making:
1. Pull apart wool into tufts (do not cut it with a scissor).
2. Lay the clumps on the bubble wrap, baking sheet, or the bamboo mat. Each row should overlap.
3. In the second layer, the tufts should go perpendicular to the bottom layer. Repeat the layers for a thicker felt sheet.
4. Cover the entire wool sheet with the fabric. Slowly add the hot soapy water (the best with a spray bottle).
5. Start rubbing with your hands or a folded bubble wrap. Rub and press until the fibers come together.
6. Wring out the excess water with the small bamboo mat, by rolling up the wool sheet several times.
For more detail, tips, and tricks, check out this tutorials on how to make felt on Wiki How.
Also here is a video tutorial if you like video more.
Felt types:
Different felt types are available on the market. You can buy them by the yard, pre-cut to sheets, or pre-cut to shapes (circle, leaf, flower, etc.). They are available in a wide range of colors. The price depends on how much wool the felt contains, or the quality of the felt.
What are the types and what you can make from them?
Let’s get started!
1. Craft felt
Craft felt is a 100% synthetic felt, made with acrylic, polyester, or rayon. It is widely available at major craft stores for a low price. You can buy them pre-cut or by the yard. It is also available with self-adhesive back, with prints (dots, different seasonal patterns, animal patterns, flowers, etc.) and in glitter sheets.
Craft felt is a non-woven fabric, easy to cut, fold, glue, sew and staple – even to paint and draw on. Perfect for cutting into shapes, making costumes, decorations, bulletin board backdrops, and school projects. It is safe for kids.
Synthetic felt is prone to stretching and pilling. Do not iron the felt, it will melt.
2. Eco-friendly felt
Eco-fi felt is made from recycled plastic bottles, and it’s popular. Eco-fi felt cuts and sews quickly. You can buy them by the yard or pre-cut in sheets. Kunin felt is made of 100 percent certified recycled plastic PET bottles. They come in a wide range of colors. You can use them for your regular craft projects.
Another option is available on the market; the bamboo/rayon blend felt. You can find this type of felt under the brand name Xotic felt.
3. Wool blend felt
In this type of felt, real wool is used in making the sheets. Usually, it’s a blend of wool and rayon. Wool blend felt has a better texture than craft felt, but more expensive (still affordable). I love the feel, colors, and all-around craftability.
Wool and rayon fibers work well together. They result in a durable fabric that is available in a lot of gorgeous colors.
4. 100% wool felt
The most luxurious felt made with 100% wool, used in professional apparel. They are all-natural, the fibers come from sheep. The fibers are tightly felted together. The felt is dense, pliable, and sturdy. Wool felt is quite expensive. They are available online or in specialty boutiques.
You can use them to make hats, fashion accessories, children’s footwear, clothing, home decor, etc.
How to choose felt for your projects
A lot of times, the success of your felt craft depends on how you choose it. When choosing felt for your craft projects, you should consider the thickness, consistency (stiff and soft), and felt type.
– Felt thickness
Felt is available from 1mm-5mm thickness. For your everyday crafts, like ornaments, felt flowers, toys, jewelry, etc., a 1mm-3mm felt sheet is enough. You may want to use thicker felt for specific projects like a DIY trivet, basket, or shoe soles.
The thickness of the felt depends on your project. If you want to layer multiple sheets of felt for an ornament, you may want to use thin felt (1mm). If you’re going to make a felt bag or phone case, you should use thicker felt.
– Consistency – stiff and soft
When you choose felt, you have to decide between two types of felt: soft and rigid felt.
Stiffened felt holds its shape. Stiff felt makes a perfect prop or background for craft projects. It is easy to cut, sew, glue, or paint on it. When you want to decorate your craft with detailed embroidery, you should use stiffed felt.
Soft felt is like a cloth. Choose soft felt if you want to stuff your felt project (Christmas ornaments, toys, animals). For felt flowers, you should also use soft felt.
The same rule applies, your craft project determines the consistency of the felt. If your goal is a sturdy project that keeps its shape, use stiff felt (for example, a cuff bracelet). If you aim for a more natural or bendable look, choose soft felt (like a wrap bracelet (I love bracelets… jewelry in general)).
– Felt type
For everyday craft projects, there is no need to buy the expensive wool felt. Craft felt, or wool blend felt works just fine. It’s really up to you whether you choose craft felt, or wool blend felt for a specific project. The all-around craftability is suitable for both felts.
Most crafters use wool blend felt because it has a better texture, and it is more resistant to pilling. Craft felt has a slightly shiny aspect, but also really easy to work with. If you’re just starting out, try it both. See what works best for you.
The only advice I would give to you is that if you make something that is touched a lot (for example, felt toys, bookmarks, keychains, etc.), choose the wool blend felt because it is more resistant to pilling. You wouldn’t want to fill your books with a lot of small lint. For a Christmas ornament or wall decor, craft felt works just fine.
How to transfer a pattern to felt
Sometimes the success of a felt craft depends on the precisely cut out patterns. On the internet are available a lot of free patterns. But how to transfer them to felt?
There are five ways to transfer a pattern to felt: trace pattern, pin the design, freezer paper, self-adhesive paper, transparent self-adhesive tape, and fusible web. Before using any of these methods, you should check them on a scrap felt. This way, you can avoid melted and damaged felt.
Trace pattern on felt
Print your design or draw it on a piece of paper (you can directly draw it on the felt, but I wouldn’t recommend that). After that, cut out the pattern, put it on the felt and trace it with a pencil, pen, or marker. Finally, cut out the shape. What I don’t like about this method: it is hard to draw on dark felt (mainly black), the traces of pen look ugly on the felt (for ornaments you may turn the wrong sides in). You can use a water-soluble pen, but you must only wet the ends.
– pin the pattern
This method is similar to the above one, but you don’t have to trace the pattern. You have to attach the model to the felt with a pin. What I don’t like about this method is that the needle may leave a hole in the felt, it is harder to cut out more complicated shapes. It may work with simple shapes like circles, ovals, squares, etc.
– freezer paper
I love this technique. It is a brilliant trick! Trace your pattern or transfer your design with a printer on a piece of freezer paper. Yes, you can print on freezer paper! Cut out the design, and iron it on the felt. Before ironing, check your felt. Craft felt may melt. Cut out the templates and peel off the freezer paper. Simple as that. This technique is suitable for complicated designs too.
– self-adhesive paper
This is a cheap and fast way to transfer the pattern to felt. You just have to print the design on the self-adhesive paper or draw on the paper. Cut it out, stick it on the felt, cut out the shape, and peel off the paper.
– transparent self-adhesive tape
First of all, print/draw your design and cut it out. You will need wide transparent self-adhesive tape for this technique. Cut a piece of tape and stick your pattern to the tape. It works best if the tape is larger than the model. Stick the tape-pattern combo on felt, and cut the design out. You have to cut through the tape. I don’t really like this method because the tape is slippery, it works only on small drawings, and if the adhesive is sturdy, it may damage the felt.
– fusible web
Fusible web is used in sewing, but it can be used in other craft projects too. This method is similar to the freezer paper method. You can’t print on the fusible web. So it’s harder to transfer the pattern. However, you can trace it by hand. Fusible web is used in sewing.
This technique is also effortless. Transfer your template on the web, cut it out, iron it on the felt, and cut out the design. What is fantastic about the fusible web is that you can iron your cut out felt on another felt. So it is suitable for applique.
How to cut felt
You can cut felt with scissors or rotary cutter and a Cricut Maker.
I use two types of scissors when cutting felt. I use regular scissors to cut out larger shapes and a small metal scissor whit a pointy head to cut out the details. Make sure that your scissors are sharp. A blunt scissor can ruin your craft, leaving the edges uneven or tear the fabric. You should have separate scissors for your fabric crafts. A good fabric scissor is a must-have in your craft box.
I don’t own a Cricut Maker, and I haven’t used one. I would love to buy one in the future, so I can’t share my experiences. Creative Cutting Classroom has an excellent blog post on how to cut felt with a Cricut Maker.
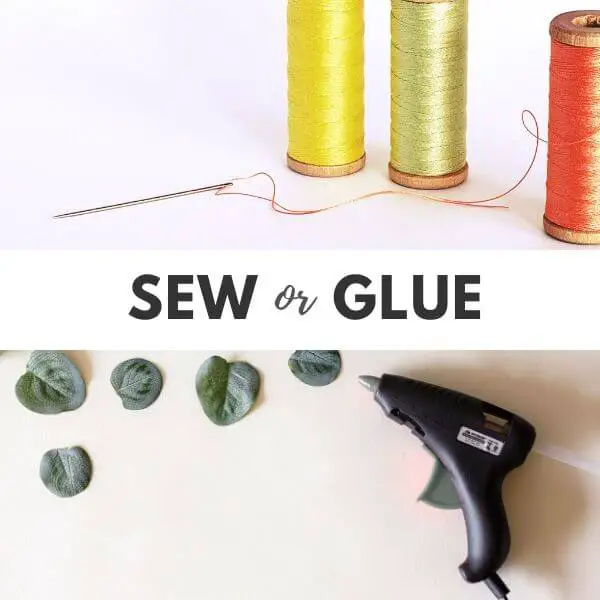
How to work with felt
When you are making your felt projects, you can either sew or glue the felt.
1. Sewing felt
You can hand sew felt or with a sewing machine. It depends on you and the craft type (it is hard to sew small pieces of felt with a sewing machine). I like to sew my felt crafts with hand. I think it gives them a nice touch.
– What thread to use
I like to use three types of yarn for my felt projects: sewing thread, crochet thread, and embroidery thread. I apply sewing thread when I don’t want the sewing to stand out. I use crochet thread and embroidery thread most of the time, but it depends on what look I wan to achieve with my craft. Keep in mind that longer yarn gets tangled sooner.
– What needle to use
When choosing your needles, make sure that you are using the smallest needle possible for your thread. Do not use thick needles, because you may leave holes in the fabric. Make sure that the needle you use is sharp. A blunt needle makes the sewing process slow and annoying and results in a clumsy look. I also experienced that with a blunt needle, the thread gets tangled a lot. And trust me, you don’t want that!
– What stitches to use
I personally use four basic hand stitches. To sew two felt pieces at the edges, I use blanket stitch most of the time. I also like to sew them with a running stitch and a whip stitch. If I want to make an applique, I use the backstitch or running stitch.
I love to embroider felt, so sometimes I make an applique with embroidery stitches. I will talk about it more in the “How to decorate felt” part.
It’s really up to you what stitches you use for your project. You can really get creative here. I would recommend trying out the stitch on a scrap of felt. Sewing may leave holes in the fabric and ruin your hardly cut out shapes.
– Tips and tricks on how to finish your felt project:
- Make marks with a pen on your thumb. This really helps with sewing even-sized stitches.
- A dangling thread can ruin a felt ornament, or any other felt craft. Check out the Gif how I make the finishing thread disappear.
2. Gluing Felt
The best glue for felt is hot glue, tacky glue, permanent adhesive, and fabric glue. Each one has pros and cons.
– Hot glue
I personally use a hot glue gun to glue my felt projects. It may soak through the layer if you use thin craft felt. You can also touch the hard adhesive underneath.
Pro – dries quickly, adheres to felt easily
Con – not so kid-friendly (they need supervision and help)
– Tacky glue
It’s a general crafting glue, and it’s excellent to glue felt to felt.
Pro – kid-friendly
Con – takes longer to dry
– Permanent glue
You can use super glue or E6000 to glue your felt projects.
Pro – creates the most reliable hold
Con – not kid-friendly, has a strong smell
– Fabric glue (Fabri-Tac)
Fabric adhesives work well on gluing felt.
Pro – dries fast, sticks hard
Con – may soak through the layer

3. How to stiffen felt
You can buy soft and stiff felt at the craft store, but if you need a piece of stark felt and you don’t want to buy a whole sheet, you can make one at home. Use these five methods to stiffen felt: white school glue, cornstarch, Stiffen Quick Spray, Glazing Media, and hot water (for wool felt).
– White school glue
Mix glue with warm water in a bowl. Soak the felt in the mixture. Gently squeeze out the excess water. Lay the sheets out on a flat surface and let it dry completely. Iron the leaves if creased.
You can find an awesome post by Cutesy Crafts on how to stiffen felt with school glue.
– Cornstarch
Mix f cornstarch with cold water. Boil more water and add the cornstarch mixture stirring constantly. Leave it to boil, stirring continuously. Set aside to cool. When the mixture is warm, add the felt. Squeeze the excess water and let it dry on a flat surface.
You can find the detailed tutorial on how to stiff felt with cornstarch by Twisted Notions
– Stiffen with Quick Spray
This is the fastest way to stiffen felt. Cut out your design, and lay them on wax paper. Spray a light coat, flip and add a light coat to the other side. Leave it to dry. For the tutorial and tips check out the guide by Wildflower Felt Designs on how to stiffen felt with quick spray.
– Glazing Media
The quickest, but the most expensive way to add stiffness to felt. You can either soak the felt in the Glazing Media or apply it with a brush. For more information, check out this excellent post on how to stiffen felt by Twisted Nation.
– Hot Water
This method works only on 100% wool felt. Boil a pot of water and add the felt. Leave the felt in the boiling water for 5 minutes, stirring constantly. Remove the felt and let it cool. Gently wring out excess water. The resulting felt stays soft and pliable. You may repeat for a more dense felt.
Tips and tricks:
- The dyes from felt may bleed so work from lightest to darkest.
- Cut shapes after the stiffening process, the felt may shrink up and warp.
- Don’t twist or pull wet felt. Gently squeeze out excess water, by pinching between your fingers or rolling it up in a small bamboo or sushi rolling mat.
- Protect your iron, put the felt between two layers of cloth before ironing. Craft felt may melt, iron it on a low setting for only a short amount of time.
- I would recommend making a test stiffening on a scrap of felt. You don’t want to ruin a whole sheet.
- Don’t stiffen a lot of items at the same time. Work in smaller batches.
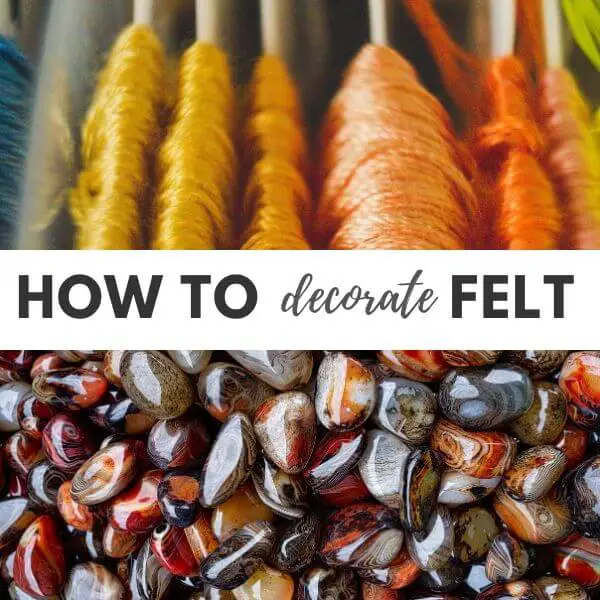
How to decorate felt
1. Painting
You can paint on felt with acrylic paint. You can also use fabric markers to add a design to felt. But be aware that you can’t draw on felt a neat design. They will mostly turn out blurry. But with paint, you can make a unique background or base for your project.
Do not soak your felt craft with the paint, because it will make it stiff.
2. Embroidery
My favorite way to decorate felt is embroidery. I use embroidery thread and crochet thread (size 8). With the two types of felt, you can create a more detailed and unique design.
3. Applique
You can also make an applique to decorate felt. Add small colorful felt pieces and secure it by sewing, or gluing to the base (for example leaves, flowers, etc.) You can also add other fabric to your felt project. You can sew it (sew around the edges) or use fusible web to attach it to the felt. If you decide to use fusible web, make sure that you seal the edges with a fabric fray stopper. Note: it may stiffen the sides of the fabric. Make a test before using it.
4. Stenciled/printed felt
You can buy printed felt, or you can make printed felt with your own stencil using a freezer paper. Check out this tutorial on how to stencil felt by American Felt and Craft.
You can make beautiful ornaments with printed felt. It’s also suitable for other beautiful felt crafts like jewelry, book covers, bookmarks, and others.
– other ornaments:
- You can use Toho beads, crystals, pearls, flat beads, or other small-sized beads to decorate felt. Beads add a nice touch to jewelry, accessories, flowers, ornaments, and other felt projects.
- Metal filigree is my favorite metal decor that I like to sew on felt. I also add small, flat, metal charms to felt jewelry or ornaments.
- Chains are also easy to sew on felt. You can create a unique design with chains (for example, steam-punk styled felt projects).
- Plastic, wood, and other buttons add a cute touch to felt projects. You can add them to felt flowers, broch, ornaments, and other felt crafts.
- Soutache adds an Oriental feeling to your felt crafts. The shiny thread makes felt projects standout and colorful. They are easy to sew on and to customize your design.
- You can also create polymer clay beads, buttons, and other decorative objects that you can sew on your felt craft.
With these ideas, you can easily create unique and stunning felt projects.
What to use for stuffing felt
You shouldn’t throw out felt scraps. You can cut them up to small pieces and use it as a stuffing for small felt projects. Try to cut the felt to even minor parts.
For larger felt projects (toys, ornaments), use toy stuffing. Work with small batches. Make sure that you fill out the corners and the edges too. You can use a pencil’s back to stuff the corners. Shred chunks of stuffing apart to separate the fibers to remove the lumps and achieve a smooth surface. Work gradually with the stuffing.
Use the right amount of stuffing. Overstuffing may stretch the felt, and the project will look misshaped. If you use too little, the felt craft will look floppy.
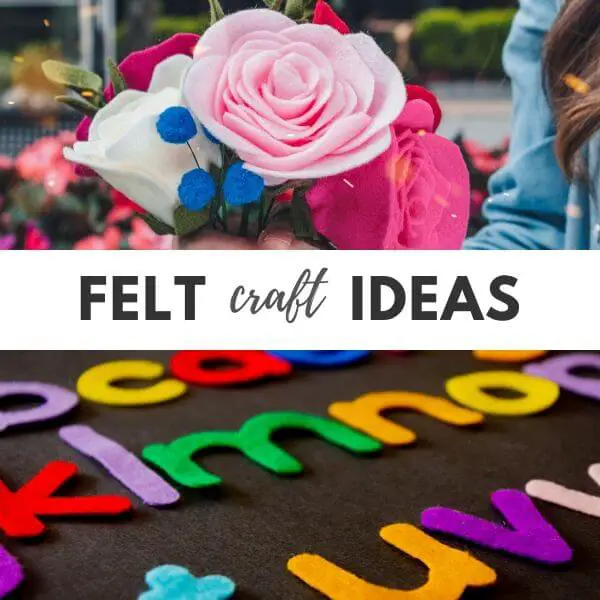
Felt craft ideas
– for the home: wreath, garland, mobile, wall decor, pillow, vertical garden, ornaments, table centerpiece, bouquet, felt quote board, basket, coaster, potted plant, office wall organizer, sock organizer, bookend, bowl, table runner, rug, tree decor, tissue holder, cutlery holder
– for yourself: earring, necklace, bracelet, hairclip, hairband, crown, boutonniere, purse, bag, phone case, pin, brooch
– other: toys, games, bookmark, puppets, storybook, rocks (one and mass production), cozie for mugs, gift attachments, penholder, book cover, piggy bank, keychain, phone charging station, earbud case, quiet book, masks, pin cushion, gift box, travel felt board, pencil holder, baby shoes, needle holder (book)
For more inspiration I have an article with more than 100 felt craft ideas.
What to do with felt scraps
As I mentioned above, you can use up felt scraps as stuffing.
Check out these other ideas for felt scraps.
- Mosaic,
- Small applique,
- Small felt pendant,
- Felt picture art,
- Stacked garlands and necklaces,
- Geode coasters,
- To decorate other crafts (shawl, hat),
- Small Iron-On’s,
- Magnets,
- Felt flowers (petal by petal flowers),
- Use it as a base for jewelry,
- Small felt books,
- Needle holder.
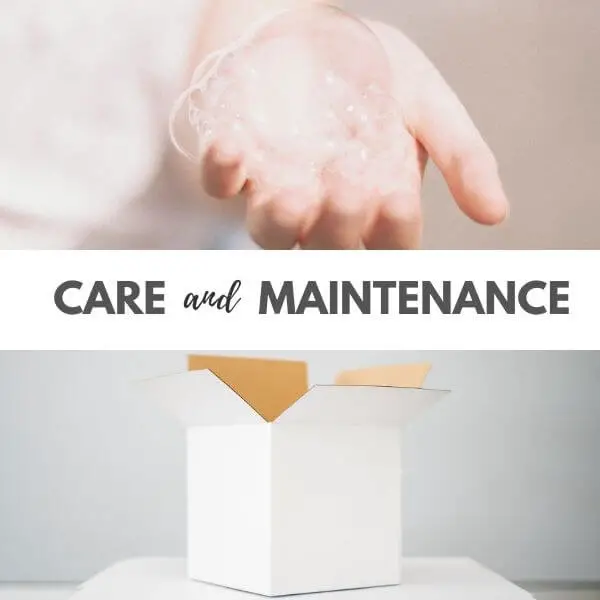
Care and maintenance
Felt is not as strong as a woven fabric. You shouldn’t pull, pinch or stretch it too much because it will stay that way. Here a couple of tips and hacks you should be aware of:
Dry cleaning felt
Dry cleaning or softly brushing off the dust is the best way to clean felt. When brushing, you should never brush in a circular or up and down motion, never rub the items. Excess brushing may cause the material to pile up and look fuzzy.
Remove lint with a small lint roller, or use a piece of tape. With sticky side out, wrap the tape around your hand and sweep the surface gently.
Washing felt
You should avoid washing. Be careful how you clean your felt crafts. Washing may cause shrinking, creases, the dyes may bleed, causing blots.
If you must wash your felt projects, hand wash it in lukewarm water (not ice cold), gently pushing and squeezing the fabric. Don’t rub the felt, it will damage the surface. Use only clean water, adding soap may ruin the felt, causing fuzzing and piling.
Do not use the dryer, the hot air will damage the felt. You can gently squeeze out the excess water, or pat with a towel. Lay it on a flat surface (flat felt projects) or hang it and leave it to air dry.
Ironing felt
Iron on a low or medium heat setting, between two cotton cloths or tea towels. Don’t iron directly, it may damage the fabric and also your iron. You should test out first on a corner of the felt (acrylic felt may melt).
Storing felt
Keep felt away from fire, moisture, and direct sunlight. Exposure to sunlight for a more extended period may cause the colors to fade.
Boxes and drawers are perfect for keeping felt sheets or folded yards clean, organized, and crease-free.
Store the felt goodies in boxes or on a shelf, and you can enjoy them for long years.
Final thoughts about crafting with felt
I tried to cover as much as possible in this guide about crafting with felt. As you could see, it is a versatile craft material. I also love that it is inexpensive and easy to work with.
If you still have questions or you want to have more information, leave a comment.
Related posts:
- The Best Felt Flower Tutorials and Patterns
- DIY Felt Lion Wall Art
- The Best Felt Crafts- The Ultimate List
- DIY Felt Embroidered Bookmark
- 23 Fun Felt Craft Kits for Adults
- The Best Felt Craft Kits for Christmas
Crafting with felt – A definitive Guide (2020)