
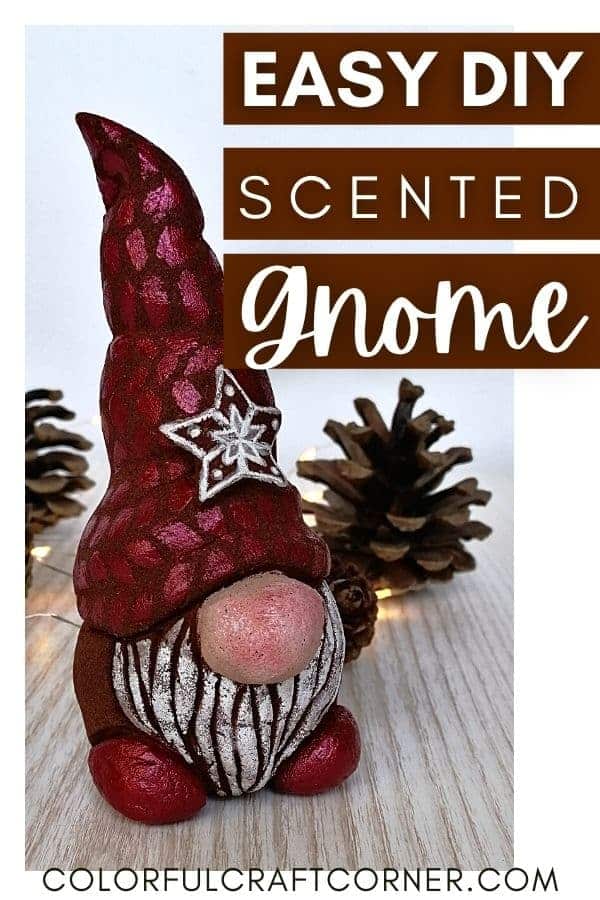
DIY Scented X-mas Gnomes
In this post, I will show you how to make cute scented gnomes out of cinnamon and applesauce dough. They’re not only easy to make and super adorable, but they will also make your home smell amazing!
I stumbled upon the cinnamon and applesauce dough recipe on Pinterest a couple of years ago (almost 10 years ago). I fell in love instantly and decided to make ornaments for Christmas. They turned out amazing!
When I started to work in a school, we decided to make cinnamon dough ornaments and decorations for a Christmas fair. We made Christmas tree ornaments, hanging reindeer ornaments (these were super cute, I think I will make a post about it too), and star candle holders. They were a huge hit!
I love this dough for several reasons:
- It’s easy and inexpensive, using only two ingridients.
- Has a strong cinnamon scent, that lasts for years.
- The rich brown color of cinnamon makes it perfect as a gingerbread alternative.
- The dry project is light and durable with a wood-like feel.
I’ve been looking and brainstorming new craft ideas for Christmas. Scented gnomes are pretty popular and usually made of fabric and essential oils.
Then it hit me!
I could use cinnamon clay to make cute gnomes. The best part? I could display them not only for Christmas but starting from November to the end of the cold season!
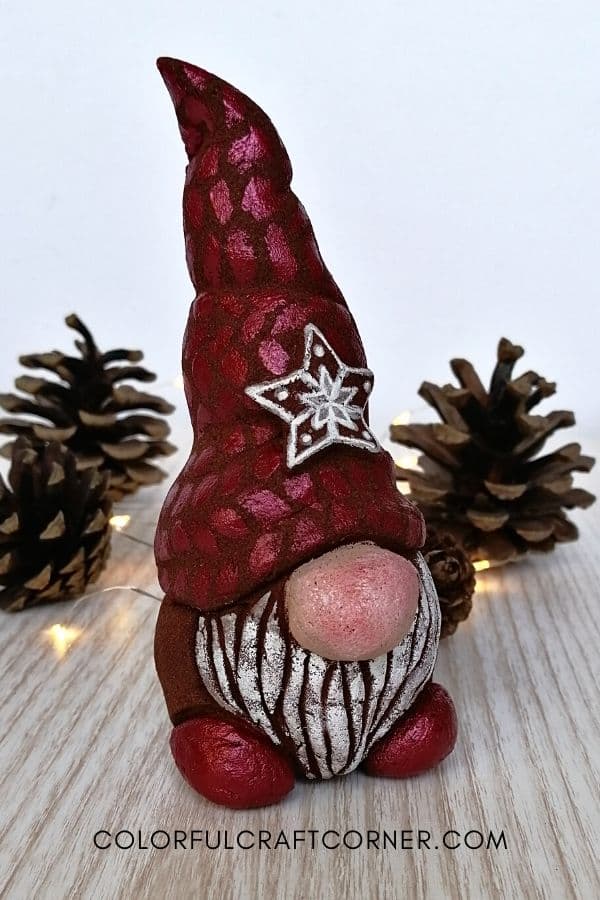
To test my idea, I’ve only made a small gnome (approx 15 cm / 5.90 inches), but you can make them bigger. Surprisingly, it was super easy to sculpt with the cinnamon dough. I loved working with it!
Now let’s stop talking and get to crafting!
DISCLOSURE: THIS POST MAY CONTAIN AFFILIATE LINKS, MEANING I GET A COMMISSION IF YOU DECIDE TO MAKE A PURCHASE THROUGH MY LINKS, AT NO COST TO YOU. PLEASE READ MY DISCLOSURE FOR MORE INFO.
Scented gnome supplies and tools
- cinnamon dough (ground cinnamon and applesauce),
- aluminum foil,
- plastic wrap or wax paper,
- rolling pin
- some tool for sculpting,
- a small star cookie cutter,
- craft glue,
- hot glue,
- acrylic paint,
- brush,
- gel pen.
How to make the gnome decoration
I used this recipe from Completely Delicious to make my cinnamon dough, but I haven’t added the cloves. A couple of years ago a tried it, but I haven’t noticed any difference, so I just left it out.
I’ve made my own applesauce for the dough. The key is to make it as smooth as possible.
My applesauce recipe – I clean a couple of apples. Chop them up into small cubes and put them in a pot. I pour a little water under them and cover the pot. When they are soft, I smooth them with a hand mixer. I add sugar, 1 tablespoon for every apple, and leave it on the stove until the sugar melts. Cool it before using it for the cinnamon dough.
1. How to Create the Gnome Base (armature)
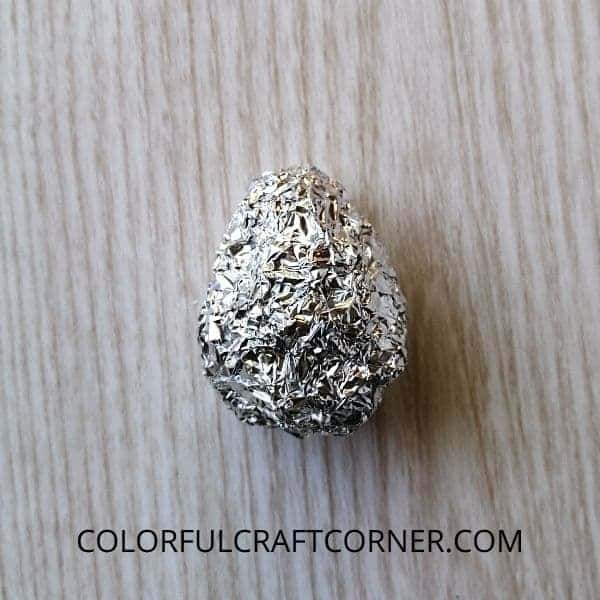
Step 1 – Tear a piece of tin foil and work it into an egg-like shape to create the body. Repeat until you have the desired size.
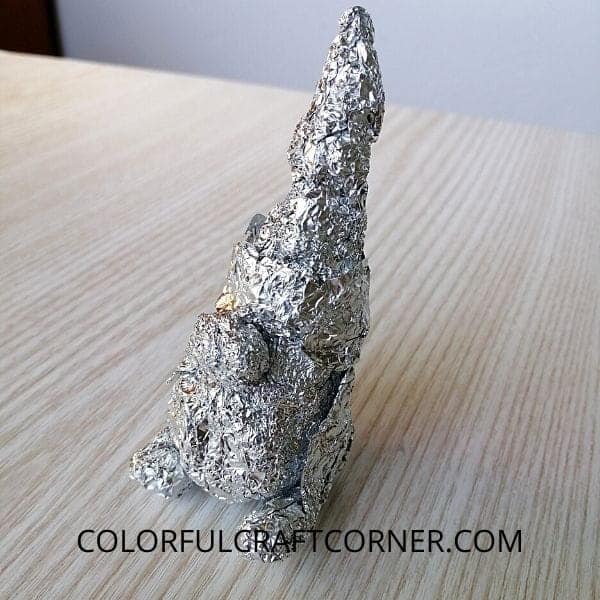
Step 2 – Tear another, big sheet, place your egg in the middle, and wrap the aluminum foil around it to form a long ‘drop.’

Step 3 – You can shape the top, pointy part so it would look like the hat. You can leave it straight up with a few wraps as I did or you can also bend the tip.
Step 4 – Grab another piece and work half of the sheet into a flattened ball for the nose. Don’t make it too big! Take into consideration, when you’ll cover it with the cinnamon dough, it will make it bigger.

Step 5 – Place the nose on the body, push it into its place and wrap the other half of the sheet around the head to form the bottom of the hat which is thicker.

Step 6 – Secure it with hot glue where needed (e.g. under the nose).
Step 7 – Tear a thinner piece of tin foil. Shape both endings into a bean-like shape for the legs.

Step 8 – Glue them on the body and wrap the remaining foil up on the back. Secure it with a drop of hot glue. And shape it where needed.
2. How to Cover the Gnome with Cinnamon Dough
Step 9 – Roll out the dough between two sheets of plastic wrap.
Step 10 – Place your gnome, facing down, on the dough. Wrap it around the body and remove the excess.
TIP! I found it to be easier to do this step in my hands and not on the table. So, I place the rolled-out dough in my hand, then the gnome. This way I can use both of my hands to help the dough stick to the tin foil.
Step 11 – Work the edges together well. Smooth them out where needed. And make sure that the cinnamon dough is sticking to the base well.
Step 12 – Use a sculpting tool to create the details. To form the nose, the creases on the hat, and the beard.
Step 13 – Cut out a small star from the scraps. Add a thin coat of craft glue and push it on the hat.
Step 14 – Leave it to dry for at least 24-36 hours.
Step 14 – Decorate your gnome!
I wouldn’t recommend covering the whole gnome with paint, because acrylic paint works as a sealant and your gnome won’t have that gorgeous scent.
I painted the legs (boots) a metallic red and added a knit-like pattern to the hat. I used white acrylic paint to paint the beard and a white gel pen to decorate the star.
Gnome video tutorial
Tips and Tricks
- Be careful while sculpting. Don’t push in the creases too deep and thin it too much. As it dries, the two parts may separate and the aluminum foil gets visible.
- Always spare a small amount of dough. If cracks appear, push in a tiny piece in the crack and smooth it out.
- Slightly wet your finger when smoothing the dough.
- Use gel pens to add intricate details like small snowflakes or fix tiny spots you couldn’t reach with the brush.
- Add texture to the body or hat by pressing farbric, stamps, textured wallpaper, or other tools into the dough.
- Take it to the next level, by adding a few drops of orange essential oil.
Check out this cute gingerbread house luminary that I made from the leftover cinnamon and applesauce dough.
Final thoughts about the scented gnome
This Christmas craft was so easy to make. I’m very happy with the results. My small gnome turned out super cute and has a strong, lovely cinnamon scent. I can’t wait for the Holidays!
I hope you enjoyed this tutorial! Have you ever tried making cinnamon dough ornaments or other decorations? leave a comment!
Related gnome crafts and articles:
YOU are a PRO! I watched your amazing video to see if it’d be something I could do. Yay! Thank you for posting it! Your ideas are terrific! I’m so HaPpY to have found you! Blessings to You and Yours in this New Year!