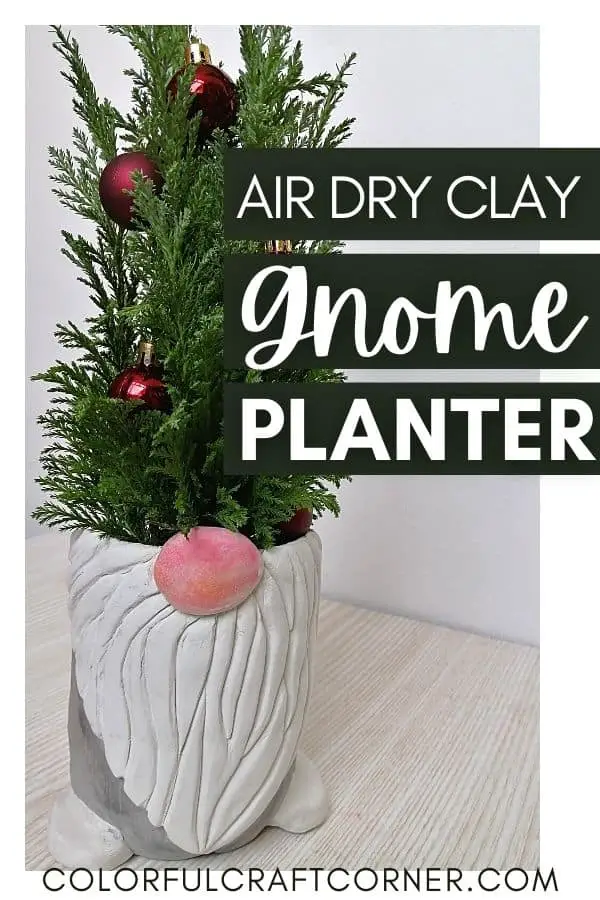
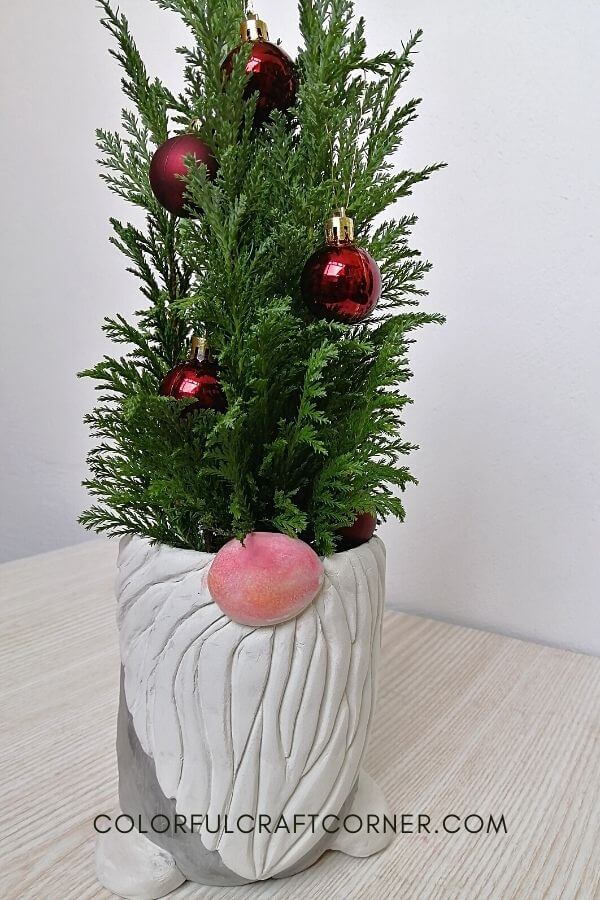
Easy DIY Air Dry Clay Gnome Flower Pot
This post will show you how to make a simple and adorable gnome planter with air dry clay. You can display it in your home all year and decorate it for Christmas with small ornaments.
One day we were trimming the bushes in our yard. We have a couple of cedar pines, and as I looked at them while taking a break, they looked just like tall gnome hats.
It suddenly popped into my mind: let’s make a gnome planter with a small cedar pine or another evergreen plant as a hat. Oh, and I could also decorate it for the holidays with mini ornaments.
Gnomes are so fun. I love them! You don’t need to put a potted plant in this gnome planter you can experiment with other hat alternatives. For example, create a Spring or Summer gnome by adding a bouquet of lavender, trimmed to a cone shape. Make them small and add a pinecone as a hat. Create a fall leaf cone or tree as a hat, etc.
Now, let’s make this cutie!
DISCLOSURE: THIS POST MAY CONTAIN AFFILIATE LINKS, MEANING I GET A COMMISSION IF YOU DECIDE TO MAKE A PURCHASE THROUGH MY LINKS, AT NO COST TO YOU. PLEASE READ MY DISCLOSURE FOR MORE INFO.
Supplies and Tools for the Clay Gnome Flower Pot:
This simple and cute gnome planter only requires a few basic supplies. I chose two types of air-hardening clay. DAS Stone effect clay has a nice cement-like light grey color after drying. I didn’t want to paint the planter, so it was a good option to create a ‘colored’ stone-like flower pot.
- DAS Stone air dry clay,
- DAS white air drying clay,
- acrylic roller pin (a wood one is also perfectly fine),
- craft knife,
- scissor,
- plastic bottle,
- soft pastels,
- water,
- clay sculpting tools (optional),
- evergreen plant (real or artificial),
- sandpaper (optional).
I used a real cedar pine bush, but I think an artificial would make a better fit.


RECOMMENDED AIR DRY CLAY ARTICLES:
- How to Strenghten Air Drying Clay
- How to Color Air Hardening Clay
- How to Dry Air Modeling Clay Properly
- DAS Stone Effect Clay – An In-depth Review
- Is DAS air dry clay good?
DIY gnome planter instructions
I chose a 2l plastic water bottle for this craft for two reasons: my cedar pine wouldn’t fit in a smaller one, and this bottle had a flat bottom.
Step 1: Cut your bottle, higher at the top (where the nose will go) and slightly lower at the back.
Step 2: Grab a good chunk of DAS stone air modeling clay. Knead it between your hands for a couple of seconds.
Step 3: Roll out the clay to an approx. 1/6″ thickness. Test it. It should be long enough so can wrap it around the bottle.
Step 4: Cut the air dry clay sheet to a rectangle to the size of your bottle.
Step 5: Wrap the clay around the bottle. Score and slip the edges before joining the endings. Trim any excess air hardening clay from the top.
Step 6: Roll out another piece of DAS stone clay. Put your bottle on top of it and trace it with the craft knife.
Step 7: Score and slip where you’ll join the bottom to the bottle. Work them together as well as you can, so they won’t separate when drying.
Step 8: Take a piece of white DAS modeling clay. Knead it for a couple of seconds.
Step 9: Roll out the white clay to a 1/6-1/8″ thickness. Cut out a triangle, but make the sides rounder to resemble more to a beard. Cut a half-circle at the top for the nose.
Step 10: Score and slip the back of the beard and the body, where you’ll attach the beard. Place and push the white clay on the bottle.
Step 11: Create the beard ‘texture’ (strands and tufts) with clay modeling tools. I don’t have any, so I used the back of a paintbrush and my craft knife.
Step 12: Let’s make the nose! Shape a white air dry clay ball and slightly flatten it. Slip and score both the nose and the body. Attach the nose so half of it would protrude at the top.
Step 13 (optional): Color the nose with red, pink, and orange soft pastels. You can skip this step if you plan to paint your gnome planter after it had hardened.
Step 14: And finally, let’s do the legs. Mold an oval, pebble-like piece of air modeling clay. Cut it diagonally.
Step 15: Slip and score where you’ll join the parts. At the bottom, try to incorporate them as well as you can, to prevent them from falling off after they have dried.
Step 14: Add further details as you like! See the recommendations section below.
Step 15: Finish your gnome: sand it if needed, paint it with acrylic paint, glue on all sorts of fun stuff, etc. Seal it with a waterproof sealant to protect it from moisture.
Gnome planter video tutorial
This was a super fast clay craft I did while my mom took my son for a short time, so I chose to make a video, which was a lot faster than taking photos of each step. Also, I think craft tutorials work better as videos (in most cases).
Air dry clay gnome flower pot recommendations
- Customize the body of your gnome pot (before you attach any other part or detail) by adding texture using knit fabric, textured paper, stamps, a stencil or by adding a print with image transfer.
- Add artificial plants so you don’t have to water, trim, etc.
- Decorate your gnome for Christmas with mini ornaments.
- Seal your dry gnome planter with a water-based varnish. This will not only make it waterproof, but will also make it stronger, and add an extra grip to the attached parts and details.
- Customize them according to the season: flowers for Spring or Summer, colorful leaves for Fall, pinecone for Winter.
- DON’T use this planter outdoors! If you seal it with an outdoor varnish, like Modge Podge for outdoors, you still should keep your gnome in a place protected from excess moisture and extreme weather.
Final thoughts about the DIY gnome planters
As you could see creating a clay gnome flower pot is super easy and fun. If you like gnome decoration as I do, this clay craft is for you!
It’s easy to make, you can do it with your kids and create a gnome family.
Do you like gnome decor? Have you tried making one out of other material? Leave a comment!
Related DIY gnome posts: