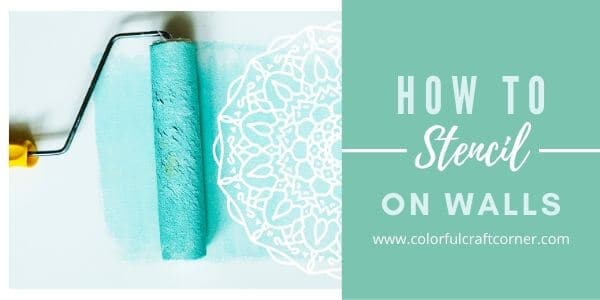
Best stenciling tips and hacks for wall painting
In this post, I covered all the basics you need to know about how to stencil walls. You will learn the best stencils for wall painting, how to make and where to buy stencils, what tools and supplies to use, and how to achieve professional results.
Let’s get started!
You may ask: What is a stencil?
Stencil definition:
According to the Cambridge dictionary – stencil meaning:
a piece of card, plastic, metal, etc. into which shapes have been cut, used to draw or paint patterns onto a surface
The best stencil for wall painting:
The best material for stencils is flexible plastics. You can wipe them after you’ve finished painting, and also you can bend or cut them if you have to stencil narrow spaces or the edges.
Popular wall stencil ideas:
The most trending wall stencils ideas are:
- tree stencil for wall painting (pine, birch, leafy trees you decide),
- flower stencil for wall painting (roses, abstract, small floral design are all stunning),
- brick stencil for wall painting (vertical, chevron, or curved).
Also, the heart and circle stencil for wall painting is trending, and they are very versatile. You can let your creative juice flow and create fun and unique designs.
Other fashionable and beautiful stencils are mandala, damask, and modern wall stencils.
Can you make your own stencil?
Yes, you can. And it’s not complicated or expensive at all. I have an article on how to easily create your own mandala stencils. However, with this method, you can also create other stencils too.
How do you make a stencil for painting walls?
You can make a DIY stencil for wall painting from various supplies and using different techniques.
What to use for the stencil:
- Paper or cardstock – After repeated use, the paper will tear or rip, but if you want to add the stencil design only a single time (it may last for an additional couple of uses), the paper will do the trick.
- Flexible plastic sheets (mylar sheets) – These are the best options for making stencils by hand. You can use them over and over again. They won’t get soaked, just wipe down the paint or wash it and store flat laid in a box until your next stencil project.
How to cut out the stencil design
- You can print out the design on paper, put the plastic sheet above it, and with a craft knife cut out the pattern,
- You can also use a cutting machine or your Cricut to cut out the stencil.
Learn more about how to make stencils by My Modern Met.
Where to buy stencils for wall painting?
Stencils are available in multiple sizes with various designs. You can find stencils with standard letter-sized, square and rectangular, and also large stencils for your walls.
If you look for a more diverse look you can also choose from stencils kits (they include multiple stencils).
One of the best places to buy stencil for wall painting is Amazon. They offer tons of stunning wall stencils in all sizes for every home decor style. Here are three of our favorite stencils to create beautiful wall paintings:
You can also buy wall stencils at Michaels. If you already like to buy from Michaels, with your next purchase, grab a stencil, a brush, and paint to try out wall stenciling.
Exist other online webshops like Stencil Revolution and Cutting Edge Stencils that are all about stencils and stenciling.
If you want a custom stencil, but you don’t want to deal with the cutting and headaches, head over to Etsy, a lot of stores offer custom or personalized stencils. For example, Smart Screen Stencils offer custom stencils in multiple sizes.
The best tools and supplies for wall stenciling
Cutting Edge Stencils have an excellent post on the best tools for stenciling. Make sure to check it out. They also cover how to use these tools properly to achieve the best results.
But let’s cover the basics you need to know.
Tools and supplies for stenciling on walls:
- stencil,
- paint (acrylic craft paint or latex paint),
- paint tray,
- stencil brush or small cosmetic sponge,
- foam roller,
- stencil level,
- spray adhesive,
- painter’s tape (this tape for freshly painted walls and this tape for textured walls),
- paper towel or cardboard (to offload the paint),
- ladder or step stool,
- large fabric, linen or other material to cover the floor and other furniture,
TIP! If you paint with a foam roller, apply light to medium pressure while painting. Too much pressure may cause paint bleeding and mess up the design.
What kind of paint do you use for stenciling?
The best paint for wall stencils is acrylic paint (both craft and artist) or latex paint. They adhere to walls, wood, and furniture too. They have a thicker consistency (but not too thick and gummy), so they make good coverage and pretty easy to work with.
Don’t choose runny paint; it will get under the stencil, and mess up the design.
What kind of Brush do you use for stenciling?
For stenciling, you can either use a stencil brush (sponge brush or cosmetic sponge) for detailed designs and foam roller for large surfaces (for example, an accent wall).
What does a stencil brush look like?
Stencil brushes look like regular round brushes, except they have a flat top. They were designed for stenciling. The flat-top makes them perfect for dabbing the surface without getting the paint underneath.
A good stencil brush has natural bristles; it is soft and flexible. Avoid brushes with stiff bristles; they shed more and leave brush marks on painted surfaces.
What to use for stenciling: a brush or a foam roller?
It depends on your project, and mostly the size of your design or wall you want to cover. But let’s see what are the advantages and the disadvantages of the brush and foam roller:
STENCIL BRUSH
FOAM ROLLER
PROS:
- allows detailed painting,
- you can paint colorful designs,
- less paint consumption,
- you only need to clean the stencil occasionally or when you’ve finished the work,
- easier to manipulate in the smaller spaces (e.g. ceiling line and edges),
CONS:
- the bigger the design, the more time-consuming.
PROS:
- stencil large areas,
- fast workflow,
CONS:
- you will need more paint,
- you will have to clean the stencil more often,
- you can’t make detailed and colorful designs.
In conclusion, the stencil brush is suitable for smaller stencil design, and to add other colors to your pattern; the foam roller is best to cover large areas. For some stencil projects, you will need both, for example, if you want to paint an accent wall and you want to add a different color to some areas, or you want to add shade to your design, etc.
How to stencil walls?
First of all, you can stencil walls in three ways:
- stencil an accent wall,
- create a fake wallpaper effect by stenciling the whole room,
- one large or a few small designs on a wall,
- ceiling stencil.
Let’s check out real-life examples!
1. Abby Lawson has a step-by-step tutorial on how to create an accent wall with a stencil. Her project turned out fantastic!
2. Frugal Family Times found a DIY alternative for pricey wallpaper with stencils for their basement bathroom walls. I love it!

3. By adding one design to a wall, I was thinking of this stunning giant mandala. You could also use it to make a fake headboard.
4. My all-time favorite ceiling stencil is around the pendant. They add a touch of luxe to any room. Check out this mandala stenciled ceiling.
Step #1 – Prepare the walls for stenciling
When you’ve already planned out your new stunning room and grabbed a stencil, it’s time to prepare the wall or walls. If your walls don’t have a fresh coat of paint, you should at least dust them or give them a good scrub before you start using your stencil. The walls need to be clean and smooth.
Also, this is the time to make any repairs if required. (If you decide to paint your walls before stenciling, make sure that you give it enough time to dry completely. Otherwise, when you remove the stencil, the tape may also peel the wall paint.)
Mask all the edges, borders, and parts you don’t want to paint. You should cover floors and other furniture to prevent them from any paint splatters.
Also, before you start painting, always examine your stencil. It should be intact; any holes or cracks will cause paint bleeding.
Step #2 – WHERE DO YOU START STENCILING A WALL?
Usually, you should start stenciling the wall at the center. Use a measuring tape or a ruler to measure the center. With a level, draw a straight line. Line the stencil up with this line.
You should move your starting point if you have a door or a window on the wall. In this case, find the middle of the largest part, and start from there.
Step #3 – Start painting
Level your stencil and secure it on the wall either with painter’s tape or mounting spray.
TIP! When buying a painter’s tape, choose the one that has an orange ring on the inside! The color of the ring indicates lower stickiness. It is crucial, so it will not pull off your existing wall paint (or choose Frog Tape for delicate surfaces).
Load your tool (brush or roller) with paint and offload the excess on a paper towel or cardboard, and start painting.
Step #4 – how to remove the stencil from the wall?
Wait until the paint is dry. It will take a couple of minutes only because the paint layer you’ve just applied should be thin. You can add multiple layers in you couldn’t achieve good coverage with the first try.
Carefully remove the stencil and wipe down any paint from the back of the stencil with baby wipes or a damp paper towel.
Using the registration marks line up your stencil and continue the pattern.
Step #5 – Finish the wall
Some stencils come with a smaller, ceiling stencil that is designed to help to fill the gap along the ceiling line.
If you have only one stencil, you can bend and hold it in place with your fingers or even trim to make the edges and the ceiling line. But before cutting the stencil, don’t forget to plan it out carefully, which part of your stencil you’ll have to use and how big it should be.
Make any touch-ups with a small paintbrush.
HOW DO YOU STENCIL A WALL WITHOUT BLEEDING?
With a couple of tips and hacks, you can stencil your walls perfectly.
#1 TIP: Foremost, make sure that your stencil lays flat on the surface and secure it well. One of the most common mistakes is that the stencil is not taped down well, and it moves (even slight movement), which results in the paint under the stencil and ugly design.
If you use a single, smaller, but also detailed design (for example, a mandala), you can also add a coat of spray adhesive on the back of the stencil. After you peel it off, it may leave a small residue that you can get rid of with baby wipes or a damp paper towel.
#2 TIP: If you use a brush, make sure that you don’t move it back and forth (as you would do with a paintbrush). Use only gentle dabbing motions up and down. This way you, can prevent the paint from squeezing under the stencil.
#3 TIP: Do not use paint in excess. Always offload the excess paint on a paper towel or cardboard. Your foam roller or brush should look almost dry. You can add another or multiple layers of paint for good coverage, especially if you add a light-colored pattern on a dark background.
#4 TIP: Always let the paint dry before removing the stencil. You should check the back of your stencil and clean it if you see color on it.
Do you wait for the paint to dry before removing stencil?
Yes, you should always wait for the paint to dry before removing the stencil. Usually, you don’t have to wait for a long time since you are adding thin layers of paint in the first place.
How long do you leave a stencil on after painting?
You should leave it to dry at least for a couple of minutes.
If you are inpatient, speed up the process with a hair drier. But do not hold it too close or adjust to high temperature because it may cause adverse reactions. Even though 3D designs are trendy you don’t want a bubbled up wall.
TIP! Always wipe the back of the stencil before repositioning. You can use a baby wipe or a clean cloth. For a fresh, professional look, it is crucial to remove any paint that may have seeped through the stencil.
How to stencil textured walls?
Stenciling textured walls are doable but trickier than painting a regular, smooth wall because they are more prone to paint bleeding.
First of all, follow the steps for stenciling walls that are smooth, but consider the tips below.
To achieve the best results, you should use a mounting spray to secure your stencil on the wall and lay it flat. The spray adhesive will help with the middle parts to stay close to the wall and to achieve crisp lines. Also, replace painter’s tape to Frog Tape that is specially made for textured walls.
Another tip is to apply paint very lightly; your brush should be almost dry. You could also experiment with other tools, but using a round brush (or a dense cosmetic sponge) over a foam roller is best. It will take more time to finish, but it will spare you from a lot of headaches.
Also, don’t forget to allow the paint to dry completely, to prevent it from smudging.
TIP! Use a detail paintbrush to make any touch-ups.
Final thoughts on how to stencil on walls
If you like a patterned wall you should give stenciling a try. It’s an inexpensive and easy way to make your walls and home more beautiful.
With a few tools, supplies, and tips, you can give new life to your walls. You could read a lot of advice in this post, but if I want to make a recap, what you need to know for a successful stenciled wall is: prepare, level, secure, almost dry brush, wait it out to dry.
I hope you learned a couple of tips and hacks for stenciling a wall. Have you ever done stenciling on a wall or other surfaces?
Leave a comment!
Merci beaucoup
Le meilleur article jamais lu sur le Stencilling! Bravo
tres simple, comrehensif, recherche dans les details necessaires.
j ai essye deux fois sur la cloture de mon jardin ainsi que sur les allees en ciment cetait une catastrophe. c est sure qu avec vos conseil je reaissayerai apres la fonte des neiges canadiennes.
Unfortunately, I don’t speak French (but I did translate your comment with Google translate). I’m happy that you’ve found my article helpful. I hope that your next stenciling attempt will be successful. Send me an email with your results! Good luck!