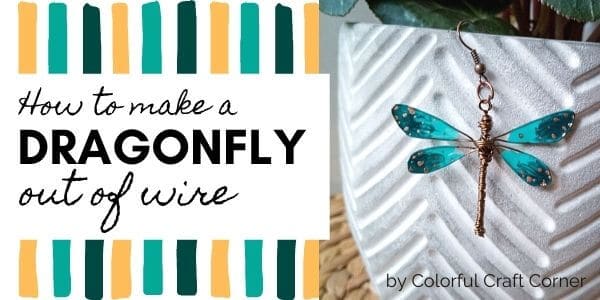
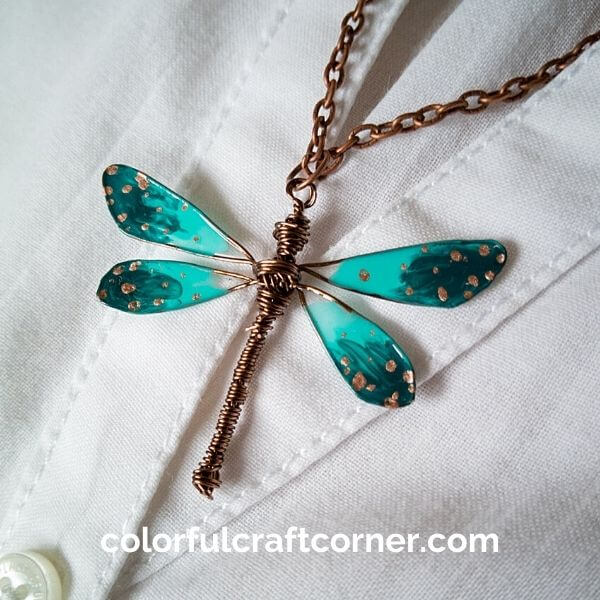
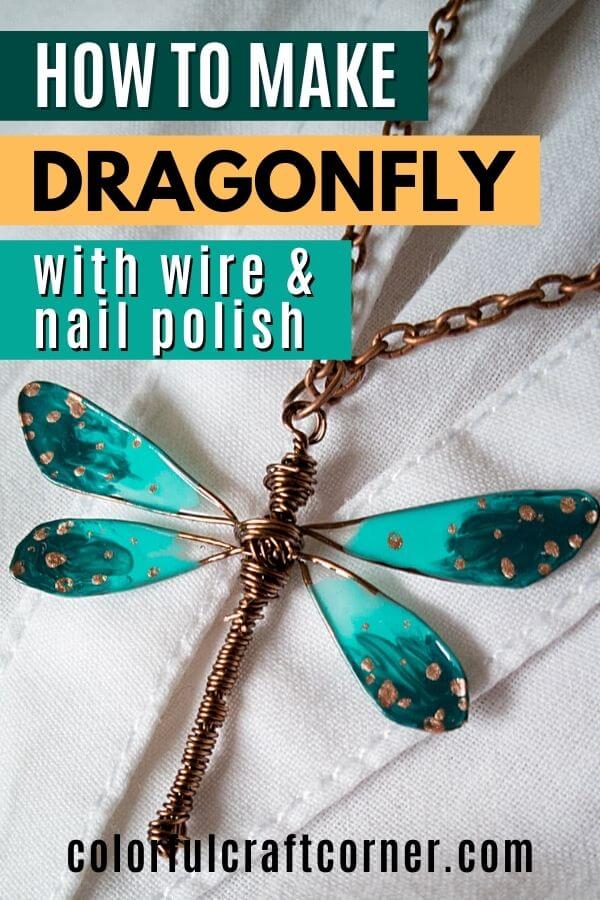
How to Make a Wire Dragonfly Pendant
Bring a little Spring and color into your life with this beautiful wire dragonfly. In this post, I will show you how to make a stunning dragonfly pendant using wire and nail polish.
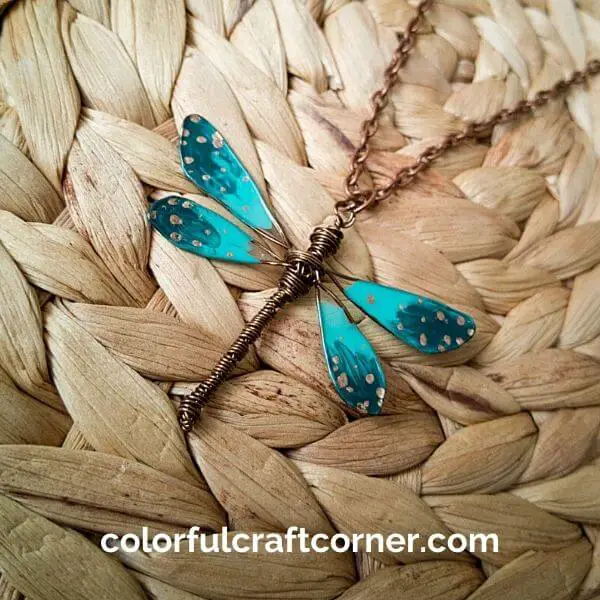
wire wrapped dragonfly
Lately, my two big favorite craft materials are air dry clay and the wire + nail polish combo. (So be prepared! You’ll see lots of those in the upcoming weeks and months. Lol!)
So, I’ve been experimenting with wire and nail polish. The most common crafts you see on Pinterest or on the internet use these two materials to create flowers or small wire trees with nail polish leaves.
Before Christmas, I created two mini wreath ornaments (here is the tutorial) with this technique. I was so pleased with the outcome that I’ve decided I will make other crafts too.
The weather got warmer, and I can’t wait for Spring to fully kick in.
So, I’ve made this gorgeous, colorful dragonfly pendant. They also look fabulous as earrings!
But let’s end this fluff and get to crafting!
Tools and Supplies:
- wire (I used 0.40 mm thick, antique bronze jewelry wire),
- clear nail polish + other colors of your choice,
- toothpick,
- scissor,
- chain and jump ring for a necklace or earring hooks,
- thick craft foam sheet (optional, I found it easier in shaping identical wings),
- template (optional, you can download mine from the resource library).
NOTE! To get the template, you have to sign up for my newsletter. You’ll get an email with the password to access the Resource Library (100% free). You can grab anything you like from there!
Video tutorial
Watch the video tutorial or read the instructions, what you prefer. I would recommend both or at least read the tips and hacks section for best results.
Wire dragonfly pendant instructions:
1. Cut out two wing templates from thick craft foam sheets.
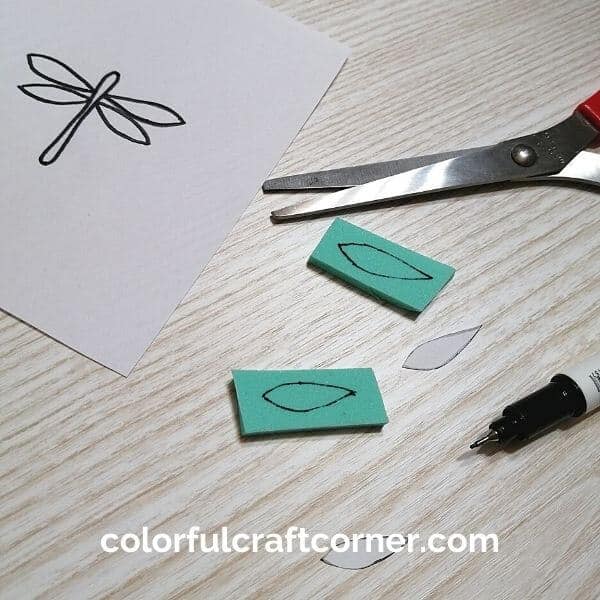
2. Use templates to shape two pairs of wings.
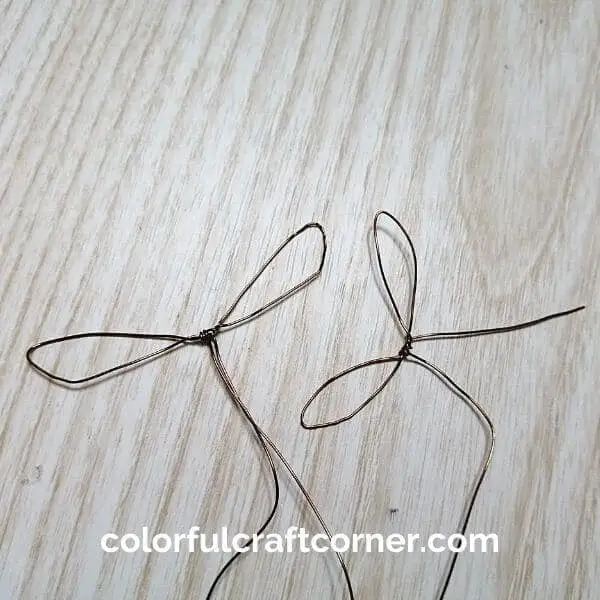
3. Cut two pieces of wire (double the body on the template). Fold it in half. Use the plier to create a buckle. Twist them together all the way down to create the base of the body. Fold back the endings.
4. Secure the wings on the body. You may need a piece of extra wire to tie them down or add a drop of super glue to hold them in place.

5. Cut a long piece of wire and wrap it around the body (start at the tail and work your way up to the top).
6. Wrap around the wire a couple of times at the top to create the head.

7. Cover the wings with clear nail polish (It may be tricky, so check out the tips and hacks section under the instructions). Leave it to dry.

8. Paint the wings with the color of your choice. I like to leave transparent parts next to the body. Add a drop of darker color at the tips. Mix the two colors with a toothpick. I like to drag the lighter color in the darker. to create a more wing-like effect. Leave it to dry thoroughly.
9. Make sure that the wings are 100% dry before adding small dots to the wings with a toothpick (metallic nail polish adds a nice and unique touch to the wings). Leave it to dry.
10. Add a final coat of transparent nail polish to connect the elements and seal the wings. It’ll create a more polished look.
10. Put it on a chain using a jump ring.
Tips and Hacks
This craft may seem easy. It’s not rocket science but it’s often hard to get it right. So, I’ve gathered a few tips to help you achieve the best results!
Nail polish wing hacks
Creating the base (the first transparent layer) may be tricky. Not enough nail polish won’t create the layer, but too much will tear the film.
Spread the brush as much as you can to cover a wider area. Make one long and slow stroke from tip to tip.
Protect your table with a paper towel. The nail polish may drip while you paint.

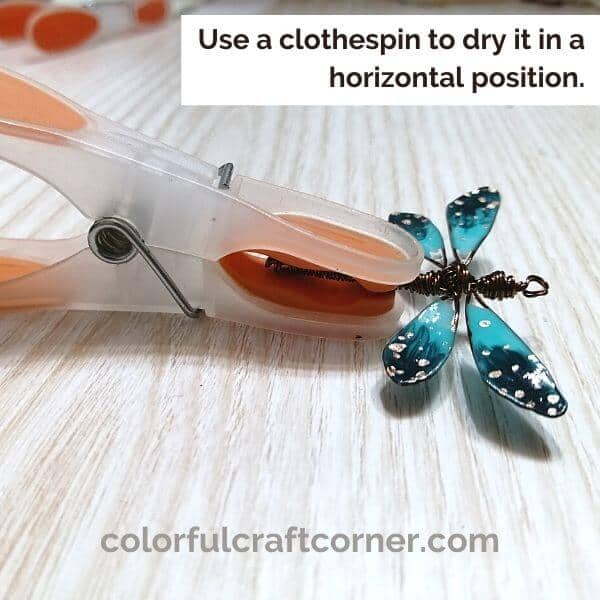
Drying tips
1. Always dry them in a horizontal position. If you hang them (vertically) the polish will gather at the bottom and tear the layer.
I use a bigger clothespin, so I don’t have to hold it until the nail polish hardens.
2. Don’t rush it. Wait it out until each layer dries. You can easily ruin and make a hole on the wings if they are not cured properly. The second, colored layer is thicker and it will take longer to dry.
3. After you’ve mixed the two colors and moved on, don’t return to make changes. If you touch it, it will become creased, leave ugly marks or make a hole.
Sizing tips
Sizing may also result in some issues. Making the dragonfly smaller shouldn’t cause any problem.
On larger wings, it’s harder to create the first layer. The smaller the area the nail polish has to cover, the easier it is to create the film.
So, if you want to make the dragonfly bigger, you can dip the wings in nail polish (pour it out in a small container where the wings fit) or wood glue.
Move it out slowly until the glue stretches on the wings. Wait until dry, then apply a second layer with a soft brush.
If you use wood glue, you may need to wait longer.
Attach the wings to the body and color them with nail polish.

Wire dragonfly uses
Even though it was designed to be a pendant you can use it for other purposes.
- Make gorgeous earrings! Create two pairs of dragonflies and put them on earring hooks.
- Glue it on a bobby pin or brooch base to make other unique accessories.
- Attach it to a metal bookmark blank.
- Glue it on a stick and decorate your small plant pots.
- Use it as a keychain (Handle it carefully! The wings are not super strong. They may break off if you regularly put it in a pocket.).
- Add it to a card with a minimalist background or light flowers. Perfect for Mother’s day!
Final thoughts about the wire dragonfly pendant
I really enjoyed creating this wire-wrapped dragonfly. I have to admit that it took me a few attempts to look like I wanted to, but the results worth it.
Don’t get discouraged if your first attempt is not flawless. Practice makes perfect.
With this technique, you can also create wire butterflies.
I hope you liked this craft!
Do you like dragonflies? Have you ever tried to create something with the wire and nail polish ‘method’?
Leave a comment!
Related craft posts you may like:
I truly enjoyed your tutorial. I used to make wire and nail polish flowers that I then twisted into neclaces, earnings and barretts. Your dragonfly was really wonderful. You have inspired me to pick up this craft again. My mind is dancing with ideas. Thank you. Your video tutorial was very nice and easy to follow. Good luck with future endeavors.
Thank you, Michele! I’m so happy that you liked it. It’s so good to hear (read in this case) that I could inspire someone with my crafts. You made my day!
How do u know of it is dried
Leave it a couple of minutes to dry. If the nail polish no longer moves/flows when you rotate it, it’s a good predictor that it has dried. You can carefully touch it, if it’s sticky, leave it to dry for another couple of minutes. When I make the final layer, I usually let it dry for 1 hour to make sure it’s 100% cured. I hope this helps 🙂
How delicate is the dried fill on the wings? I would hate to make this & have it break shortly after.
The thickness of the wings depends on how many layers you apply. My dragonfly still holds up, however, if you push or poke the wings with something pointy, they will break. You could try and apply a coat of resin to make them sturdier 🙂
Dragonflies are my favorite insect and I have been looking for an easy way to make and wear them. Your tutorials have given me the courage to make a set. Thank you!
Mine too! I have other dragonfly craft ideas that I hope I’ll be able to share soon.
How delicate are the wings afterwards? I’m looking to make an ornament and want it to last for years (with proper handling of course.)
Denise
Poking and bending the nail polish parts will tear or break the layers. However, if you hang the ornament and store it properly, I think you will enjoy it for years. I decorated one of our indoor plants with this dragonfly. It’s still safe and intact, despite my husband giving it a couple of ‘baths’ (he forgot to remove it when watering the plants).
Thank you for this great craft idea! I liked using glue and polish layers, humidity seems to ruin glue alone, but with polish layers on top of glue ,there was just enough strength to withstand all that humidity.
Nice! I’m happy it worked out for you! 🙂
I would try larger for garden. copper tubing, copper wire, plastic clear sheeting and translucent glitter paint, or iridescent.
That would look fantastic! I’ve seen a couple of garden dragonfly ideas on Pinterest, and I loved how they looked. Good luck with your project!
How gorgeous and delicate..thanku so much for sharing 😉
I’m happy you liked it. It’s one of my favorite projects too.
Wow,,Thank you for sharing. I love this!
I’m so happy you liked it!
I make suncatchers, so this technique could come in very handy for me. I hope I can do it! (Also, for other elements like flowers or butterflies, this is a great teaching aid.. I really appreciate your generosity with this tutorial! Thank you!
Sherry Laird